Variations
This section guides you through the process of creating a variation to an existing Health Product Application (HPA).
Prerequisites
Before beginning a variation application, ensure you have:
- The application ID of the existing registered product
- All required documentation for your specific variation type
- Details of the changes you wish to make
- Please note that this guide only applies to new variation submissions, and not for creating response or closing sequences. Please refer to the Create a Response or Closing Sequence guide for more information.
Step 1: Initiating a Variation
You can initiate a variation in one of two ways:
Create New Variation
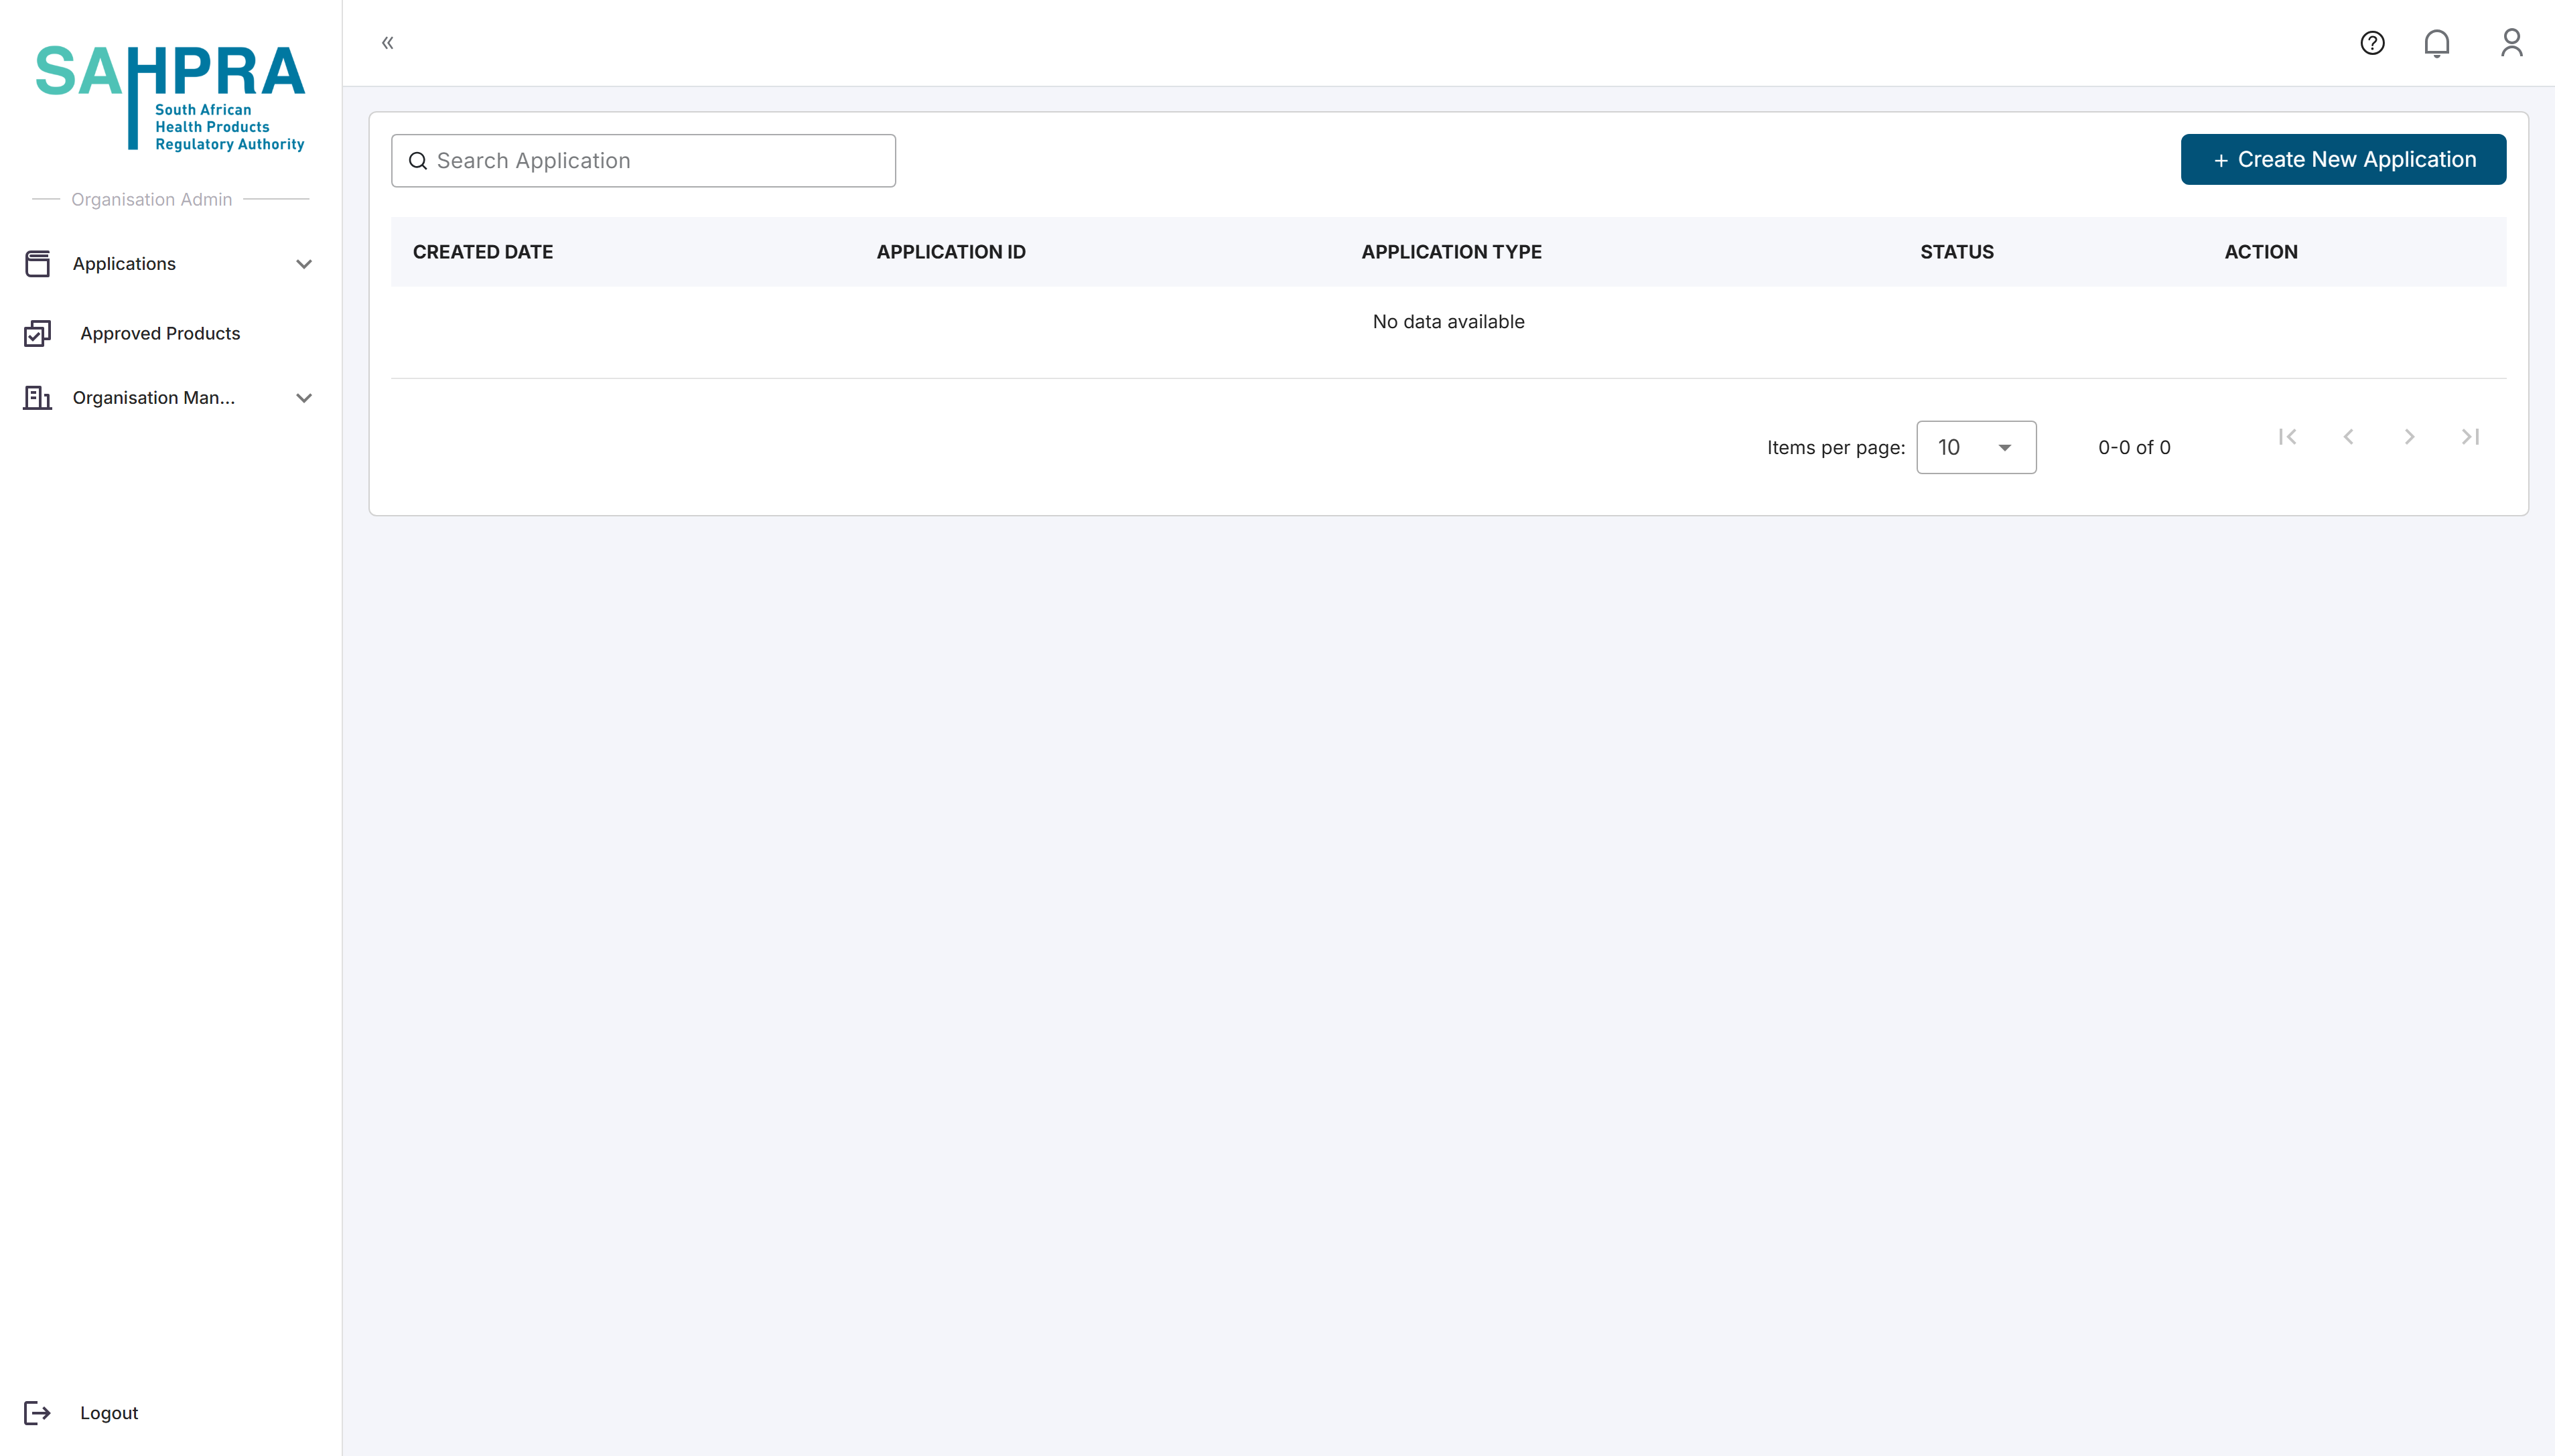
- Log in to the SAHPRA portal.
- You will be directed to the Applications Dashboard.
- Click the Create New Application button in the top right corner of the dashboard.
Select Application Type
- Select Health Product Application from the available application types.
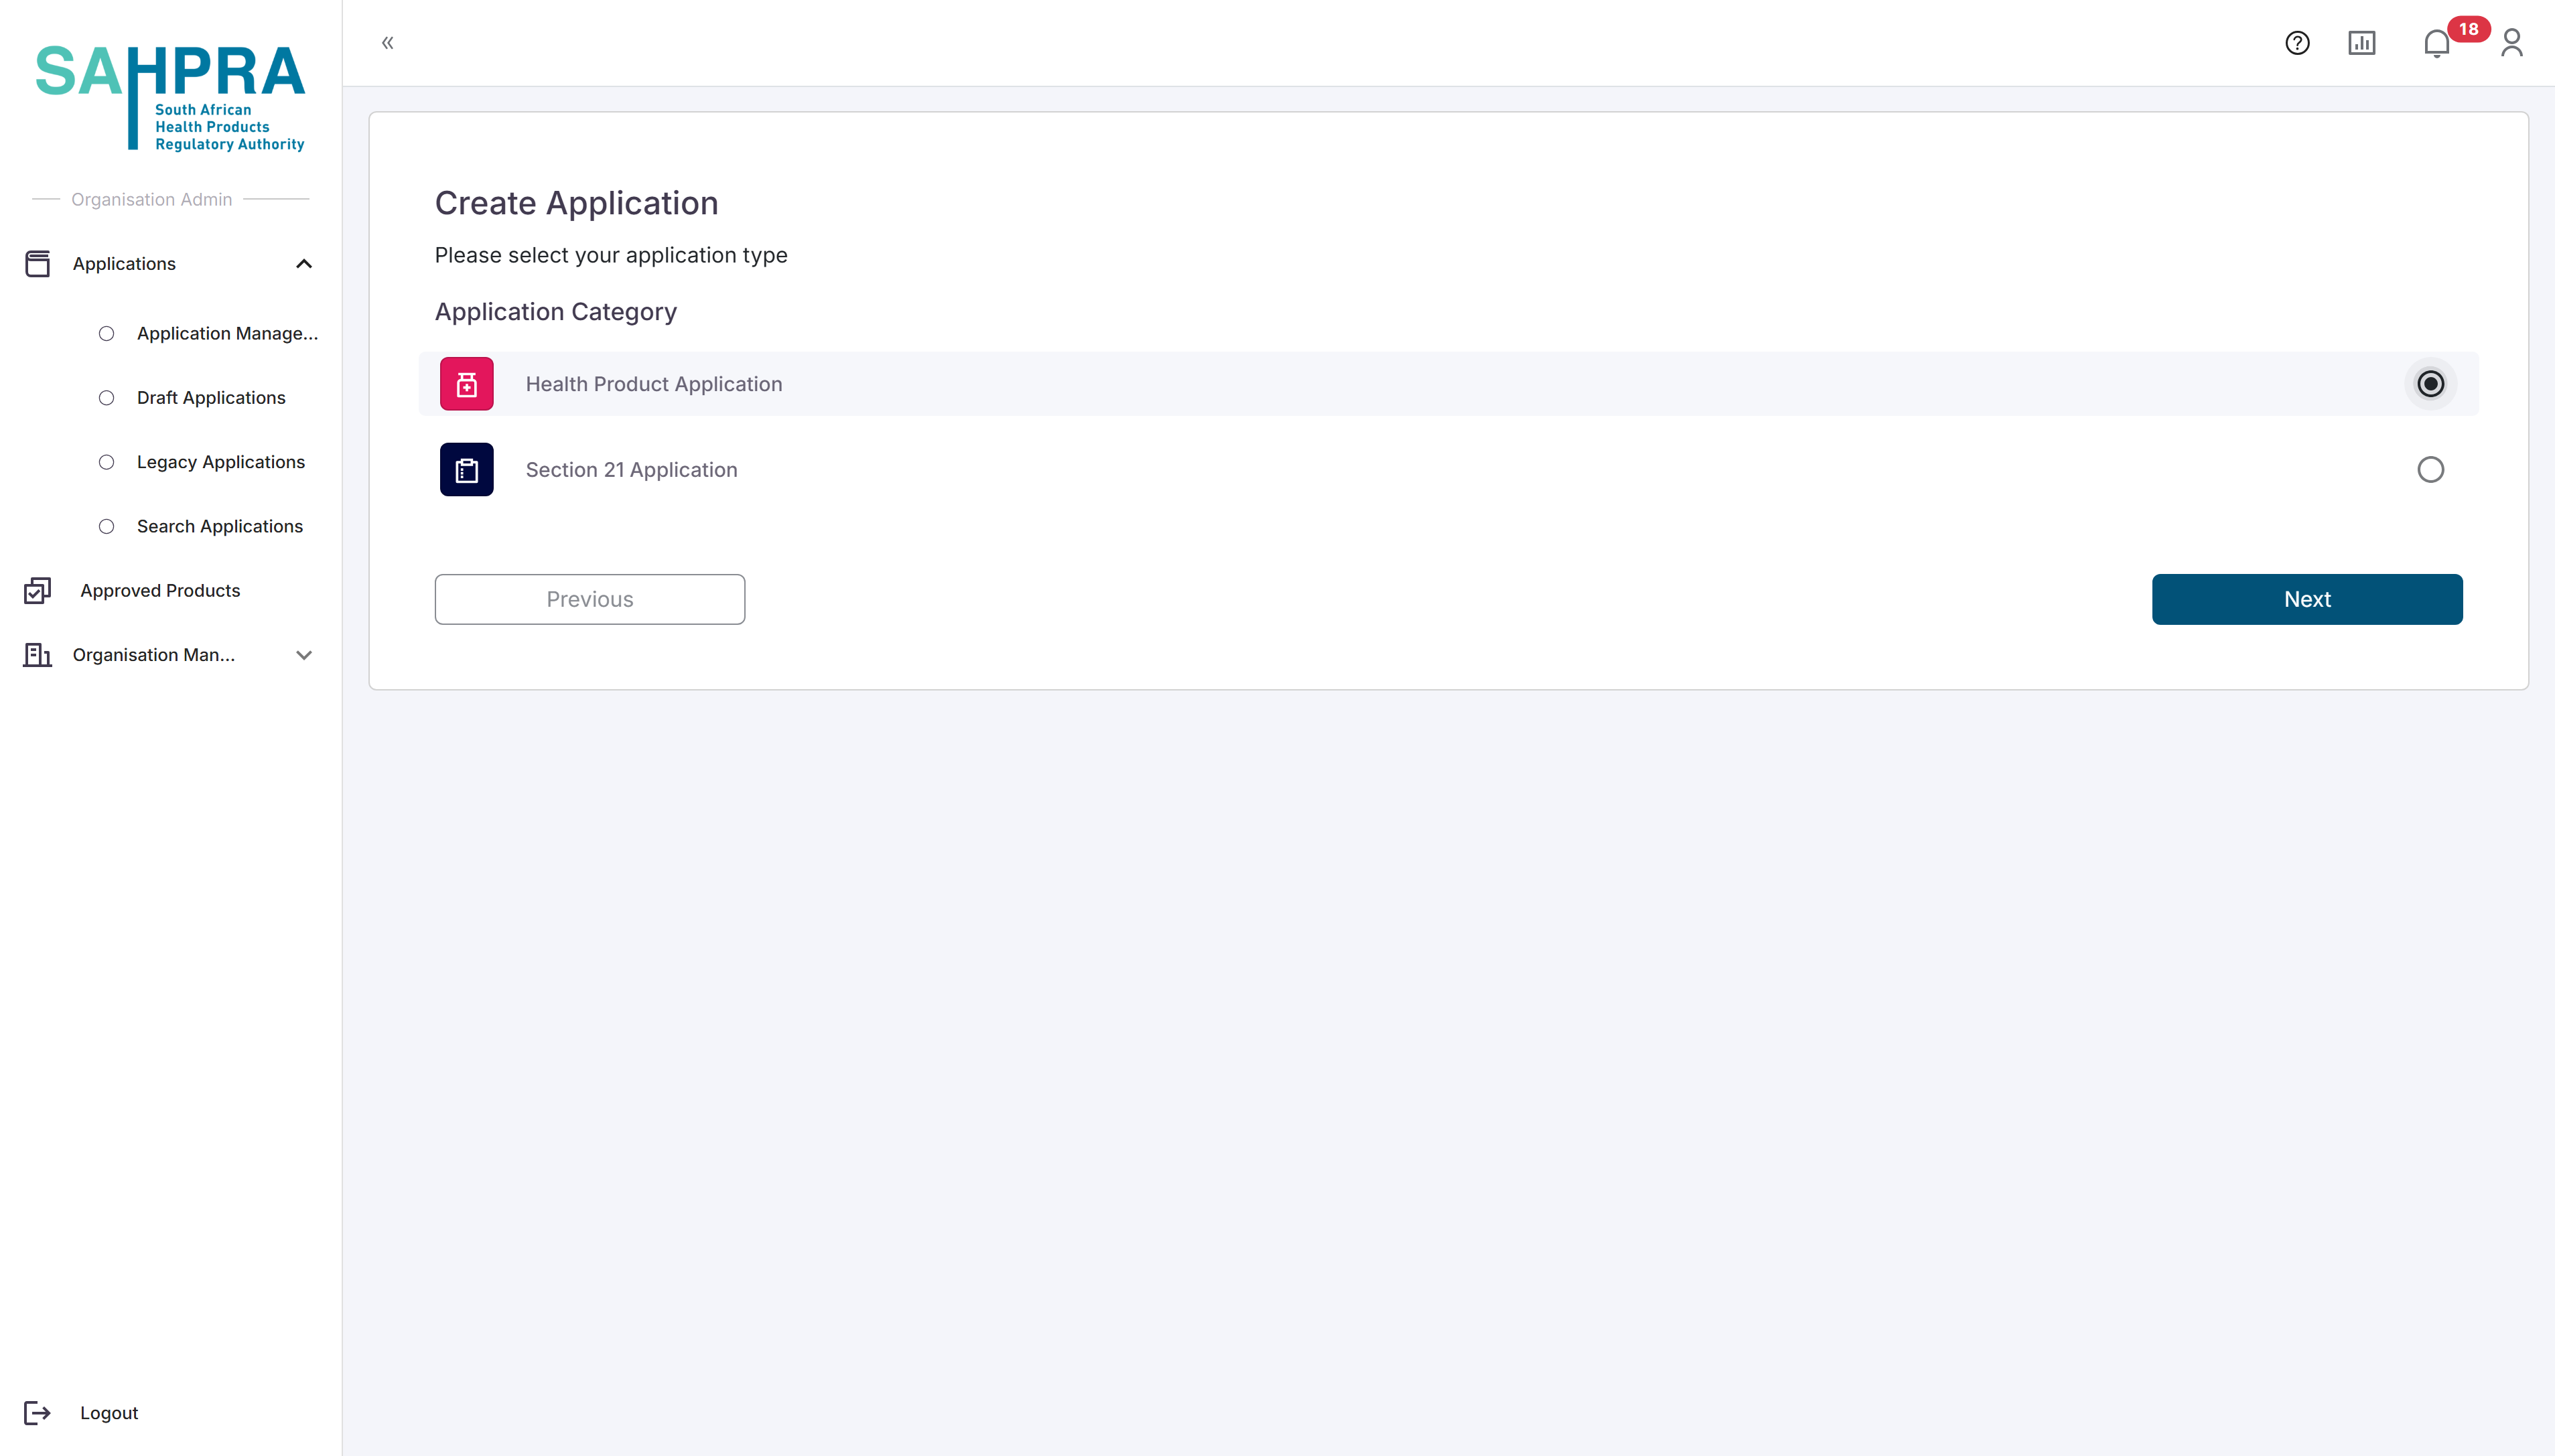
- Click Next to proceed.
Select Variation Application Type
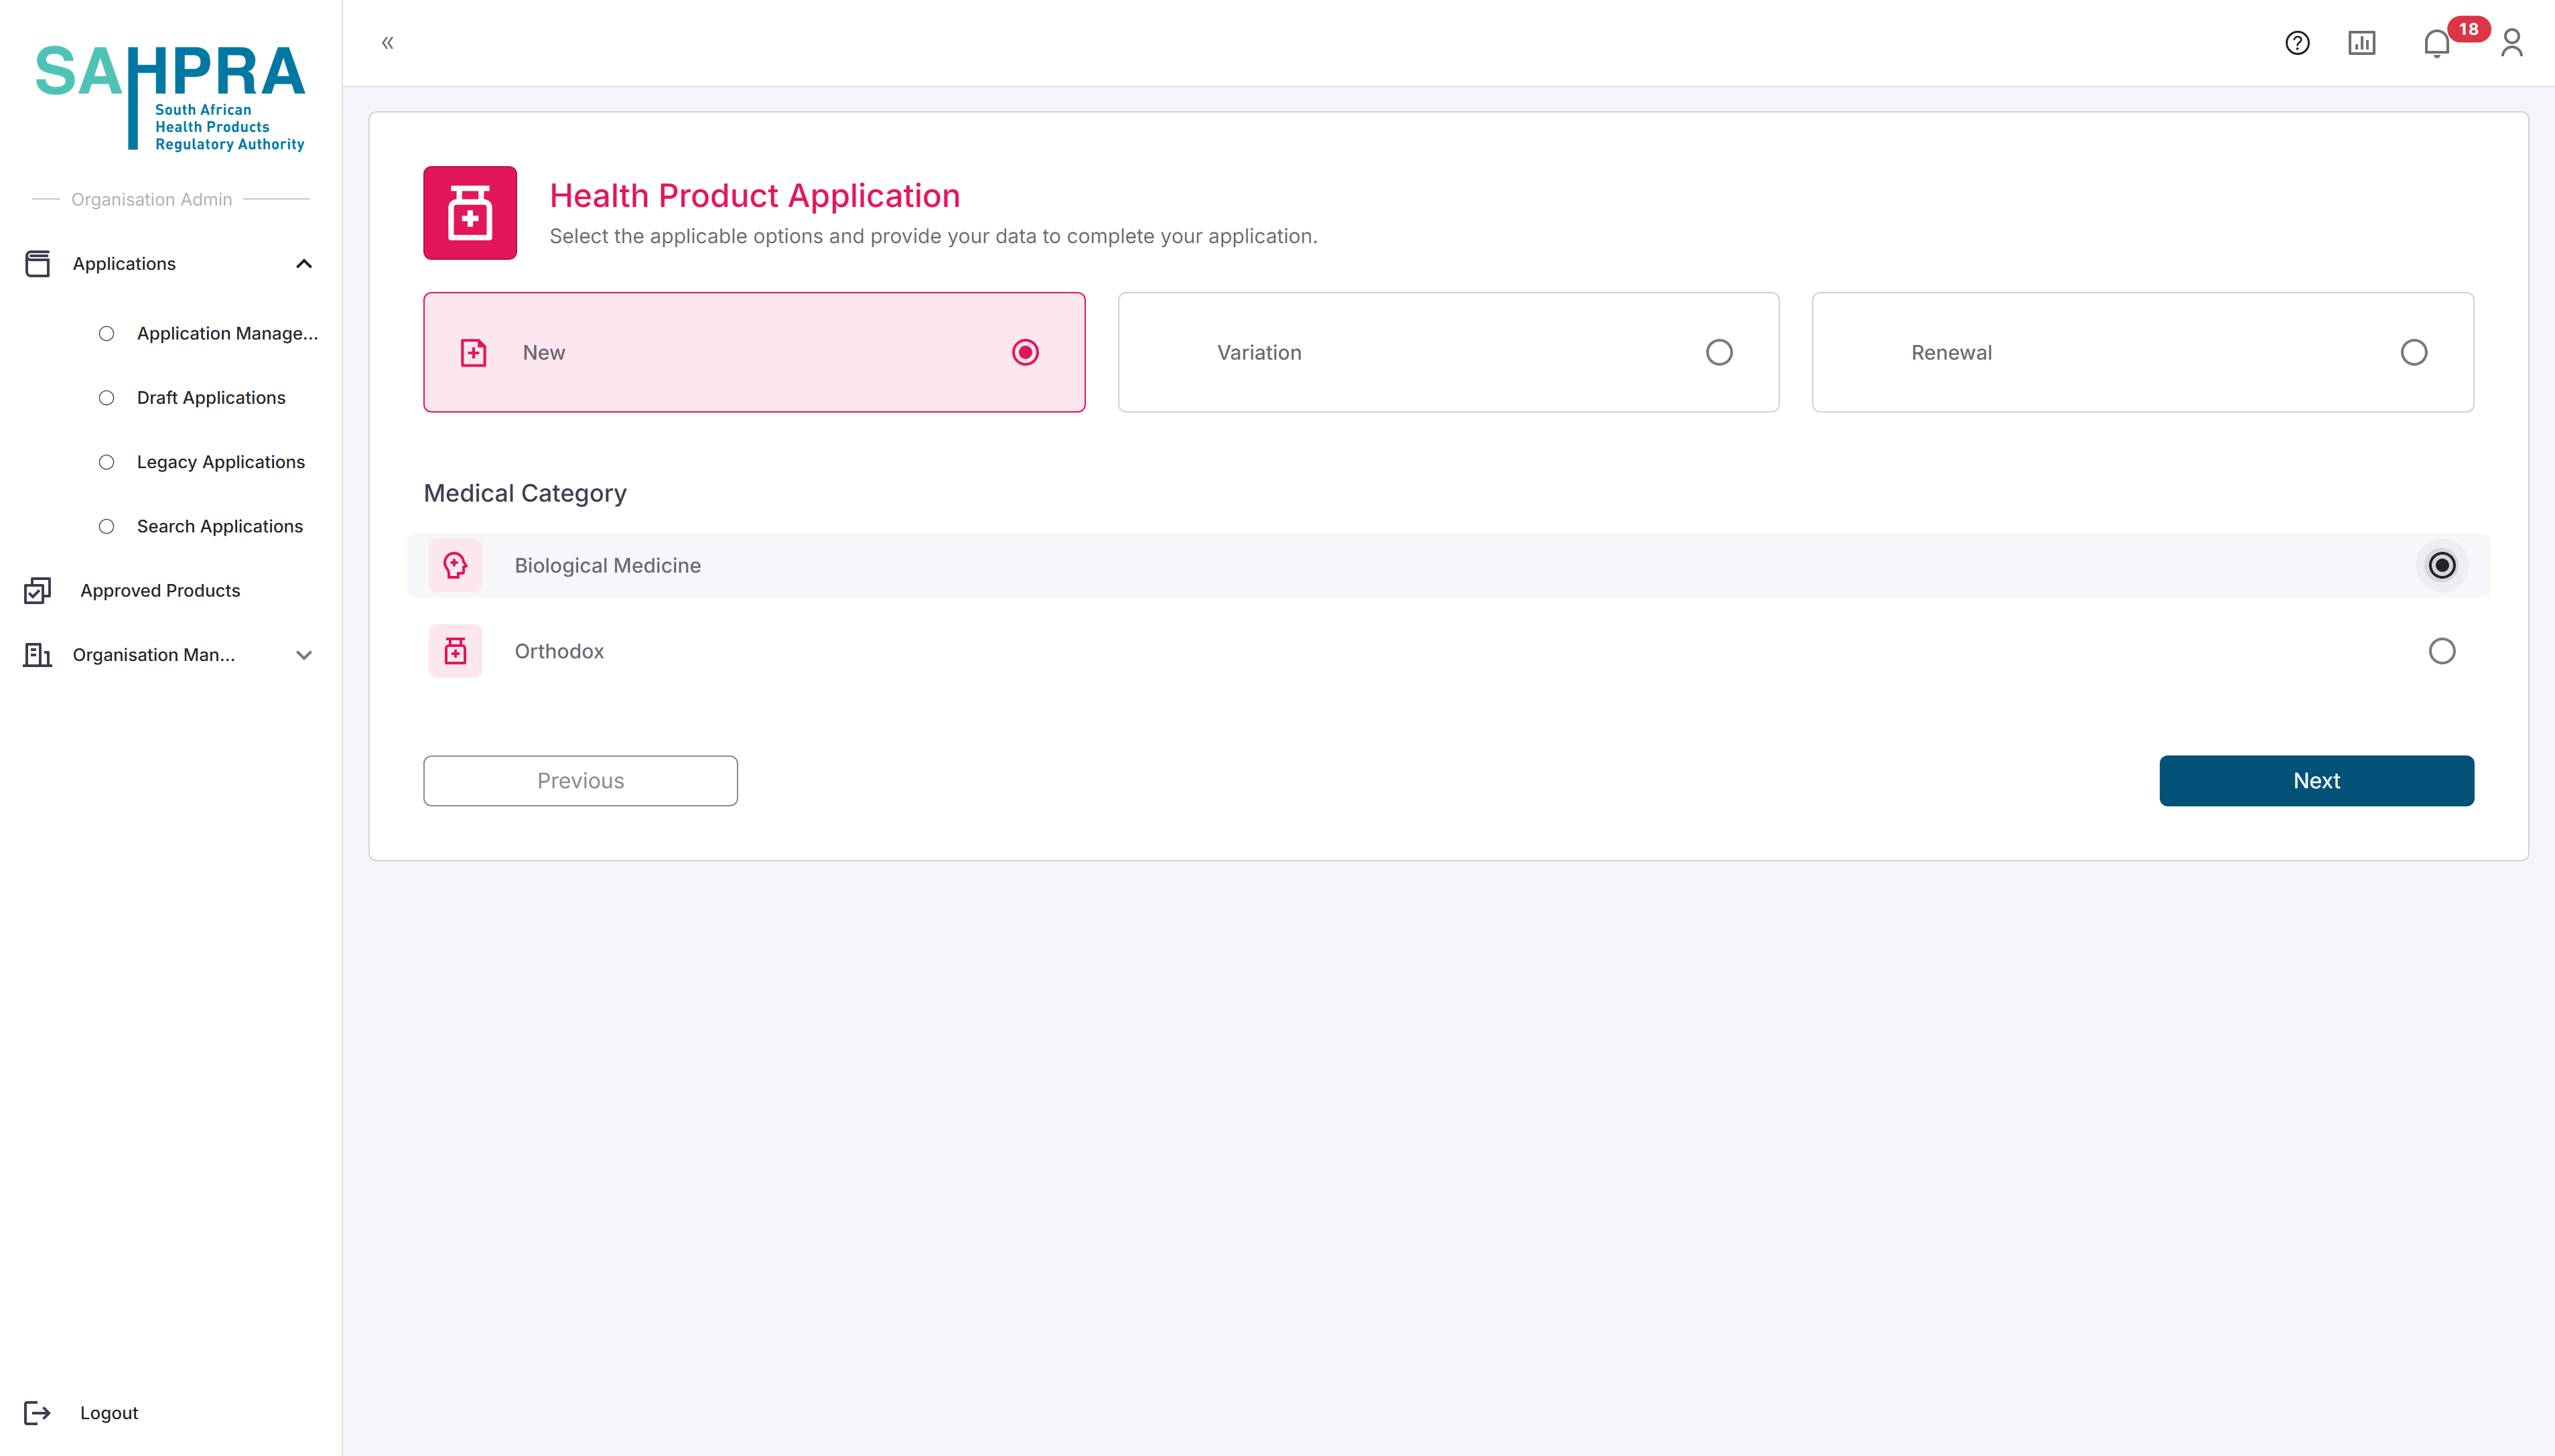
- Select the applicable Variation from the application types.
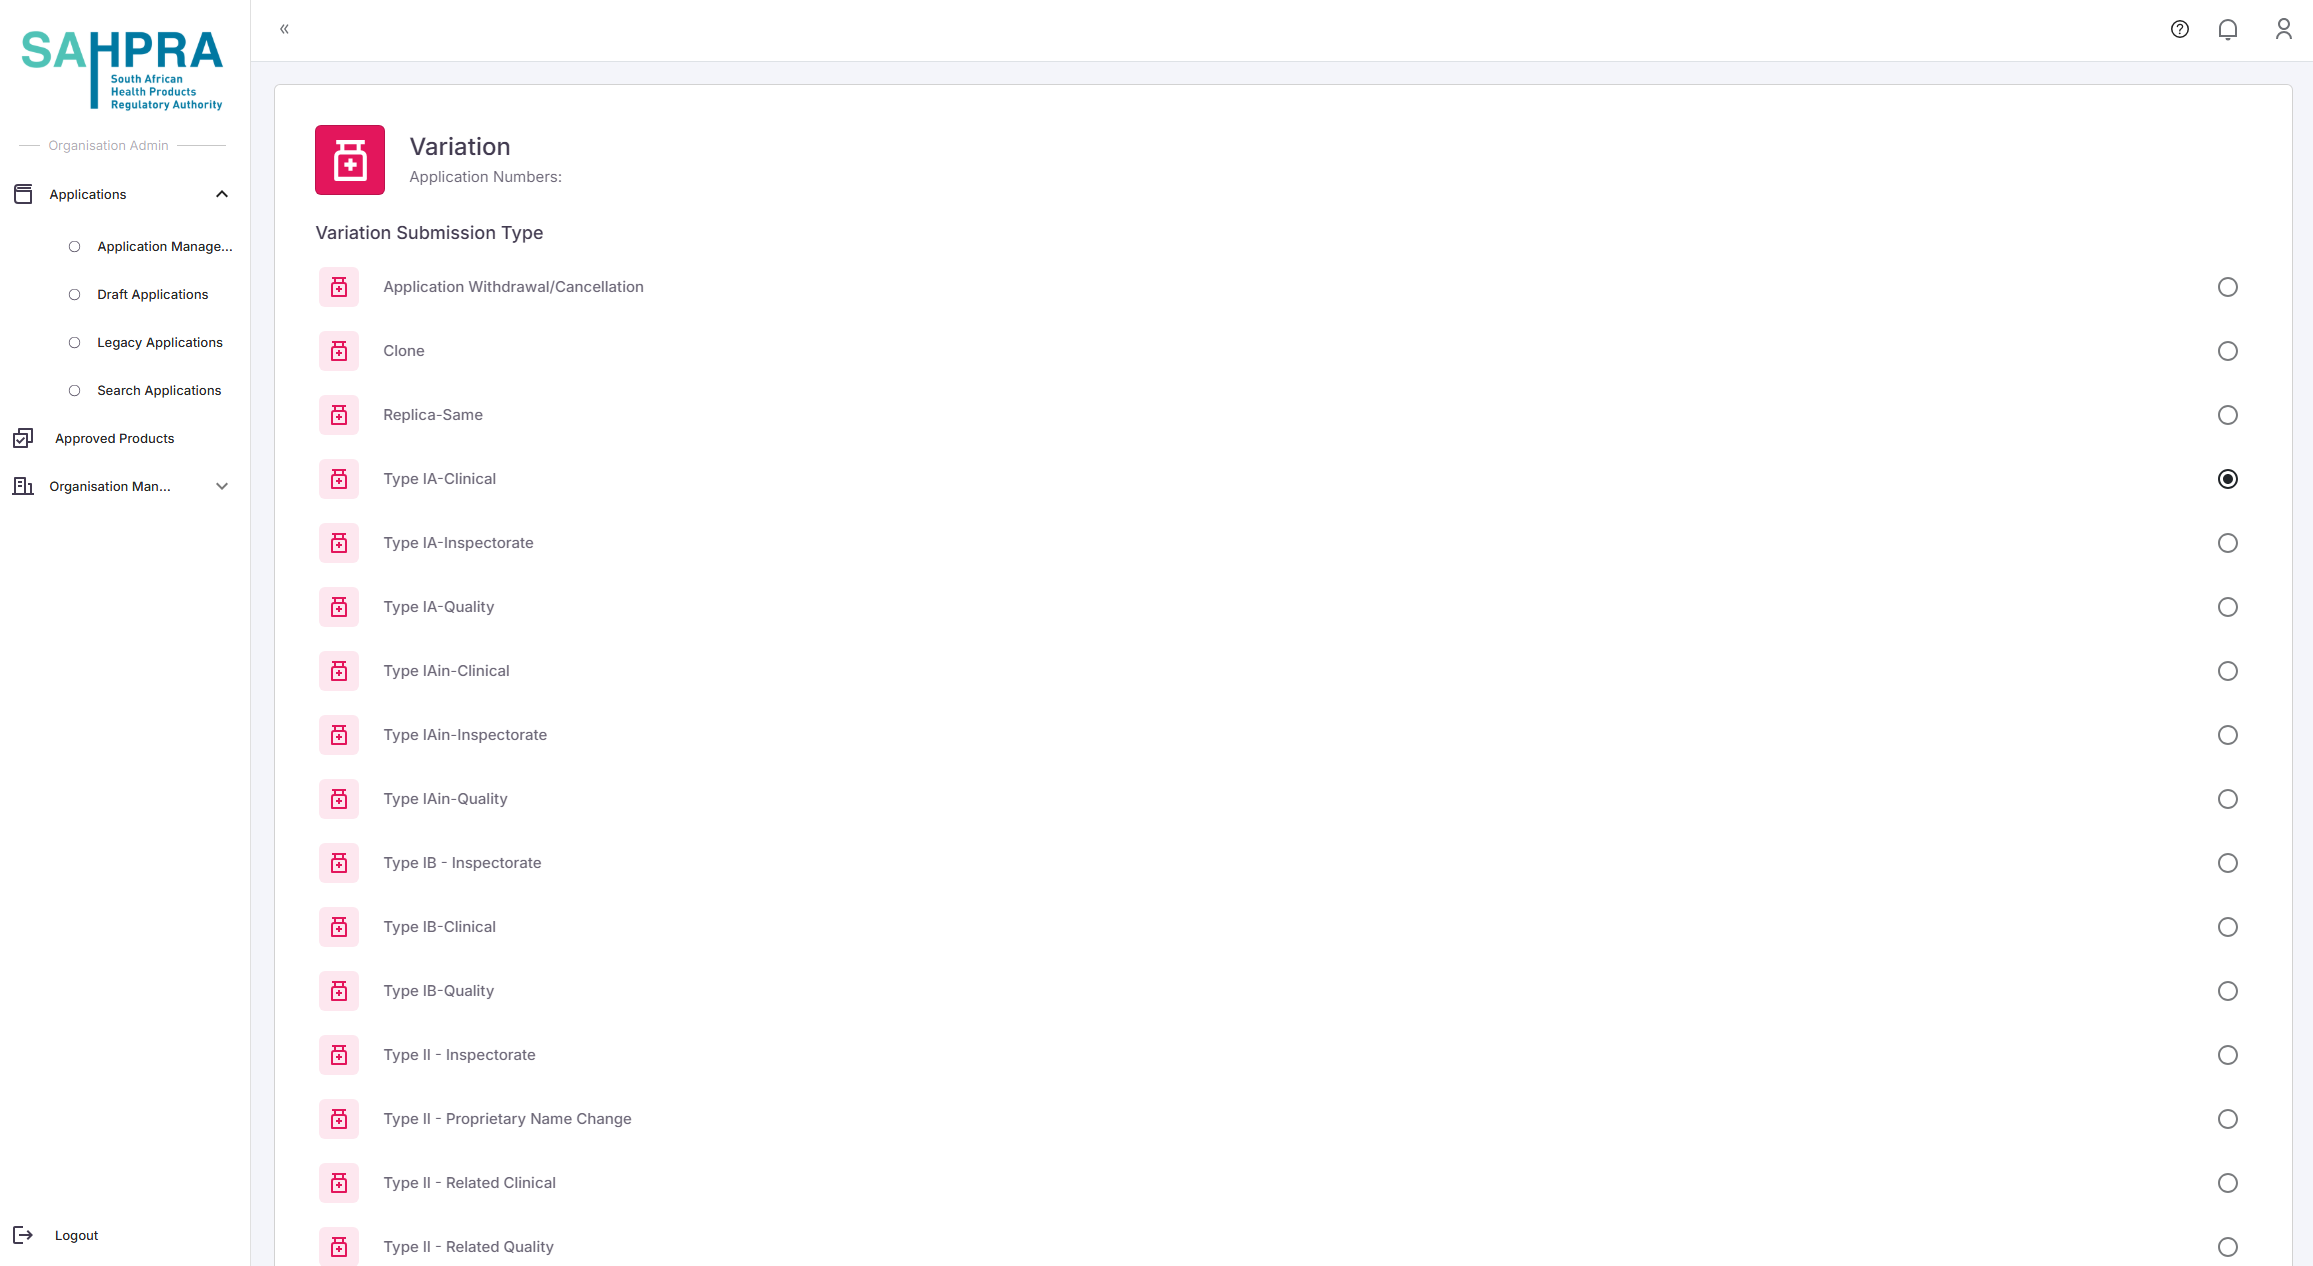
- Click Next to proceed.
Search for the applicable application
- Search for the application you wish to create a variation for. You can search for the following:
- Application ID
- Application Number
- Proprietary Name
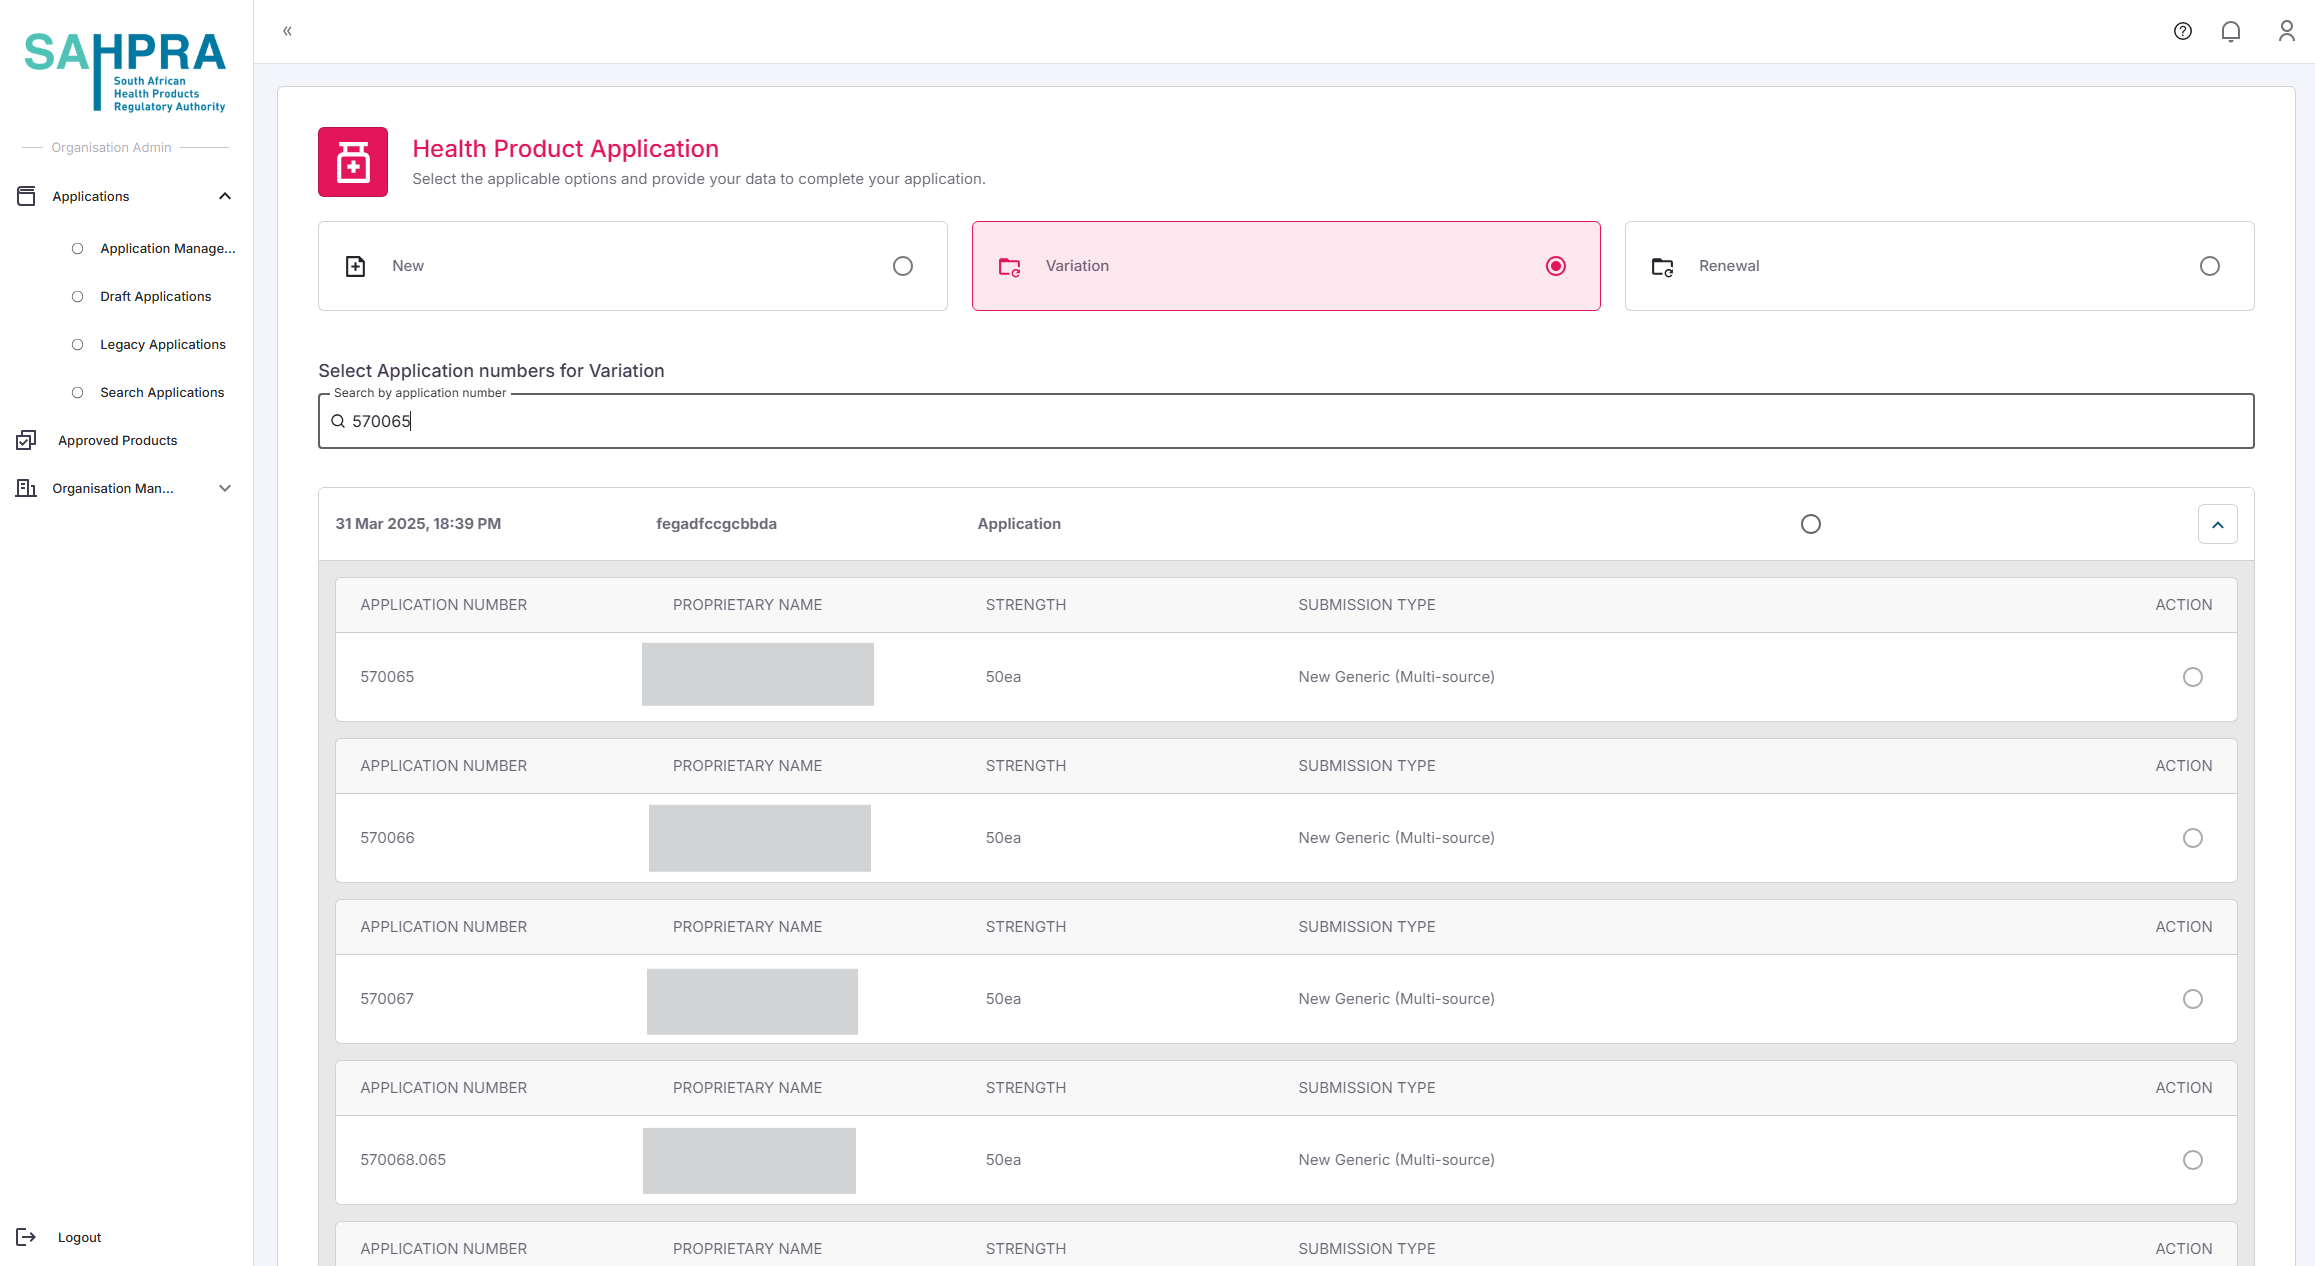
The system will display the matching application.
Depending on the type of variation, you can either:
- Select the entire application by clicking on the Select button next to the desired application
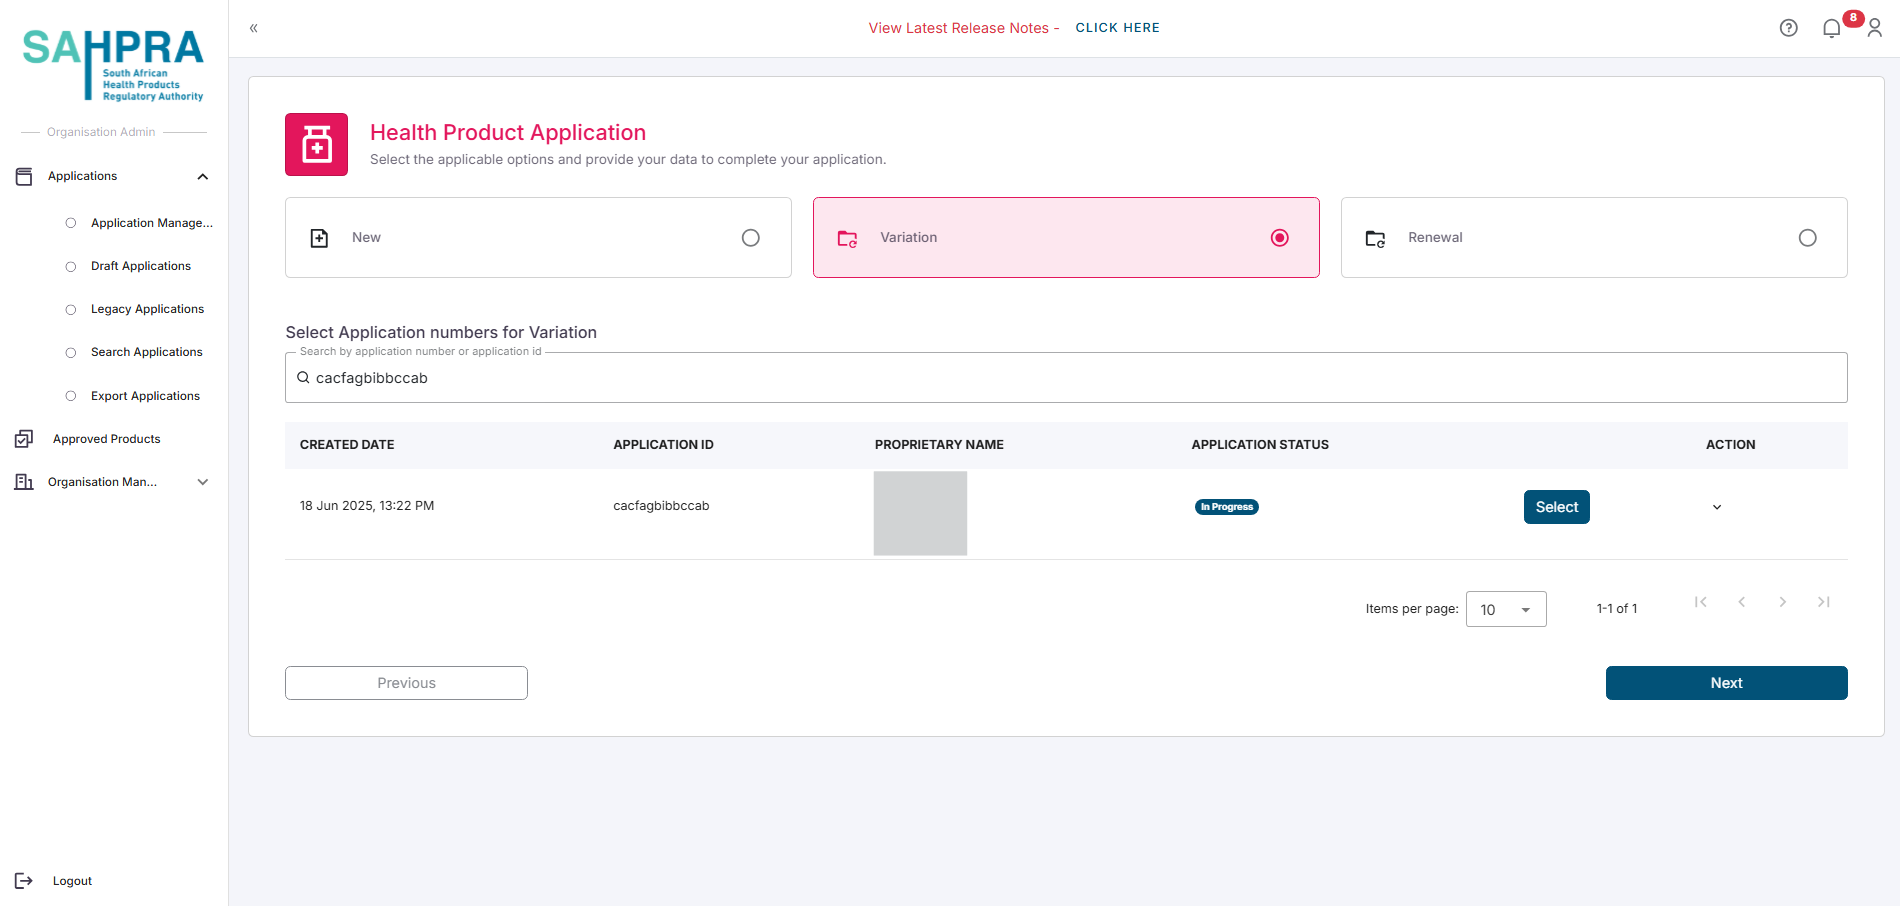
- Select the desired strength/s you wish to create the variation for by expanding the application and clicking on the desired strength/s. Each strength will have a checkbox next to it.
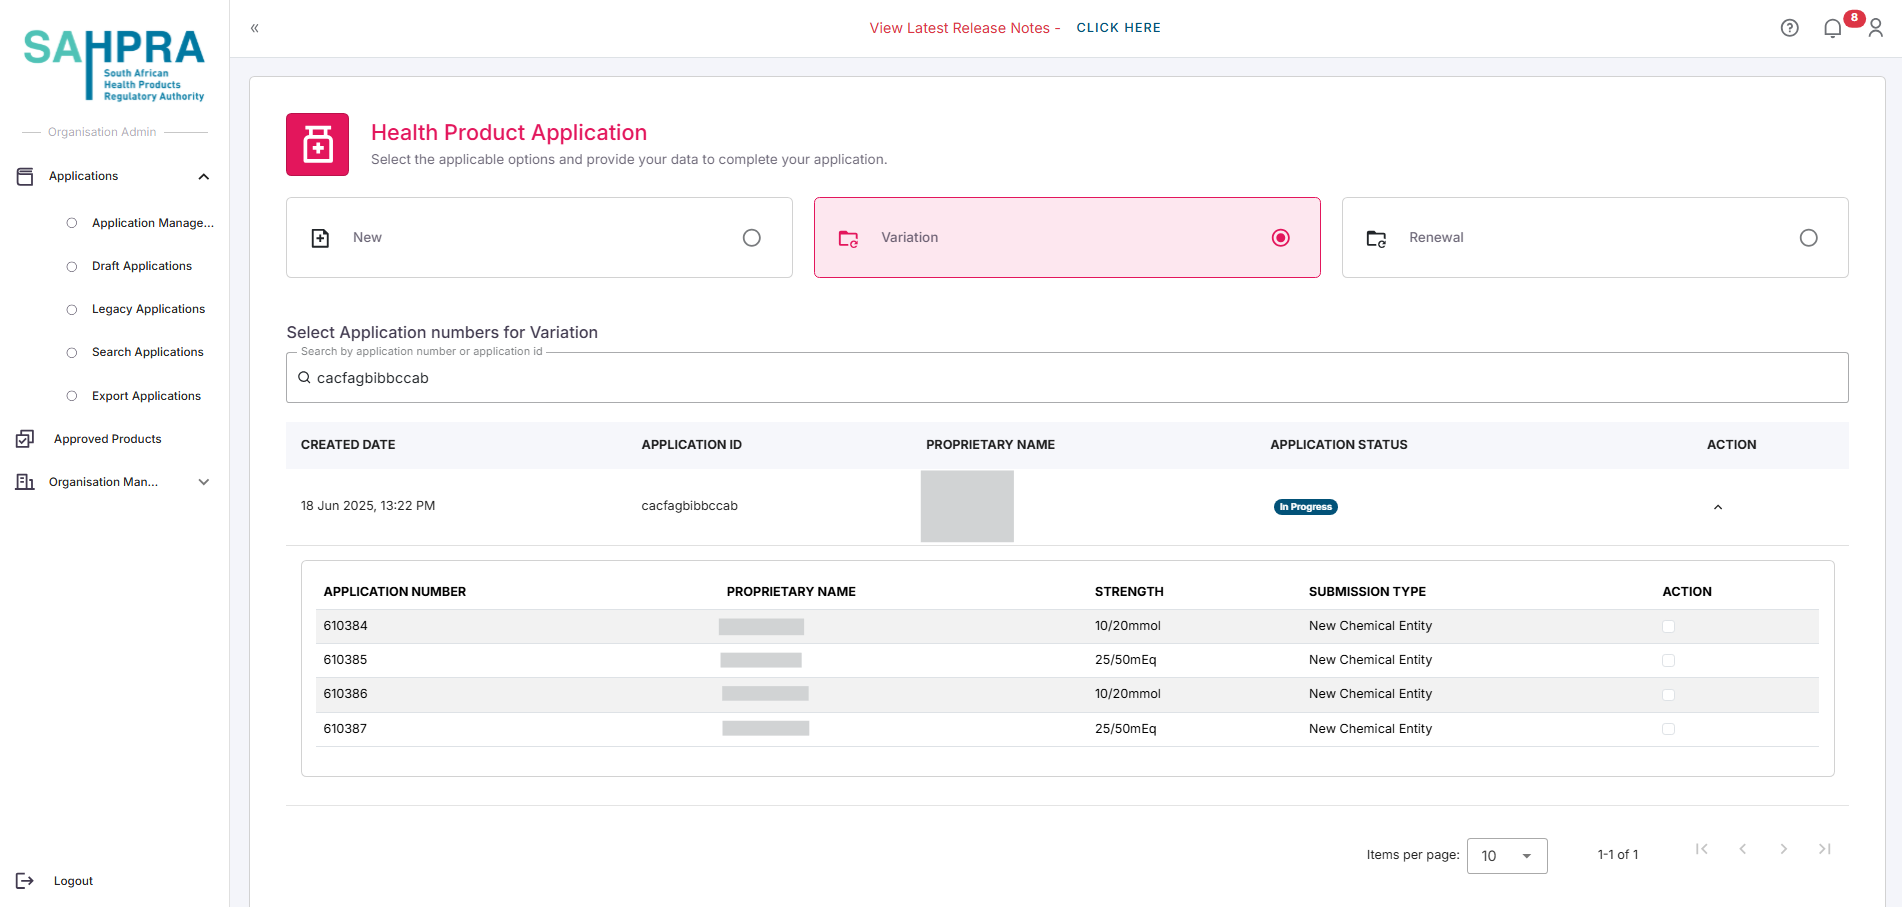
- Click Next to proceed.
Select an application
- Log in to the SAHPRA portal.
- You will be directed to the Applications Dashboard.
- Locate the existing application for which you want to create a variation.
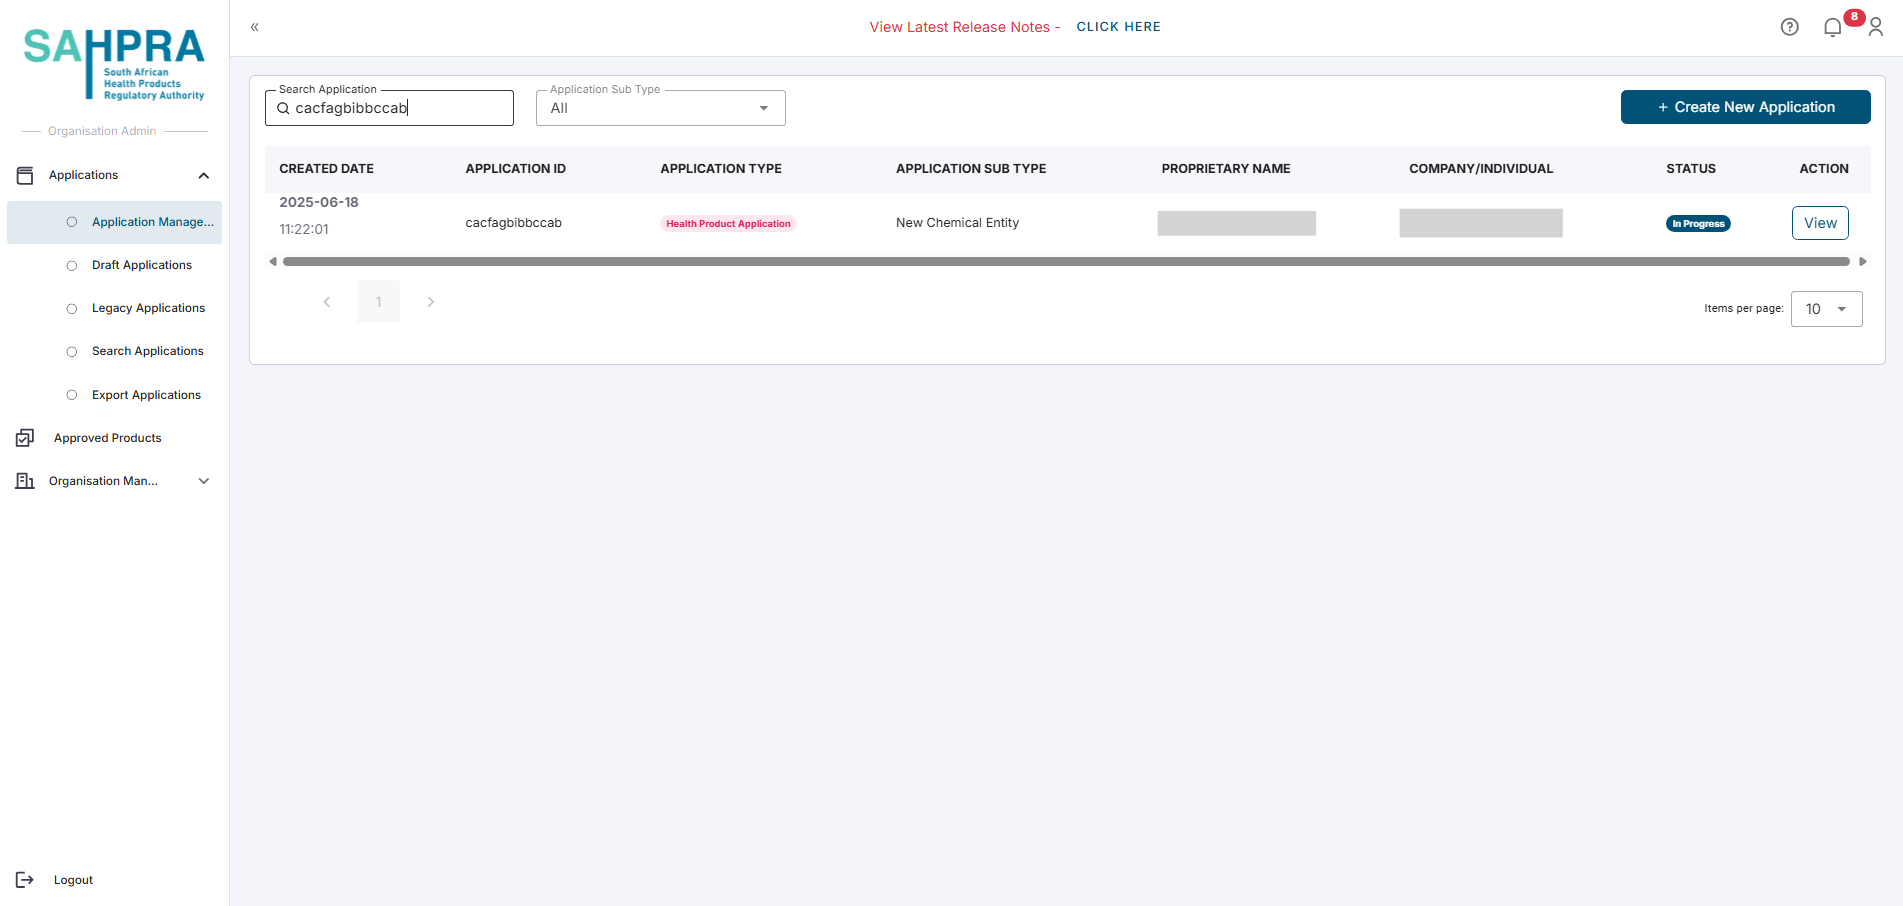
- Click the View button next to the desired application you wish to create a variation for.
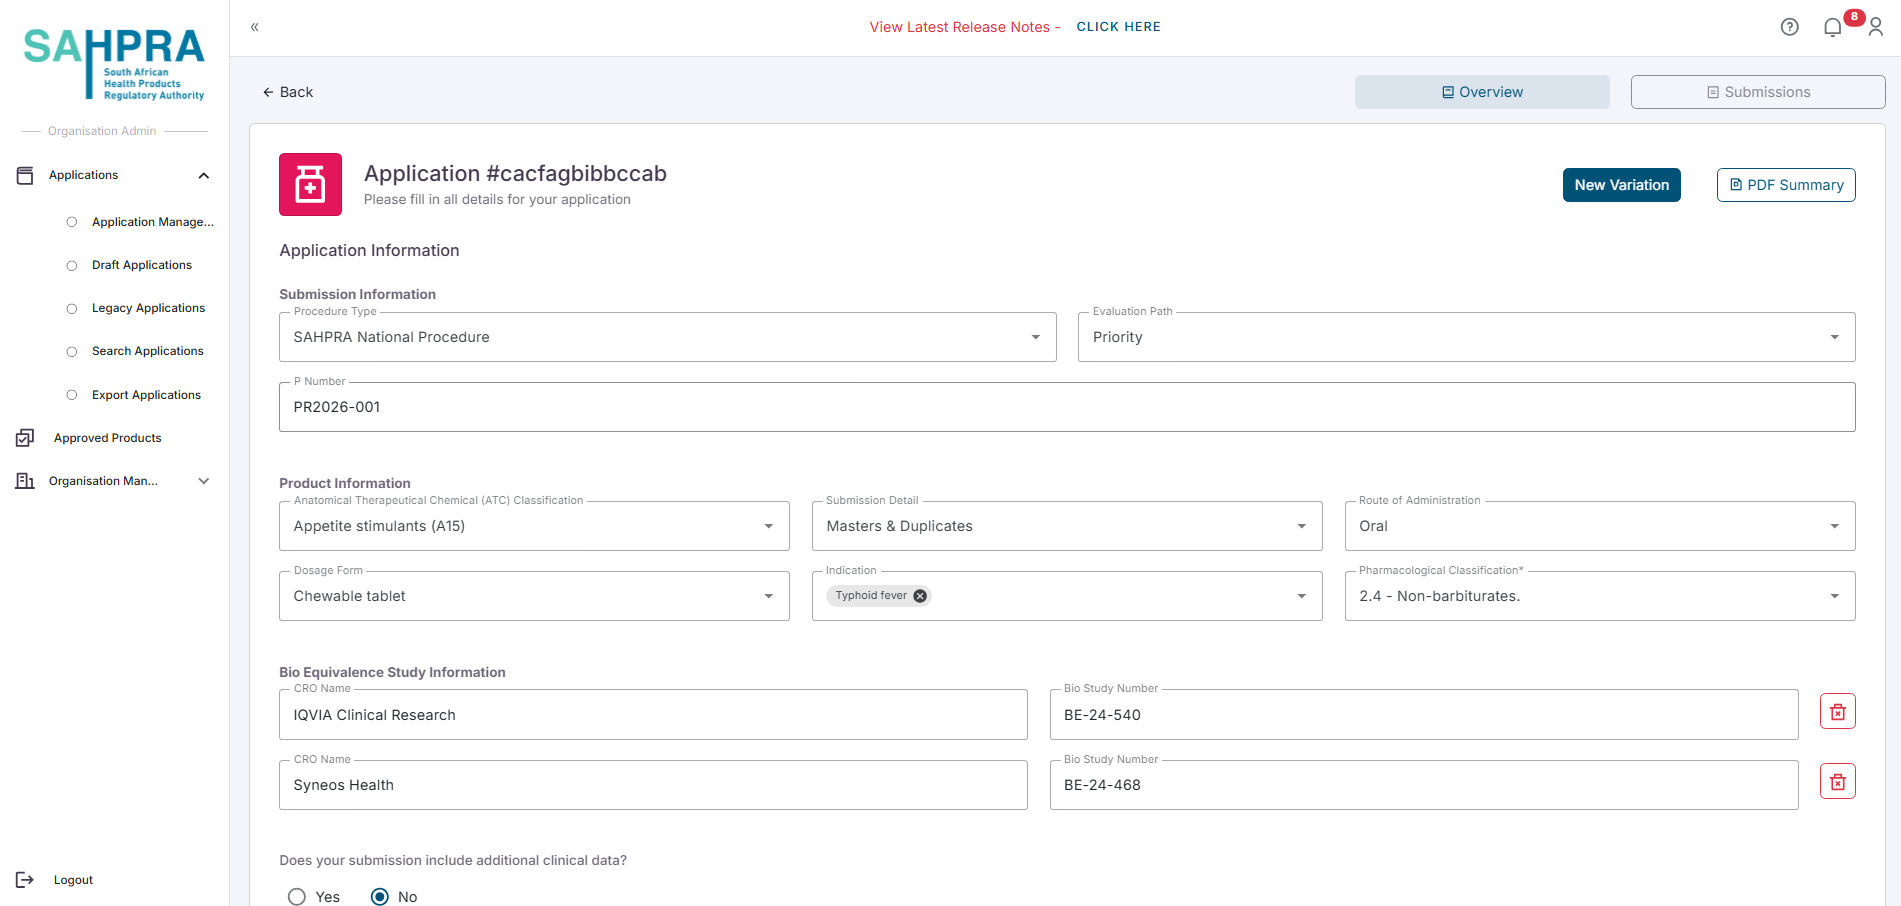
- Navigate to the Overview tab of the application by clicking on the Overview tab.
Create a variation
On the Application Overview screen, locate and click the New Variation button
Select Variation Application Type
- Select the applicable Variation from the application types.
- Click Next to proceed.
Application selection
The system will display the matching application.
Depending on the type of variation, you can either:
- Select the entire application by clicking on the Select button next to the desired application
- Select the desired strength/s you wish to create the variation for by expanding the application and clicking on the desired strength/s. Each strength will have a checkbox next to it.
- Click Next to proceed.
Step 2: Variation types
Each variation will have different options available to it, depending on the type of variation you have selected. Below are the different types of variations and the required information to be filled in.
Each Variation type allows for a different number of variation codes to be selected:
- Type IA/IAIN: 3 variation codes
- Type IB: 2 variation codes
- Type II: 1 variation code
- Grouped Variations: You can select any Type IA, IAIN, IB, and II codes for the grouped variation, and the number of variation codes is unlimited (requires approval from the HPA Unit)
- Select the variation type you want to create below:
Fill in the following Variation Details:
- Procedure Type
- Evaluation Path
- If the Evaluation Path is Priority, you will need to enter the Priority Number
- Variation Code
- Submission Lead
Each variation code added will have a Description field to fill in.
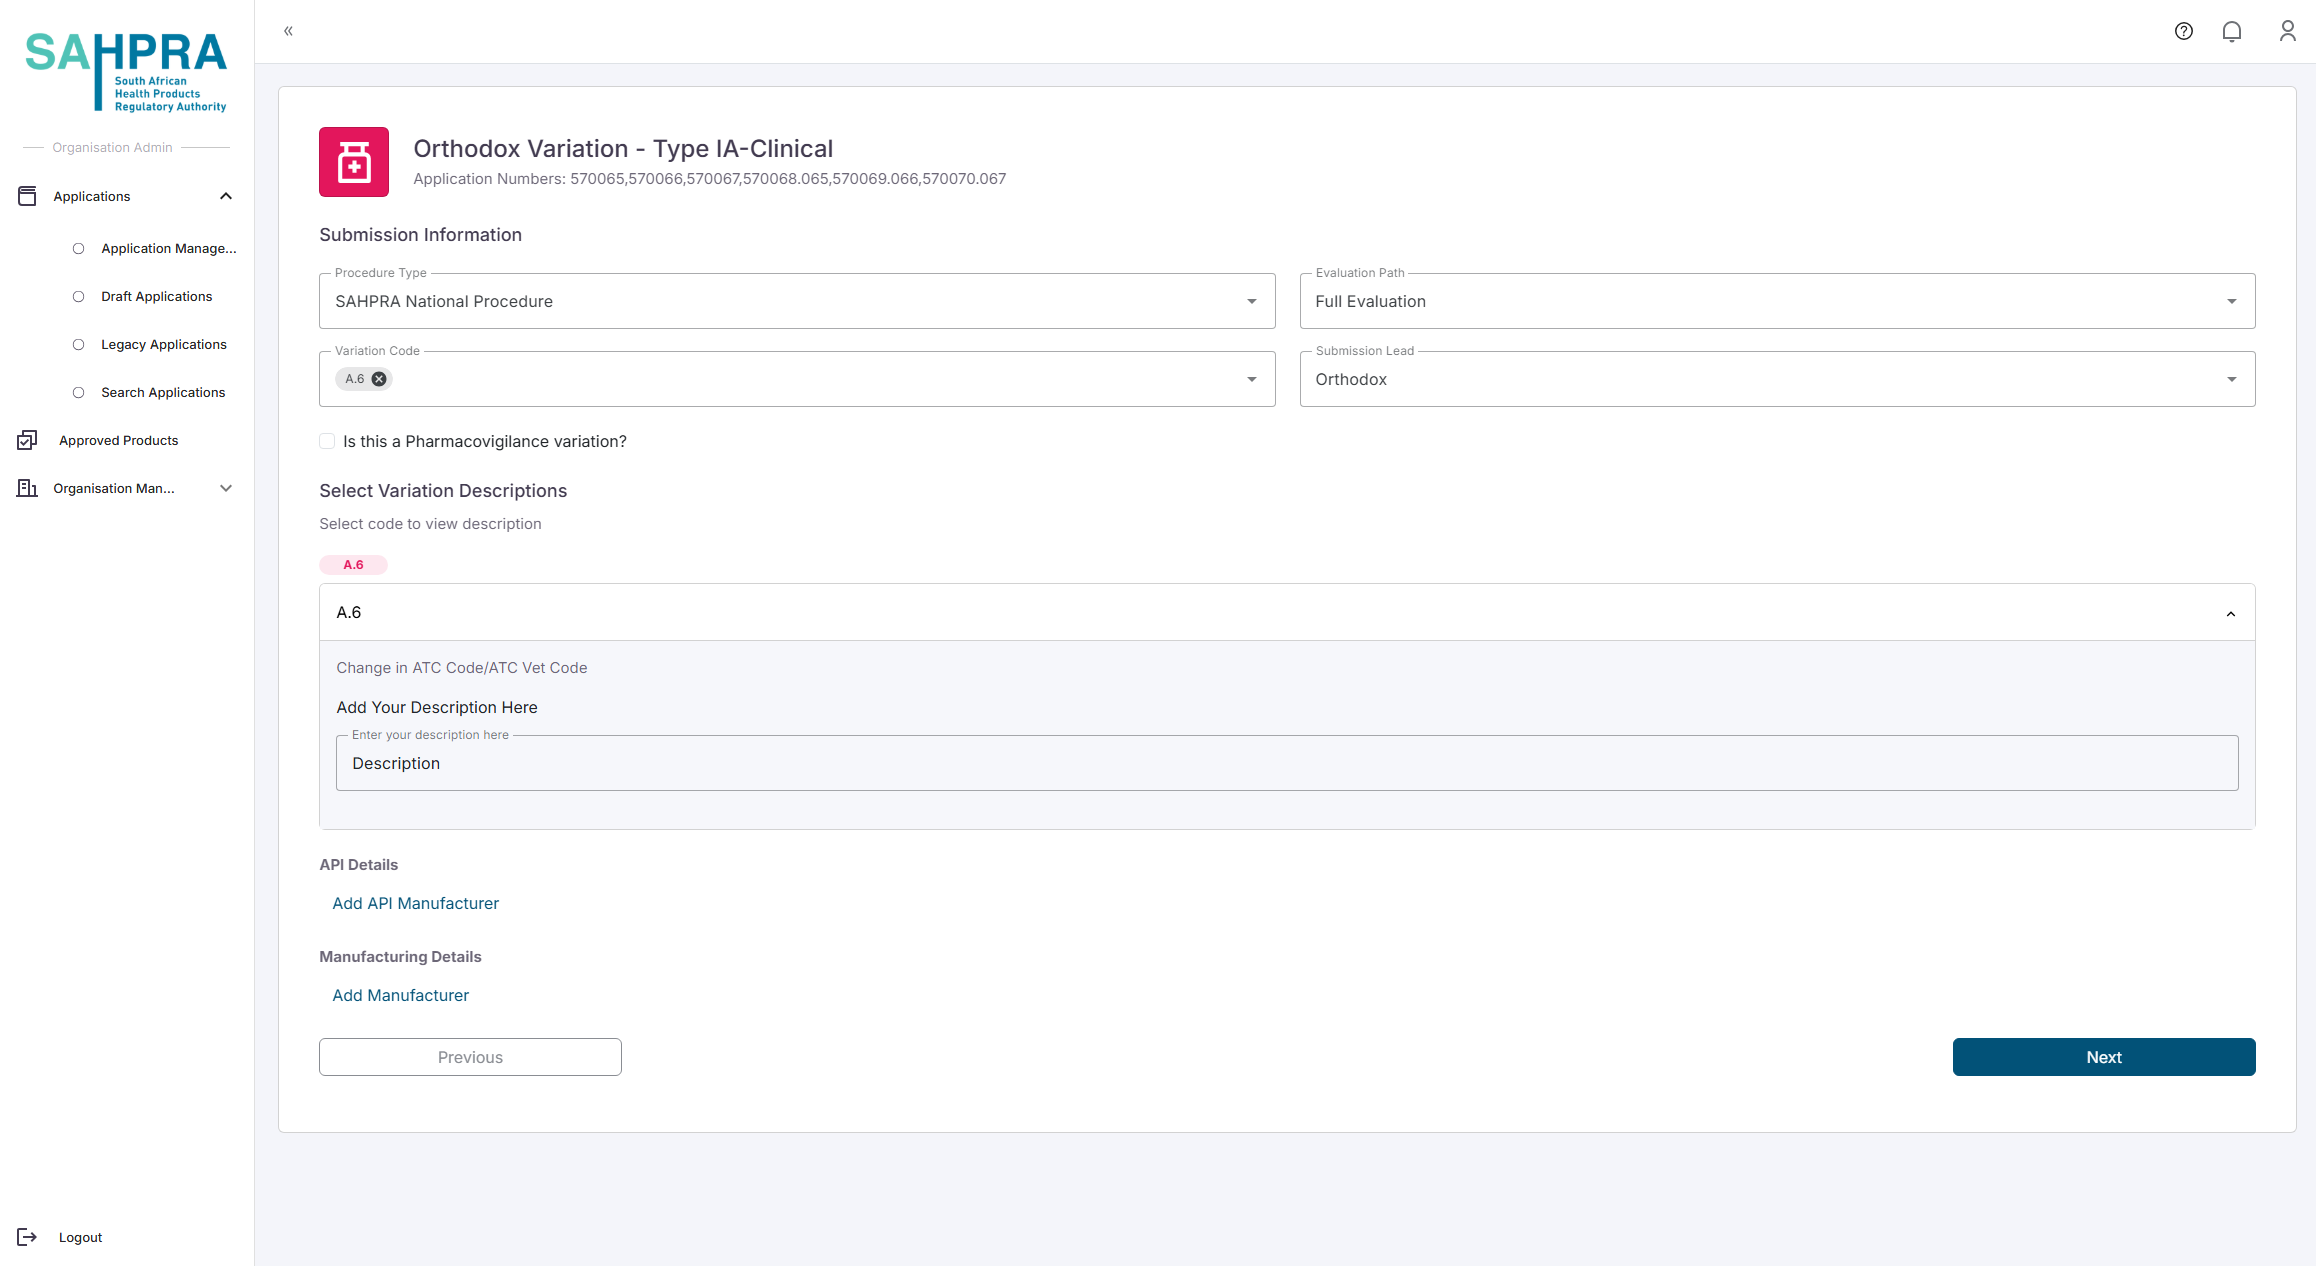
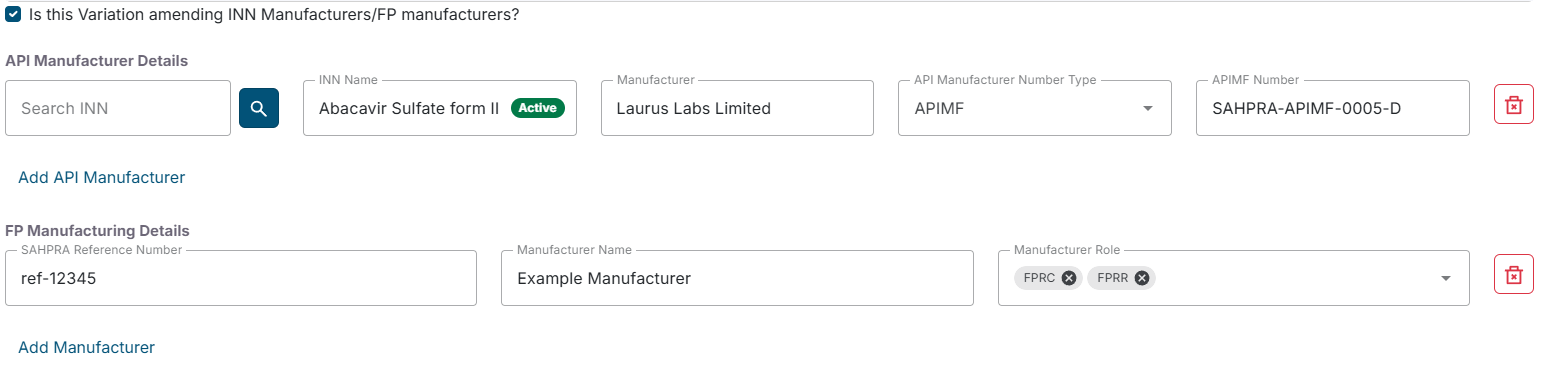
- You can also indicate if the variation is amending INN Manufacturers/FP manufacturers by checking the “Is this Variation amending INN Manufacturers/FP manufacturers?” checkbox.
- If you are are amending INN Manufacturers/FP manufacturers, and you checked the “Is this Variation amending INN Manufacturers/FP manufacturers?” checkbox, all the INN Manufacturers/FP manufacturers saved in the application will be displayed. You can proceed to add or remove INN Manufacturers/FP manufacturers as needed.
Click Next to proceed.
Continue to step 3, Create a New Sequence and complete payment.
Grouped Variations require approval from the HPA Unit. You will need to upload a Motivation Letter that the HPA unit will review.
Fill in the following Variation Details:
- Procedure Type
- Evaluation Path
- If the Evaluation Path is Priority, you will need to enter the Priority Number
- Variation Code
- Submission Lead
Each variation code added will have a Description field to fill in.
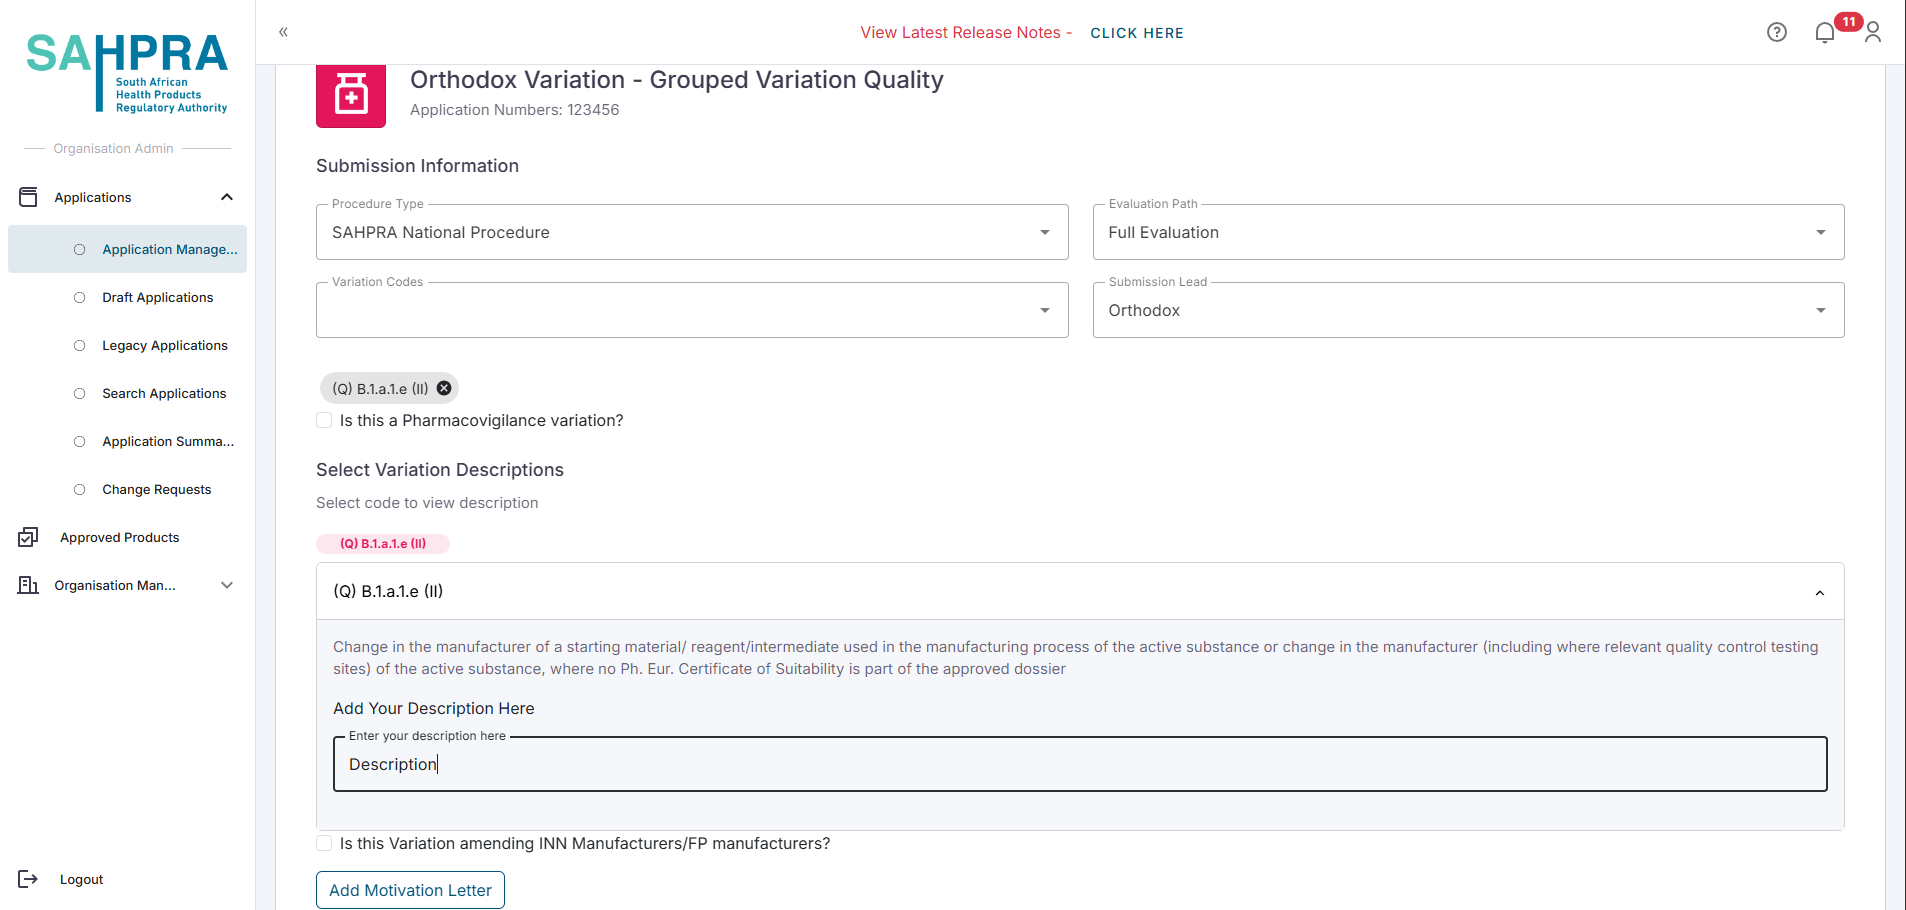
- You can also indicate if the variation is amending INN Manufacturers/FP manufacturers by checking the “Is this Variation amending INN Manufacturers/FP manufacturers?” checkbox.
- If you are are amending INN Manufacturers/FP manufacturers, and you checked the “Is this Variation amending INN Manufacturers/FP manufacturers?” checkbox, all the INN Manufacturers/FP manufacturers saved in the application will be displayed. You can proceed to add or remove INN Manufacturers/FP manufacturers as needed.
- Upload the Motivation Letter for the grouped variation by clicking on the Add Motivation Letter button.

Click Next to proceed.
The status of the variation will be Pending Approval. Once the HPA Unit has approved the variation, you will be able to create a sequence and complete payment. You will receive a notification once the variation has been approved.
- Continue to step 3, Create a New Sequence and complete payment.
Once selecting Type II-Change in Applicant-Relinquishing you can select the strengths for any approved initial application.
Once the strengths are selected you will be prompted to complete the description for the change, enter the Evaluation Path as well as select the registered organisation (you can search via their CIPC number or Organisation name) which you wish to transfer to.
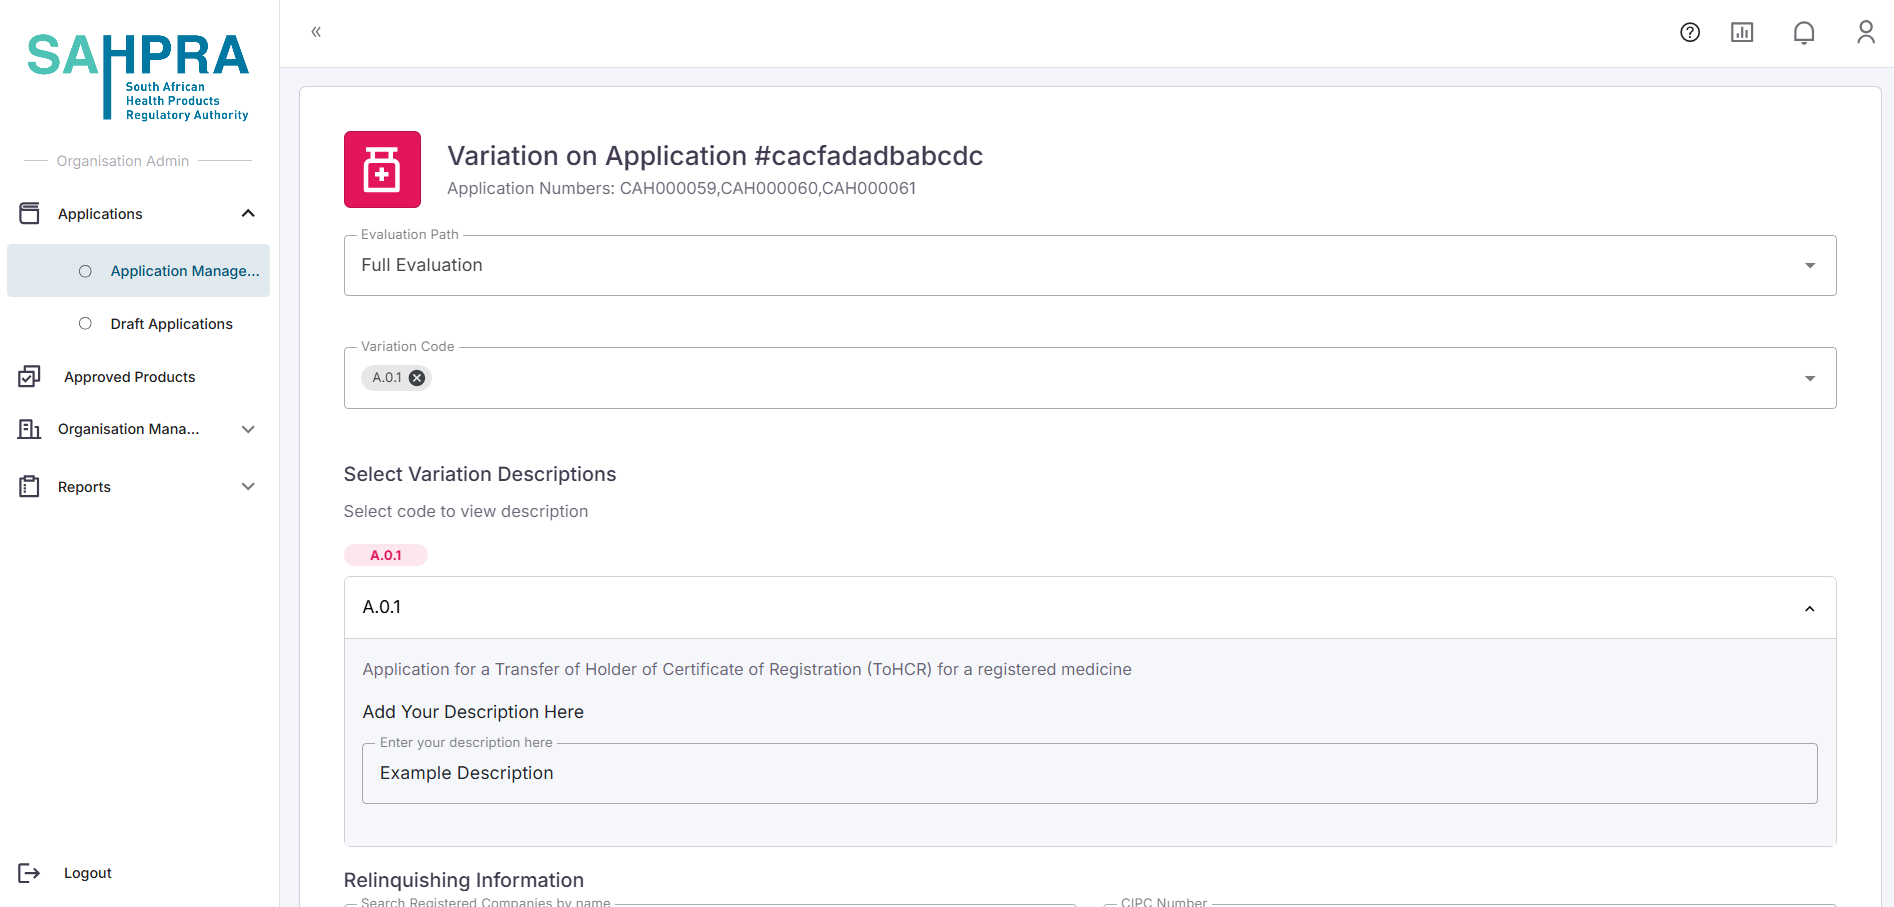
- Once you are satisfied with the details and clicking the Next button a submission will be created
- Proceed to create a sequence for this submission here.
- The application will move to the selected Organisation after the sequence is submitted to the FTP server by clicking on Confirm FTP Upload. Note that the relinquishing party will not pay any fees for a Transfer of Applicant process.
Once the sequence is submitted to the FTP server by clicking on Confirm FTP Upload, the application will move to the selected Organisation, and the Type II-Change in Applicant-Acquiring Submission will be created automatically.
The application will have a Awaiting Transfer, and the acquiring party will be able to view the application and create a sequence for the application here.
If a Full TOA is done where the entire application with all its strengths were transferred, you can note that your submission and sequence numbers continue were the previous applicant left off. The application ID will remain the same as the previous applicant’s application ID.
If a partial transfer was done, you will receive a new application ID with the submission for the transfer visible. Please note that a baseline must be submitted in this case before continuing with other actions for the application.
If the acquiring application fails, the transferred application please refer to the FAQ page for further options.
* Please note that the necessary submissions will be created automatically, and you need to View the application and Create a Sequence for the submission. A Partial TOA will have a Baseline Submission and a Type II-Change in Applicant-Acquiring Submission created for you.
- Fill in the required information for the Delinking variation.
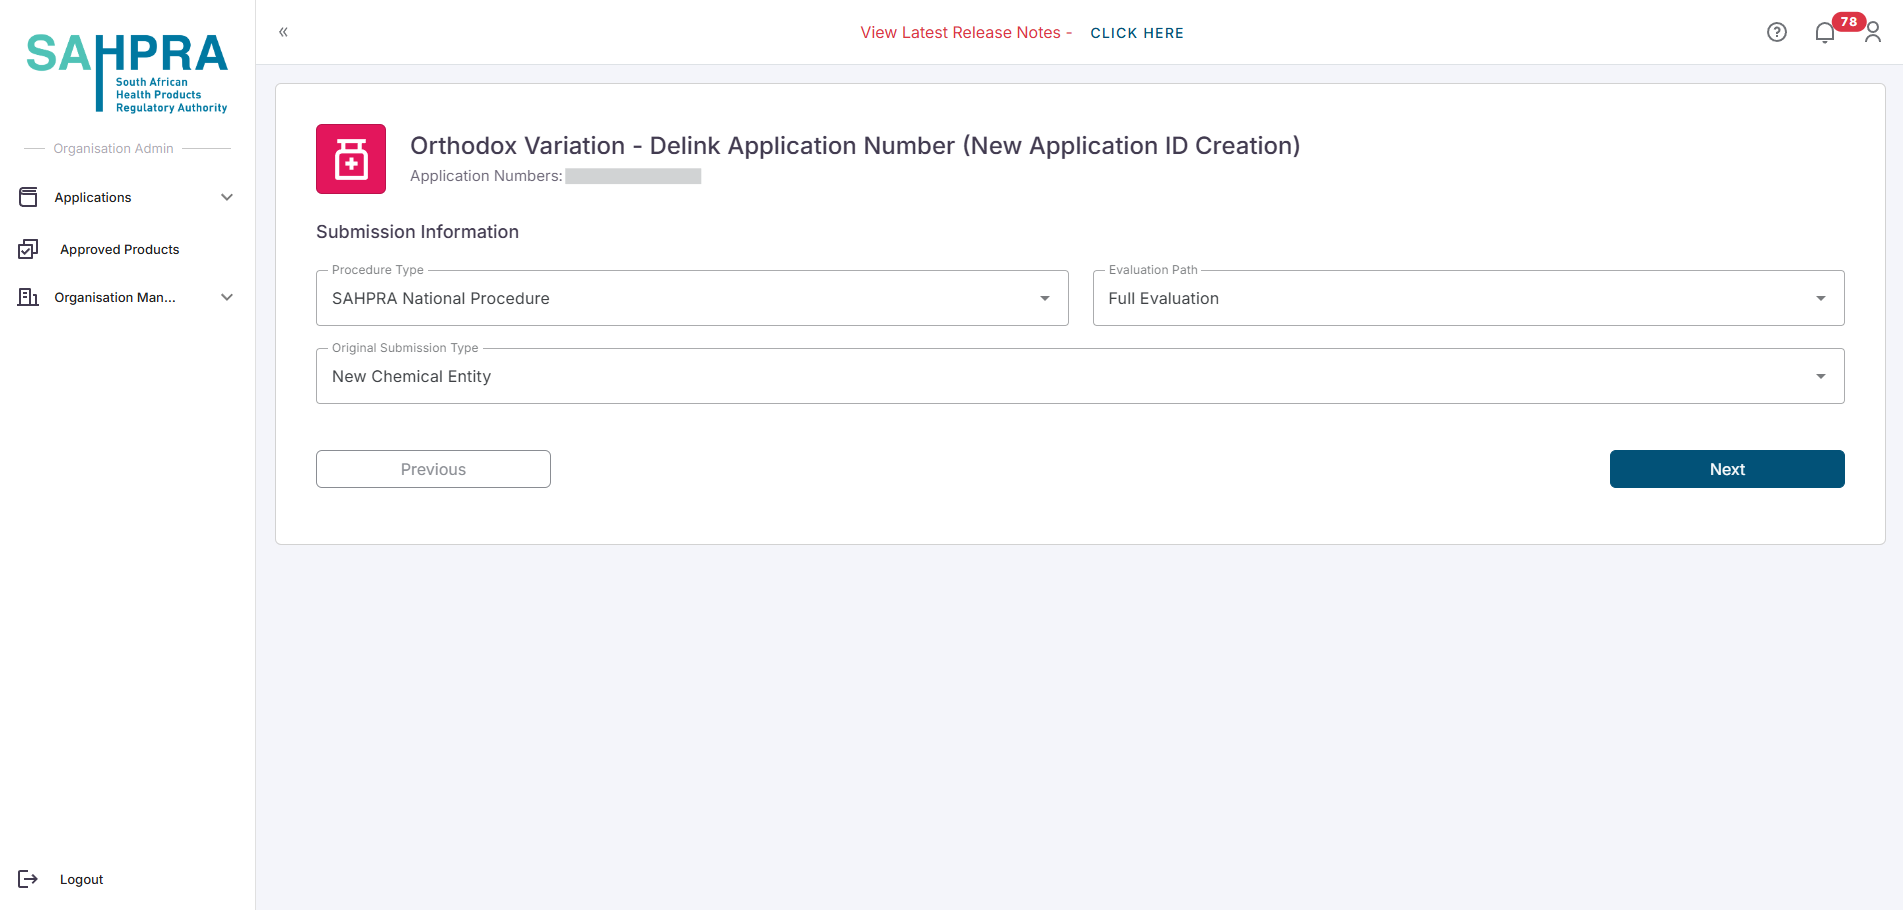
Continue to step 3, Create a New Sequence and complete payment.
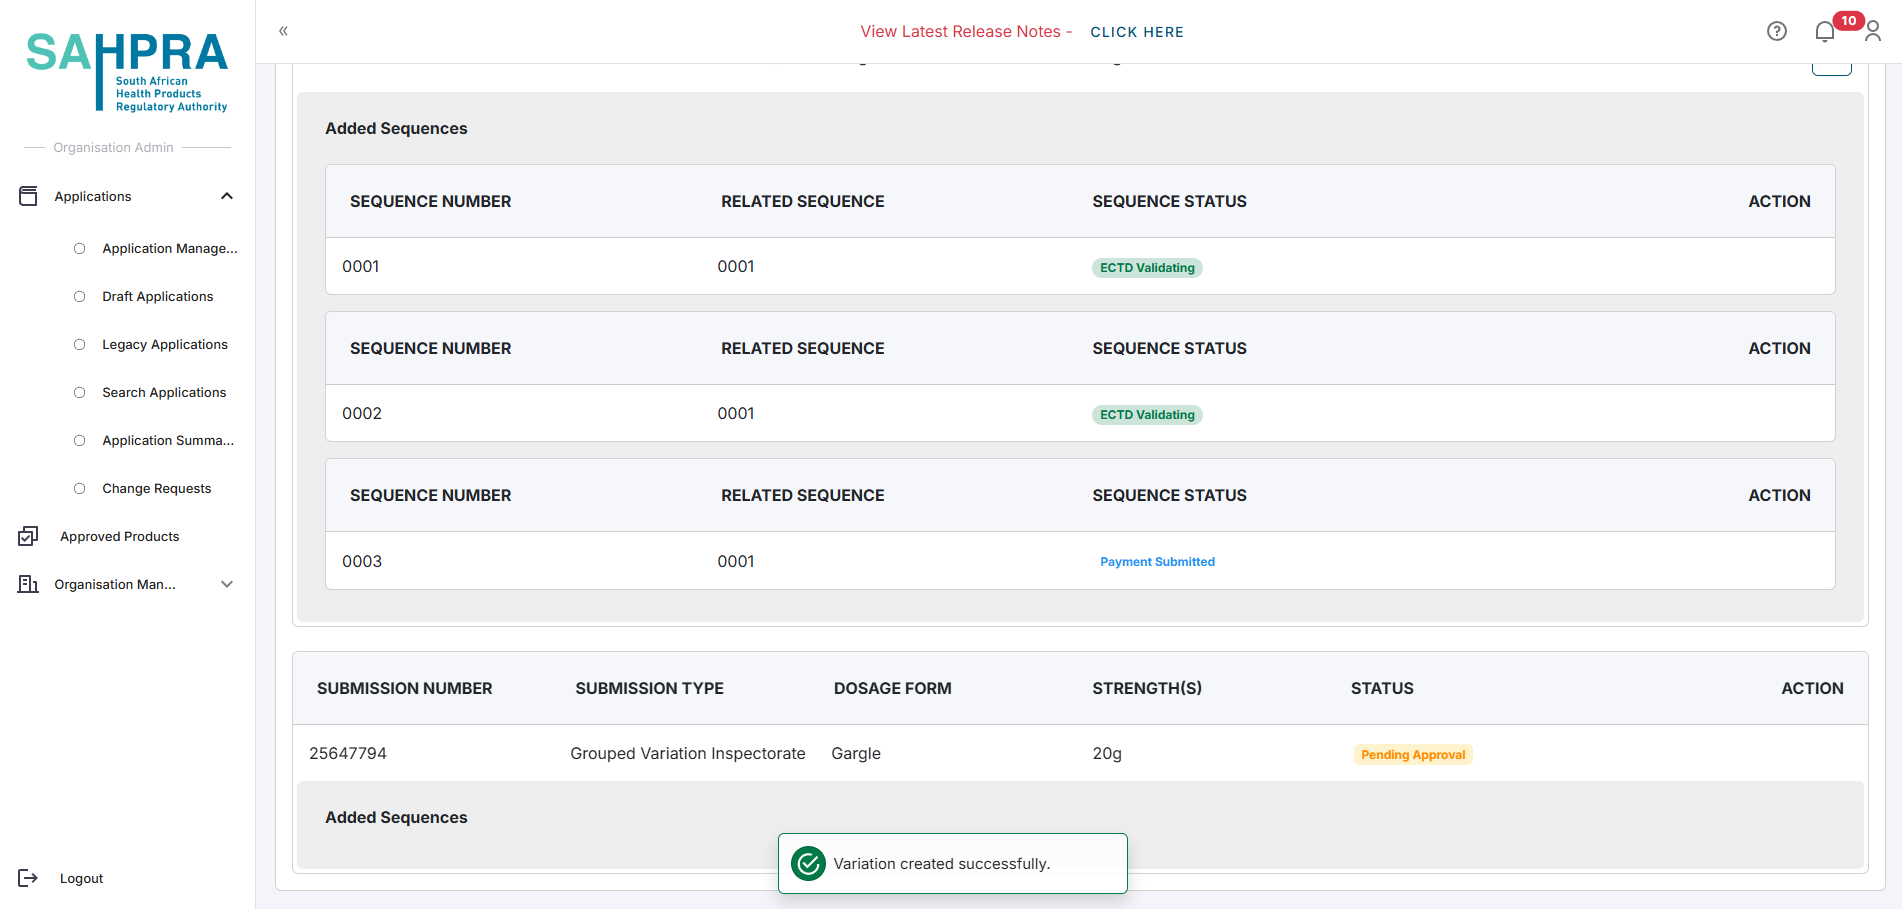
Once the variation submission has been reviewed and approved, the selected strength will be unlinked from the application and a new application ID will be created.
Navigate to the Application Management dashboard and select the new application ID by clicking on the View button. The status of the application will be Awaiting Delinking.
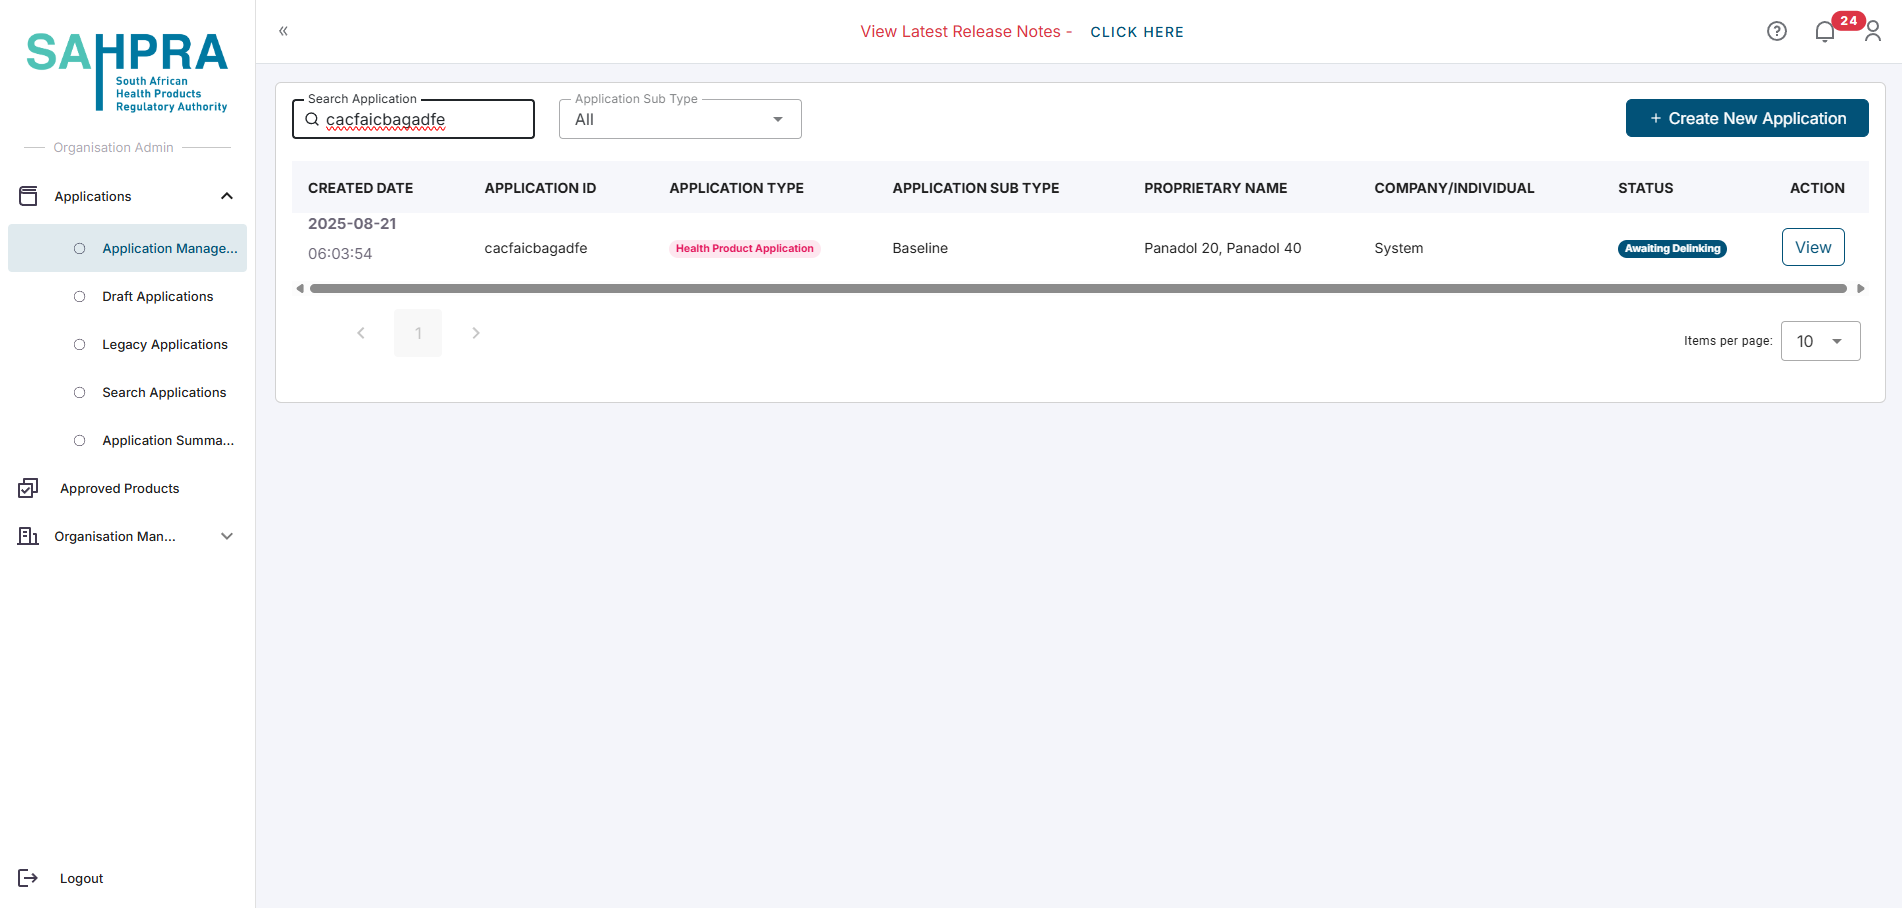
A baseline submission will be automatically created for the application.
Navigate to the Submissions tab of the application.
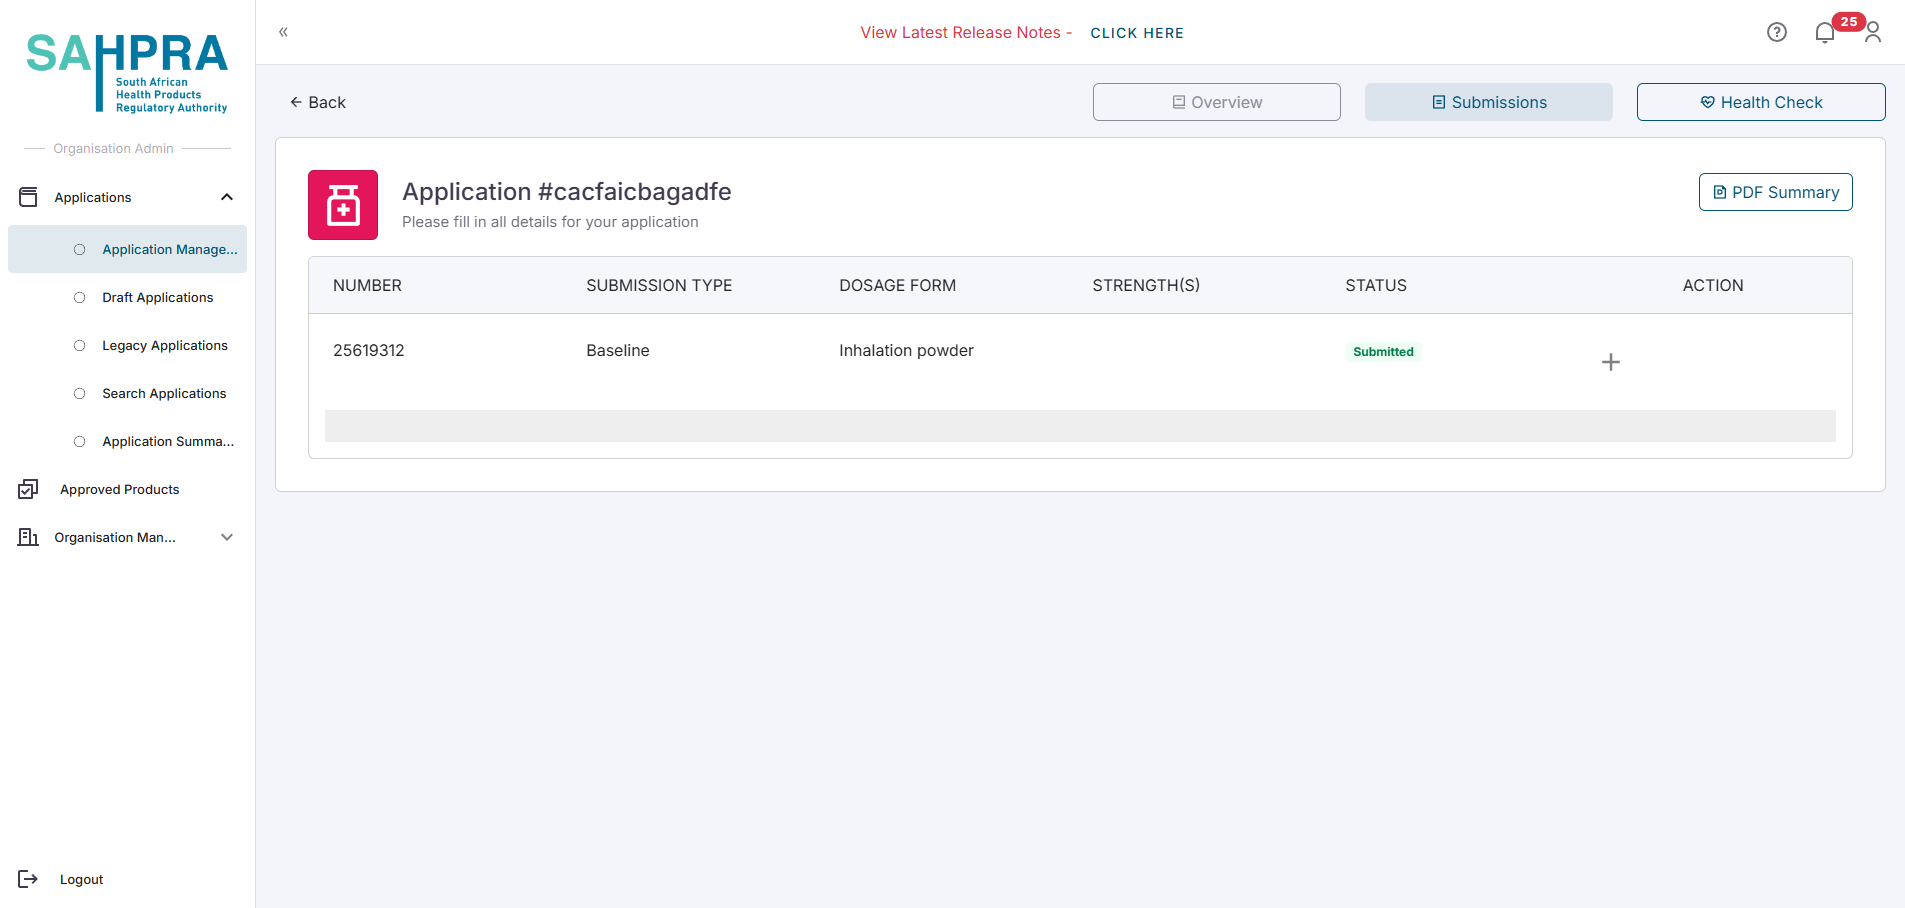
- Complete this submission by creating a sequence for the baseline submission.
- Selecting the Line extension - New Strength variation type will load a form to fill in the required information of the variation. You will be able to add one additional strength’s information here.
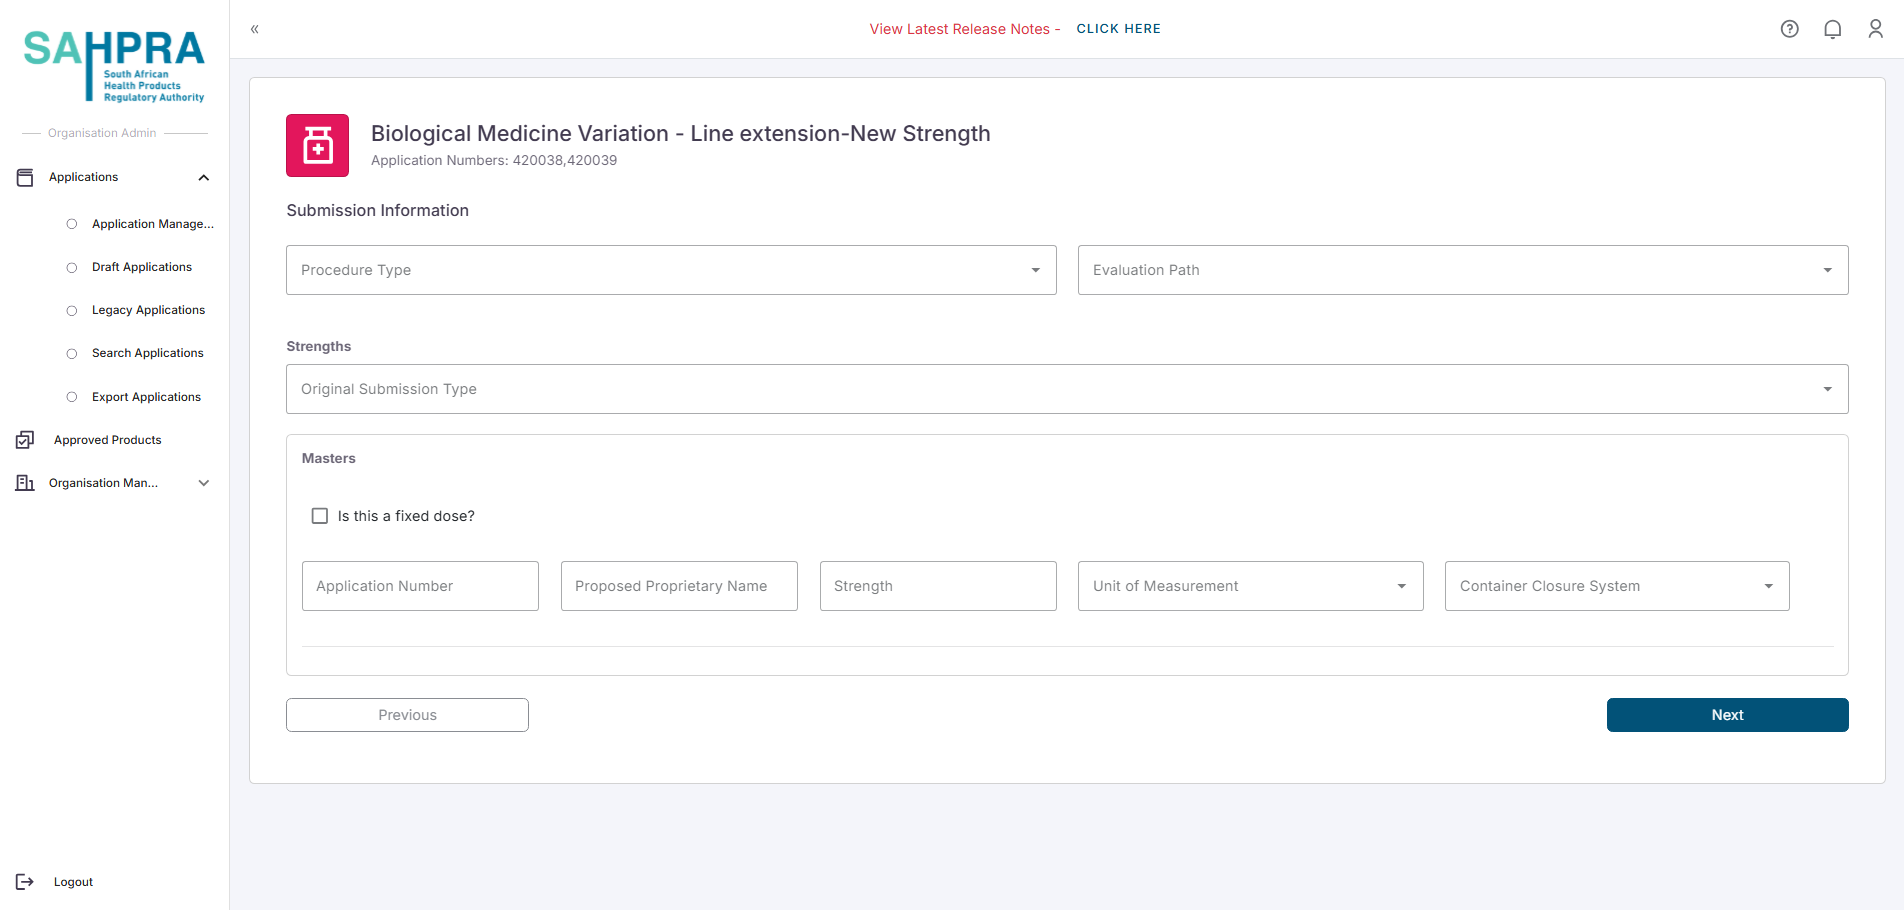
Click Next to proceed.
Continue to step 3, Create a New Sequence and complete payment.
- Selecting either the Clones or Replicas variation type will load a form to fill in the required information of the variation. Below is an example of a clones form (The Replica/s form will indicate to fill in replica/s)
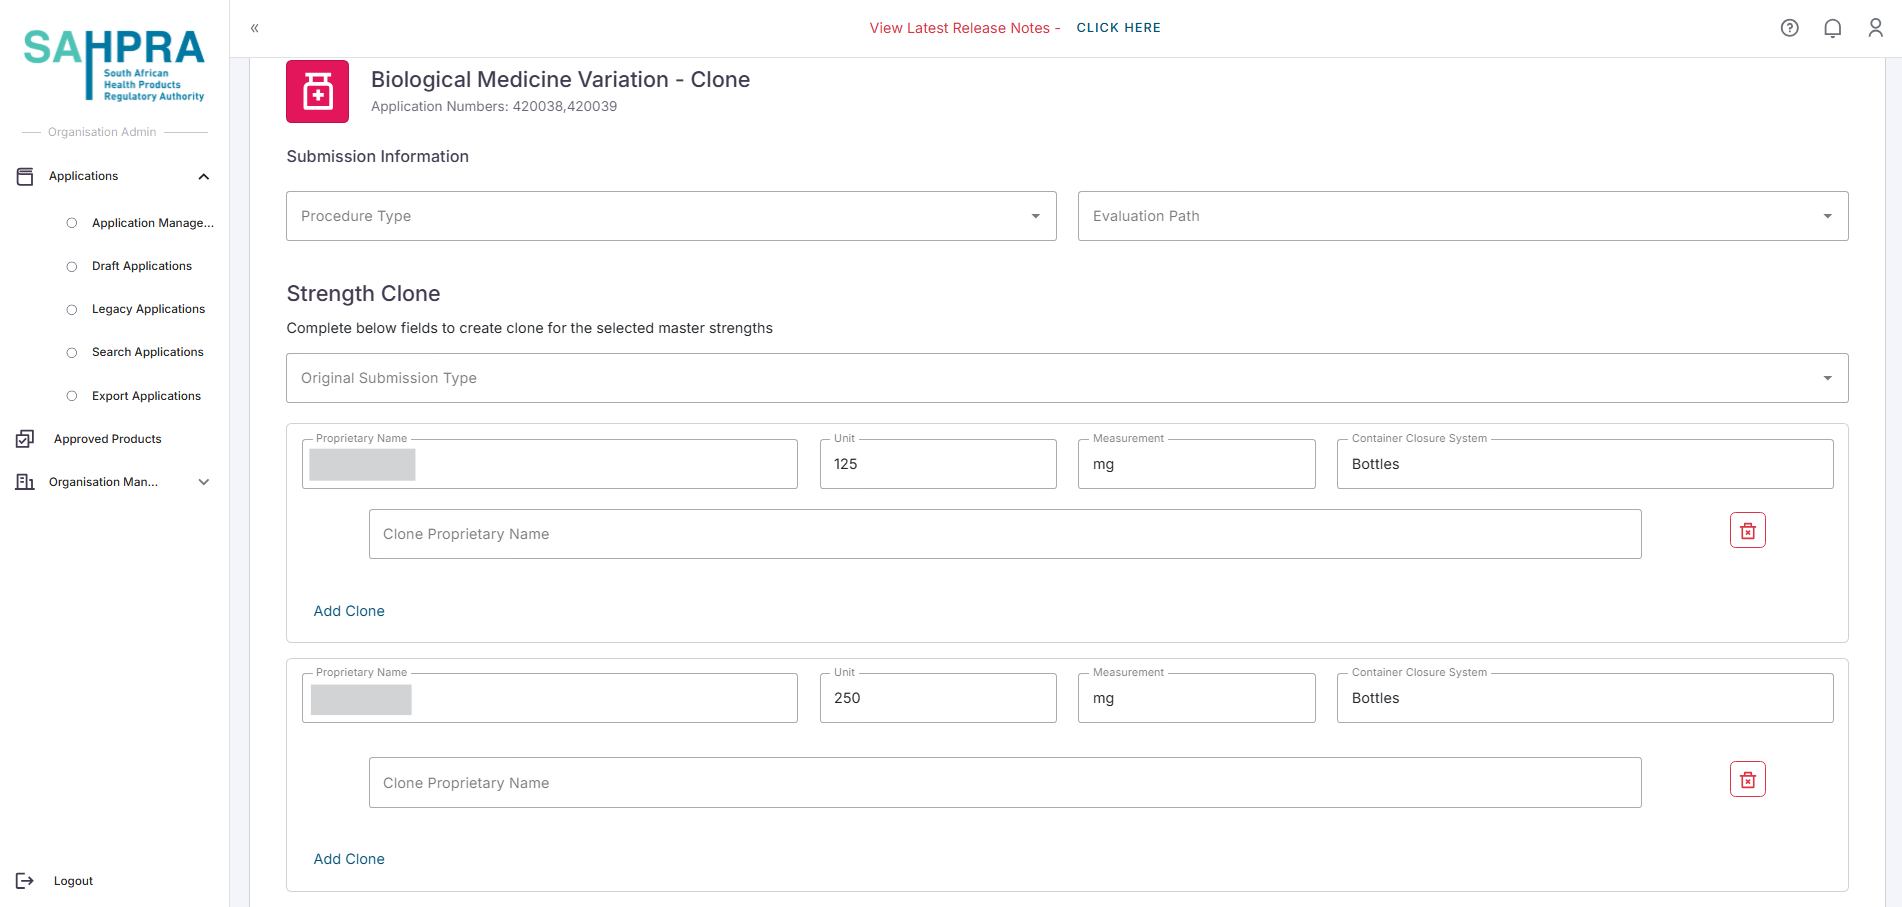
Click Next to proceed.
Continue to step 3, Create a New Sequence and complete payment.
Step 3: Create a New Sequence and complete payment
- Once clicking next the application overview screen will appear which will automatically create a submission for the application.
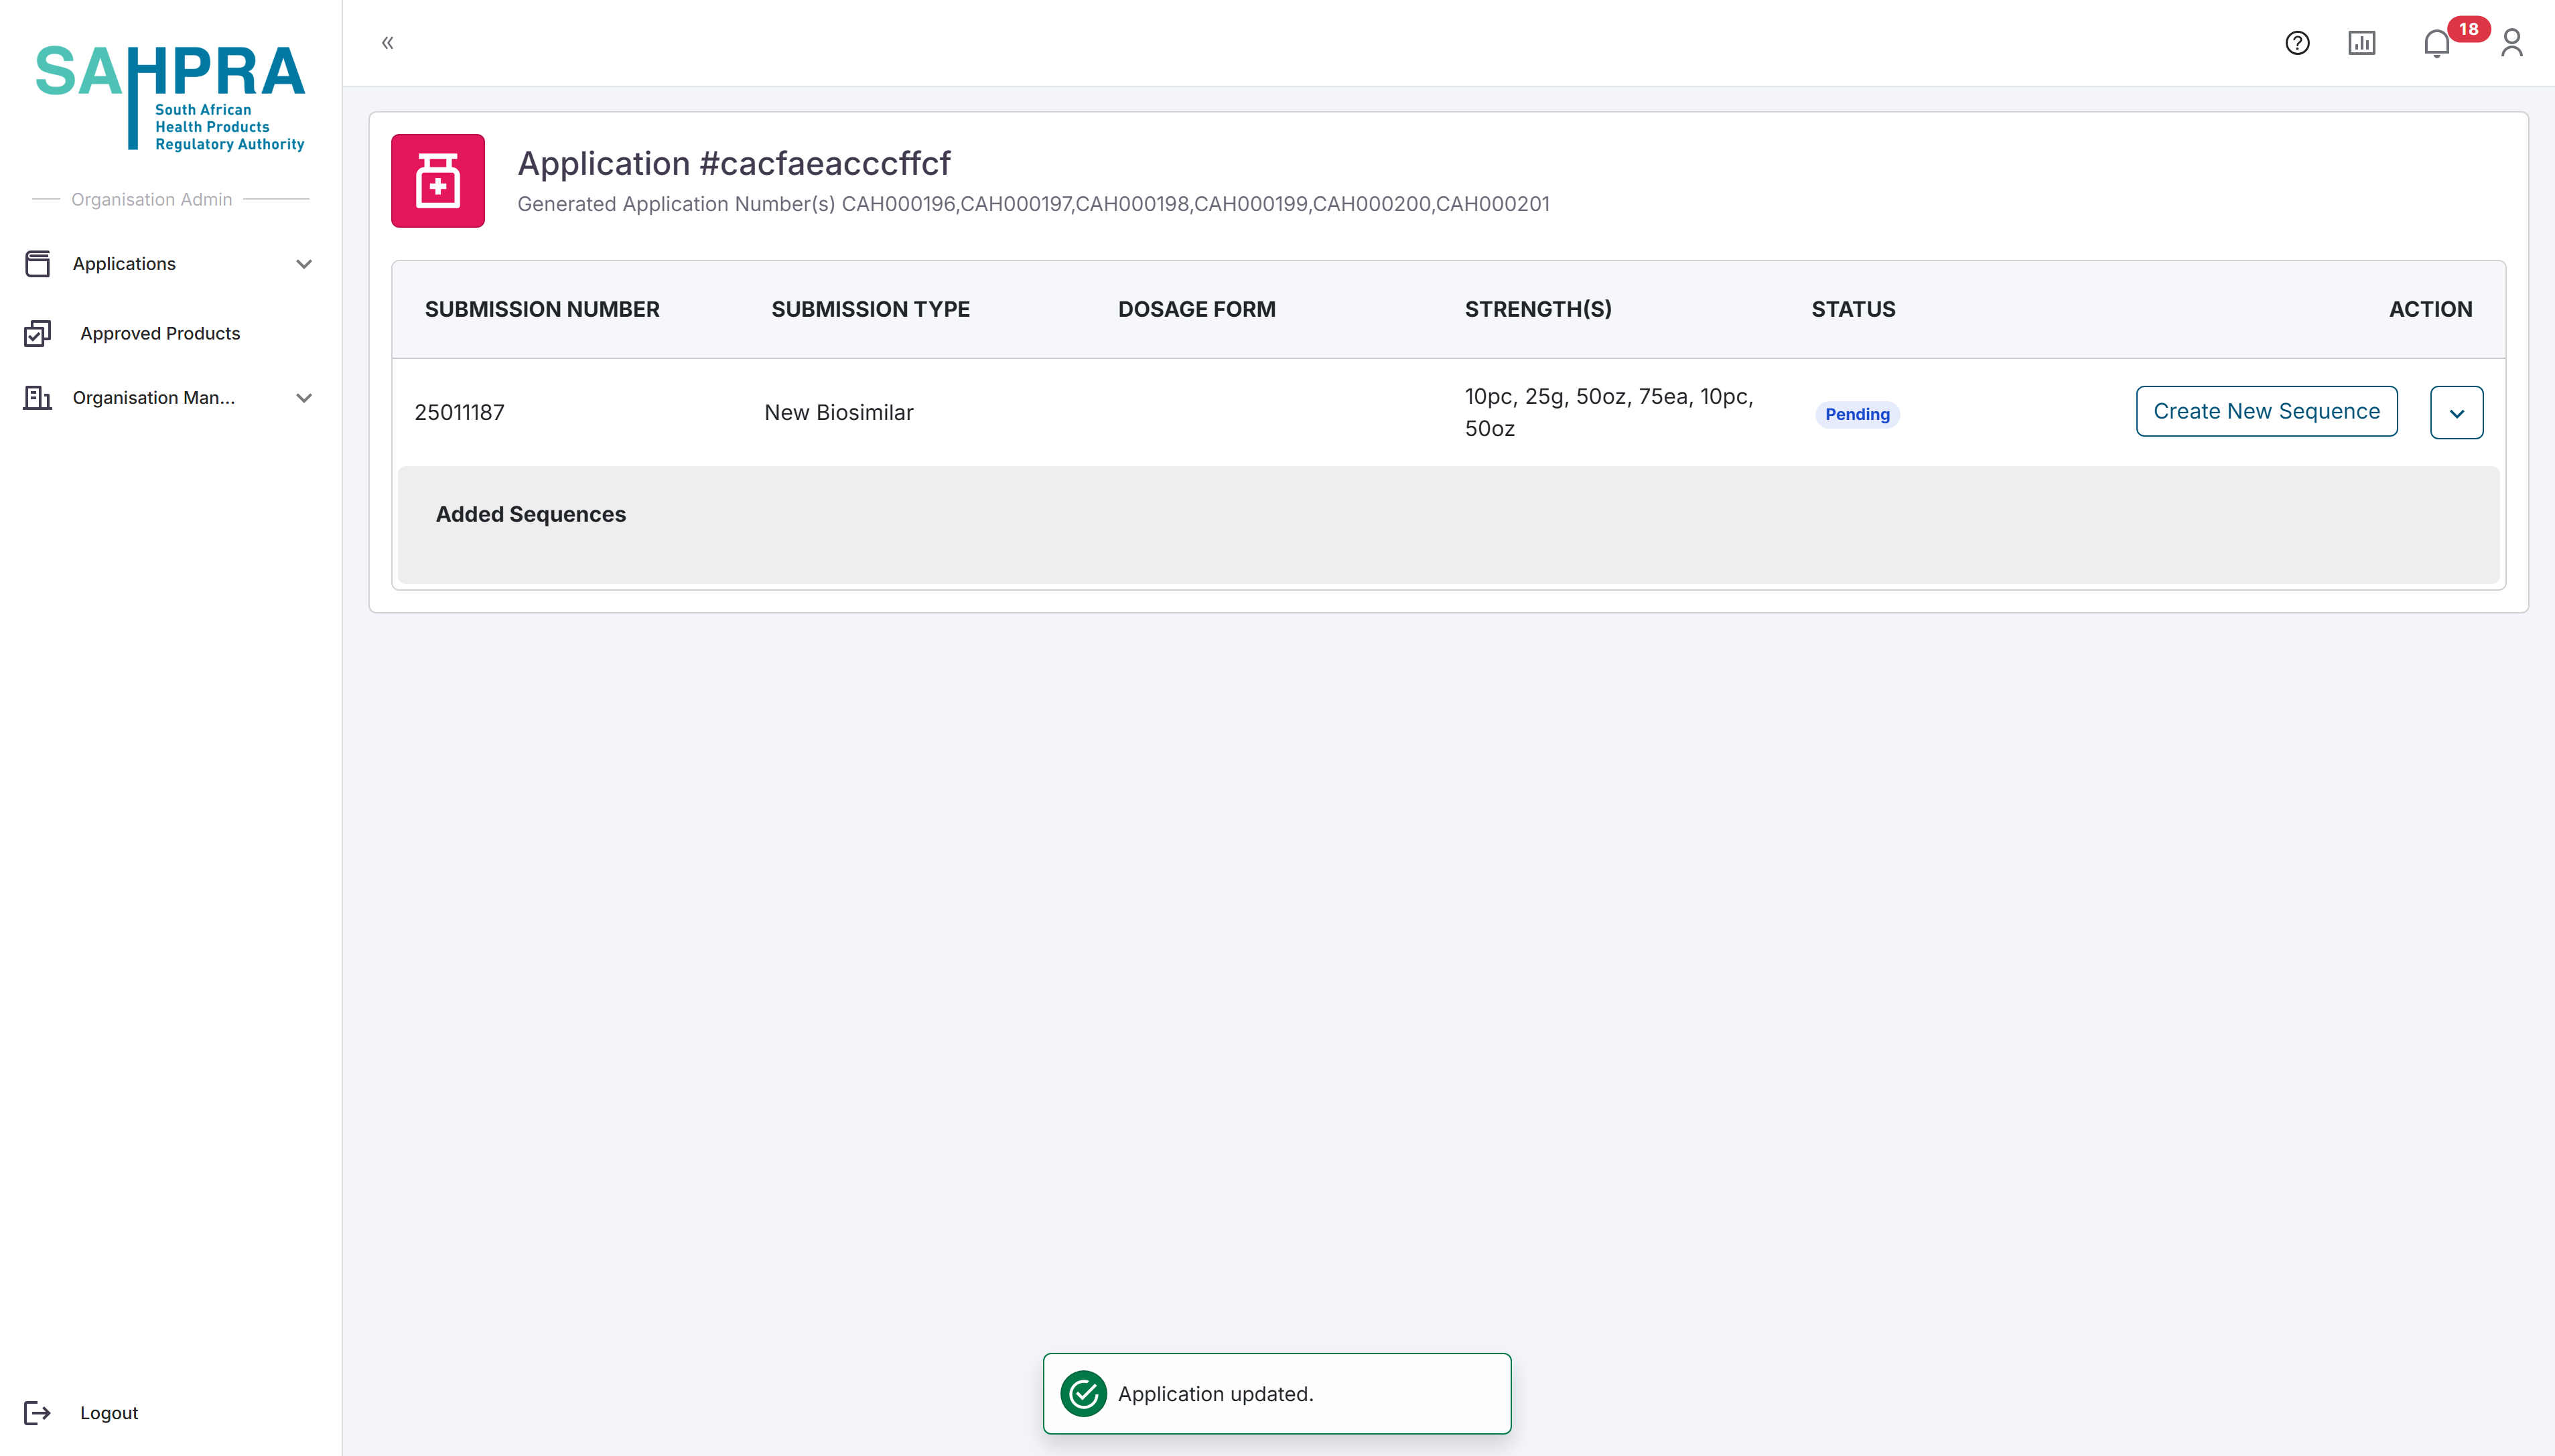
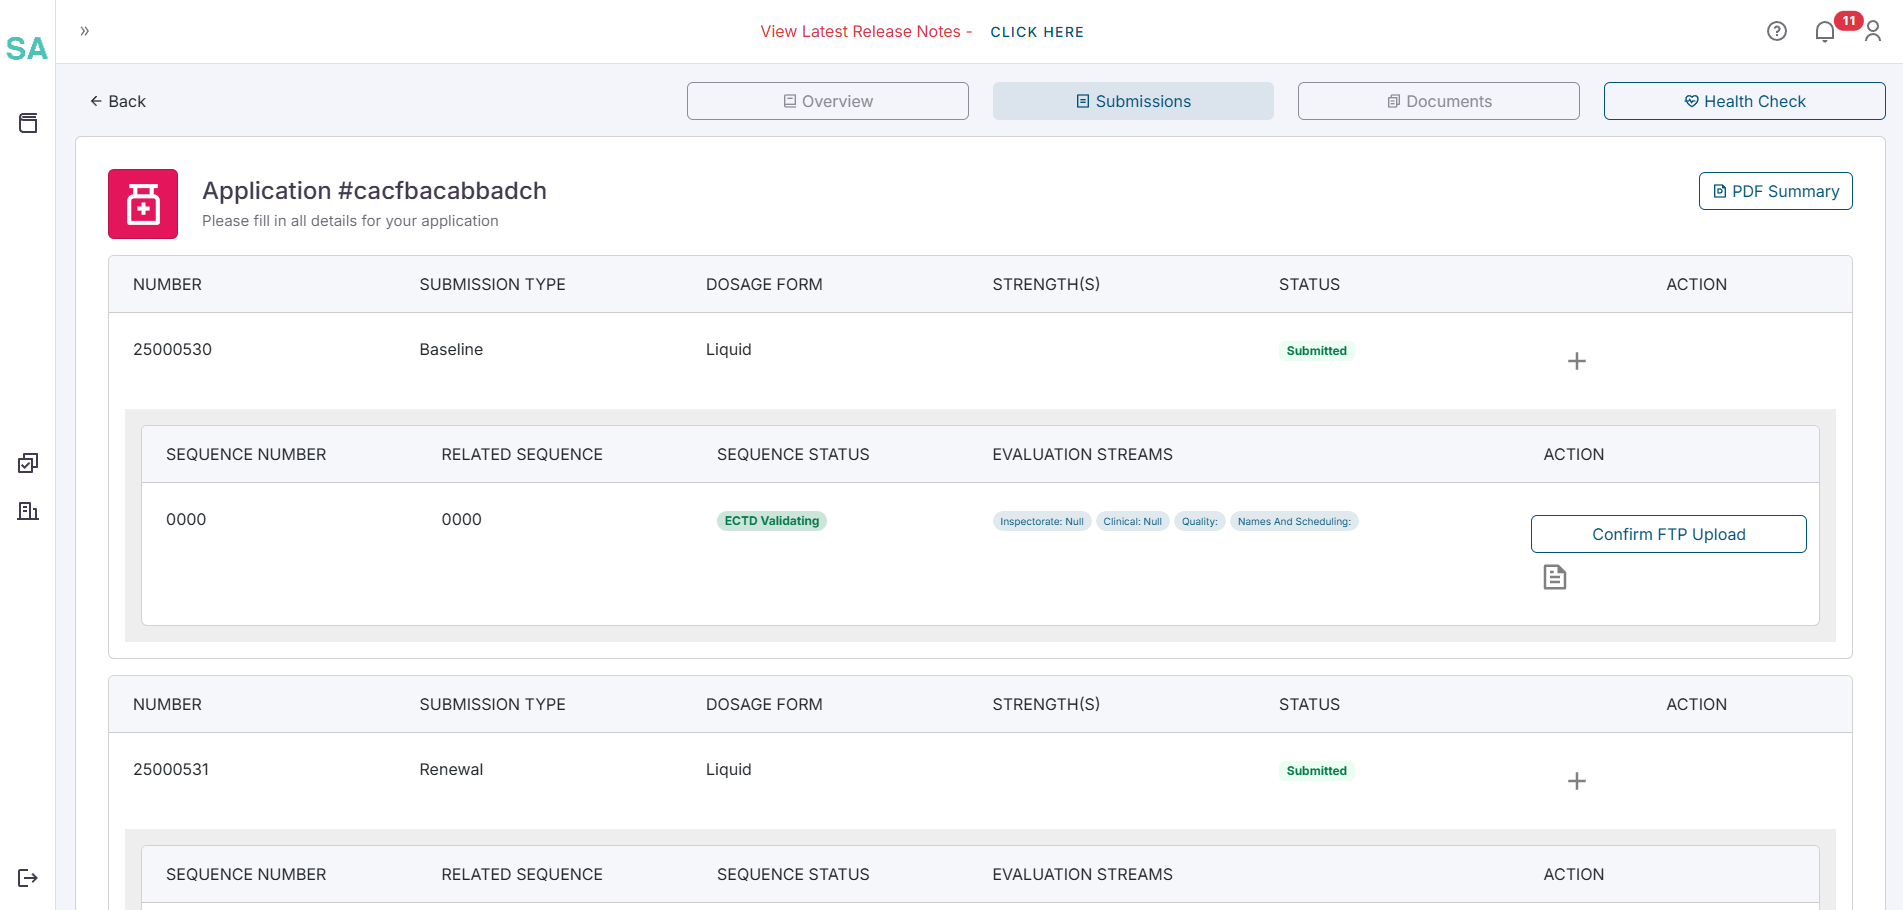
Creating a Sequence at a later stage?
You can create a sequence for the submission at a later stage by viewing the application again. The page will look slightly different, and you will need to click on the + icon next to the submission to create a new sequence.
Navigate to the Applications Management dashboard and select the application you wish to create a sequence for.
Click on the View button to the right of the application.
Find the submission you wish to create a sequence for and click on the + icon next to the submission.
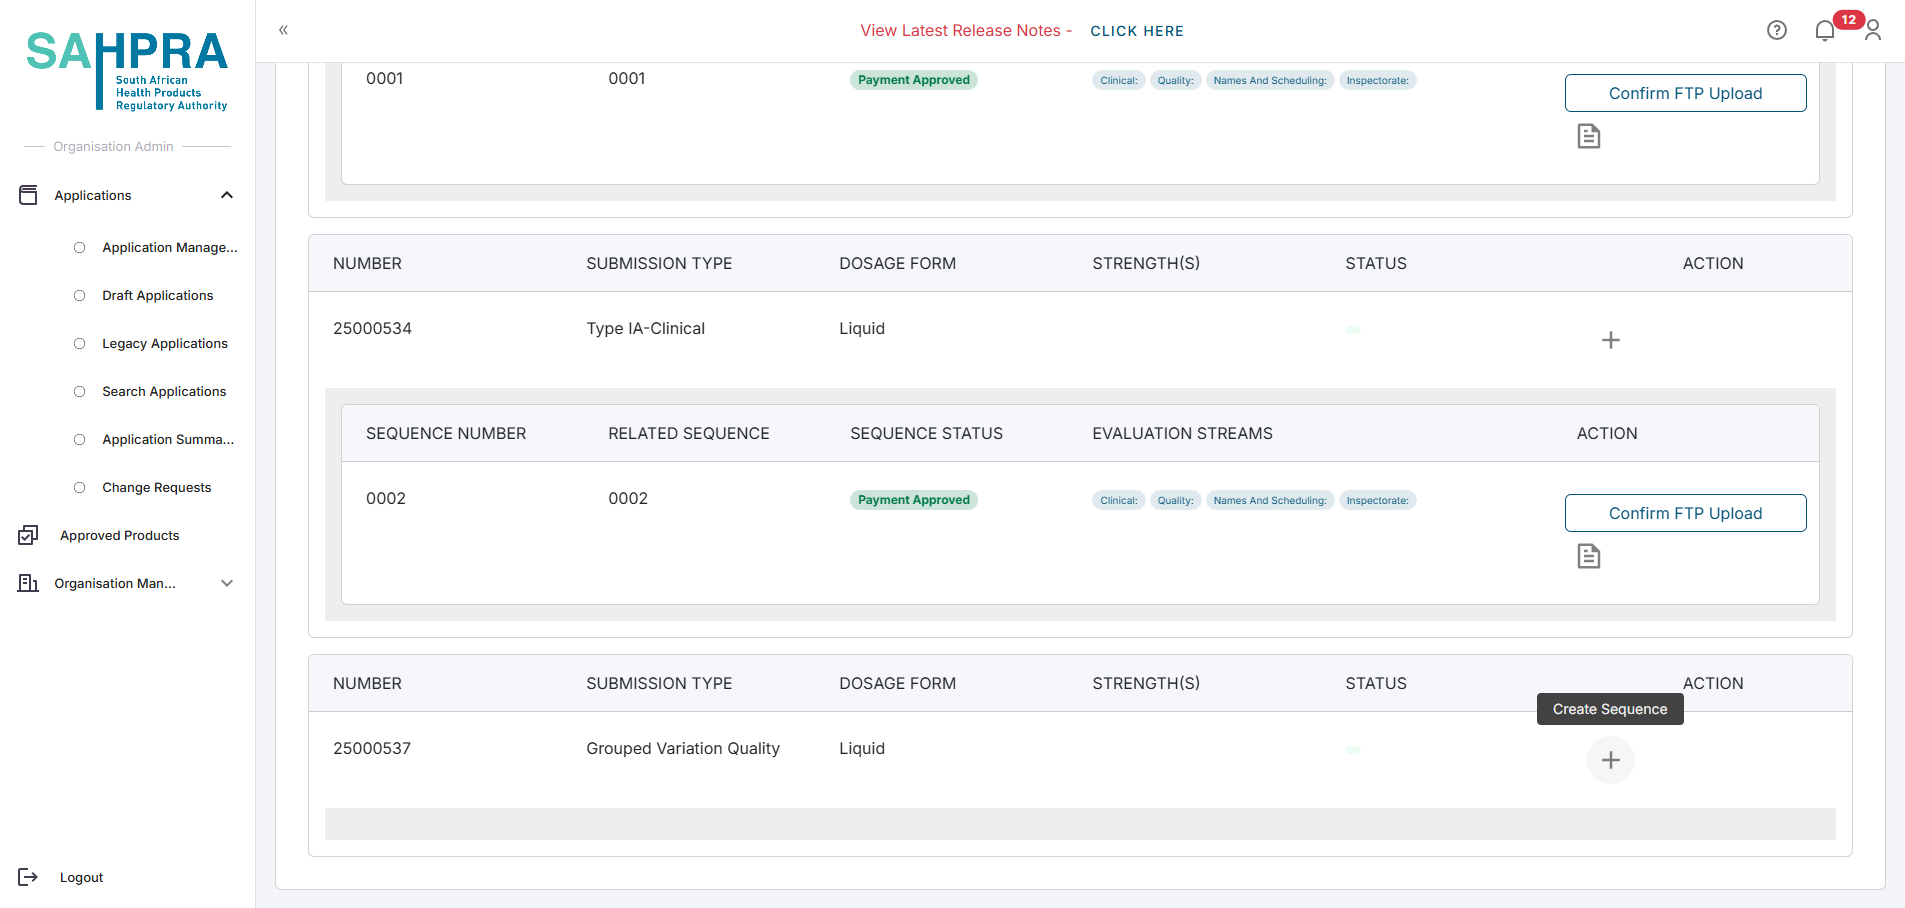
Click on the Create Sequence button to the right of the submission.
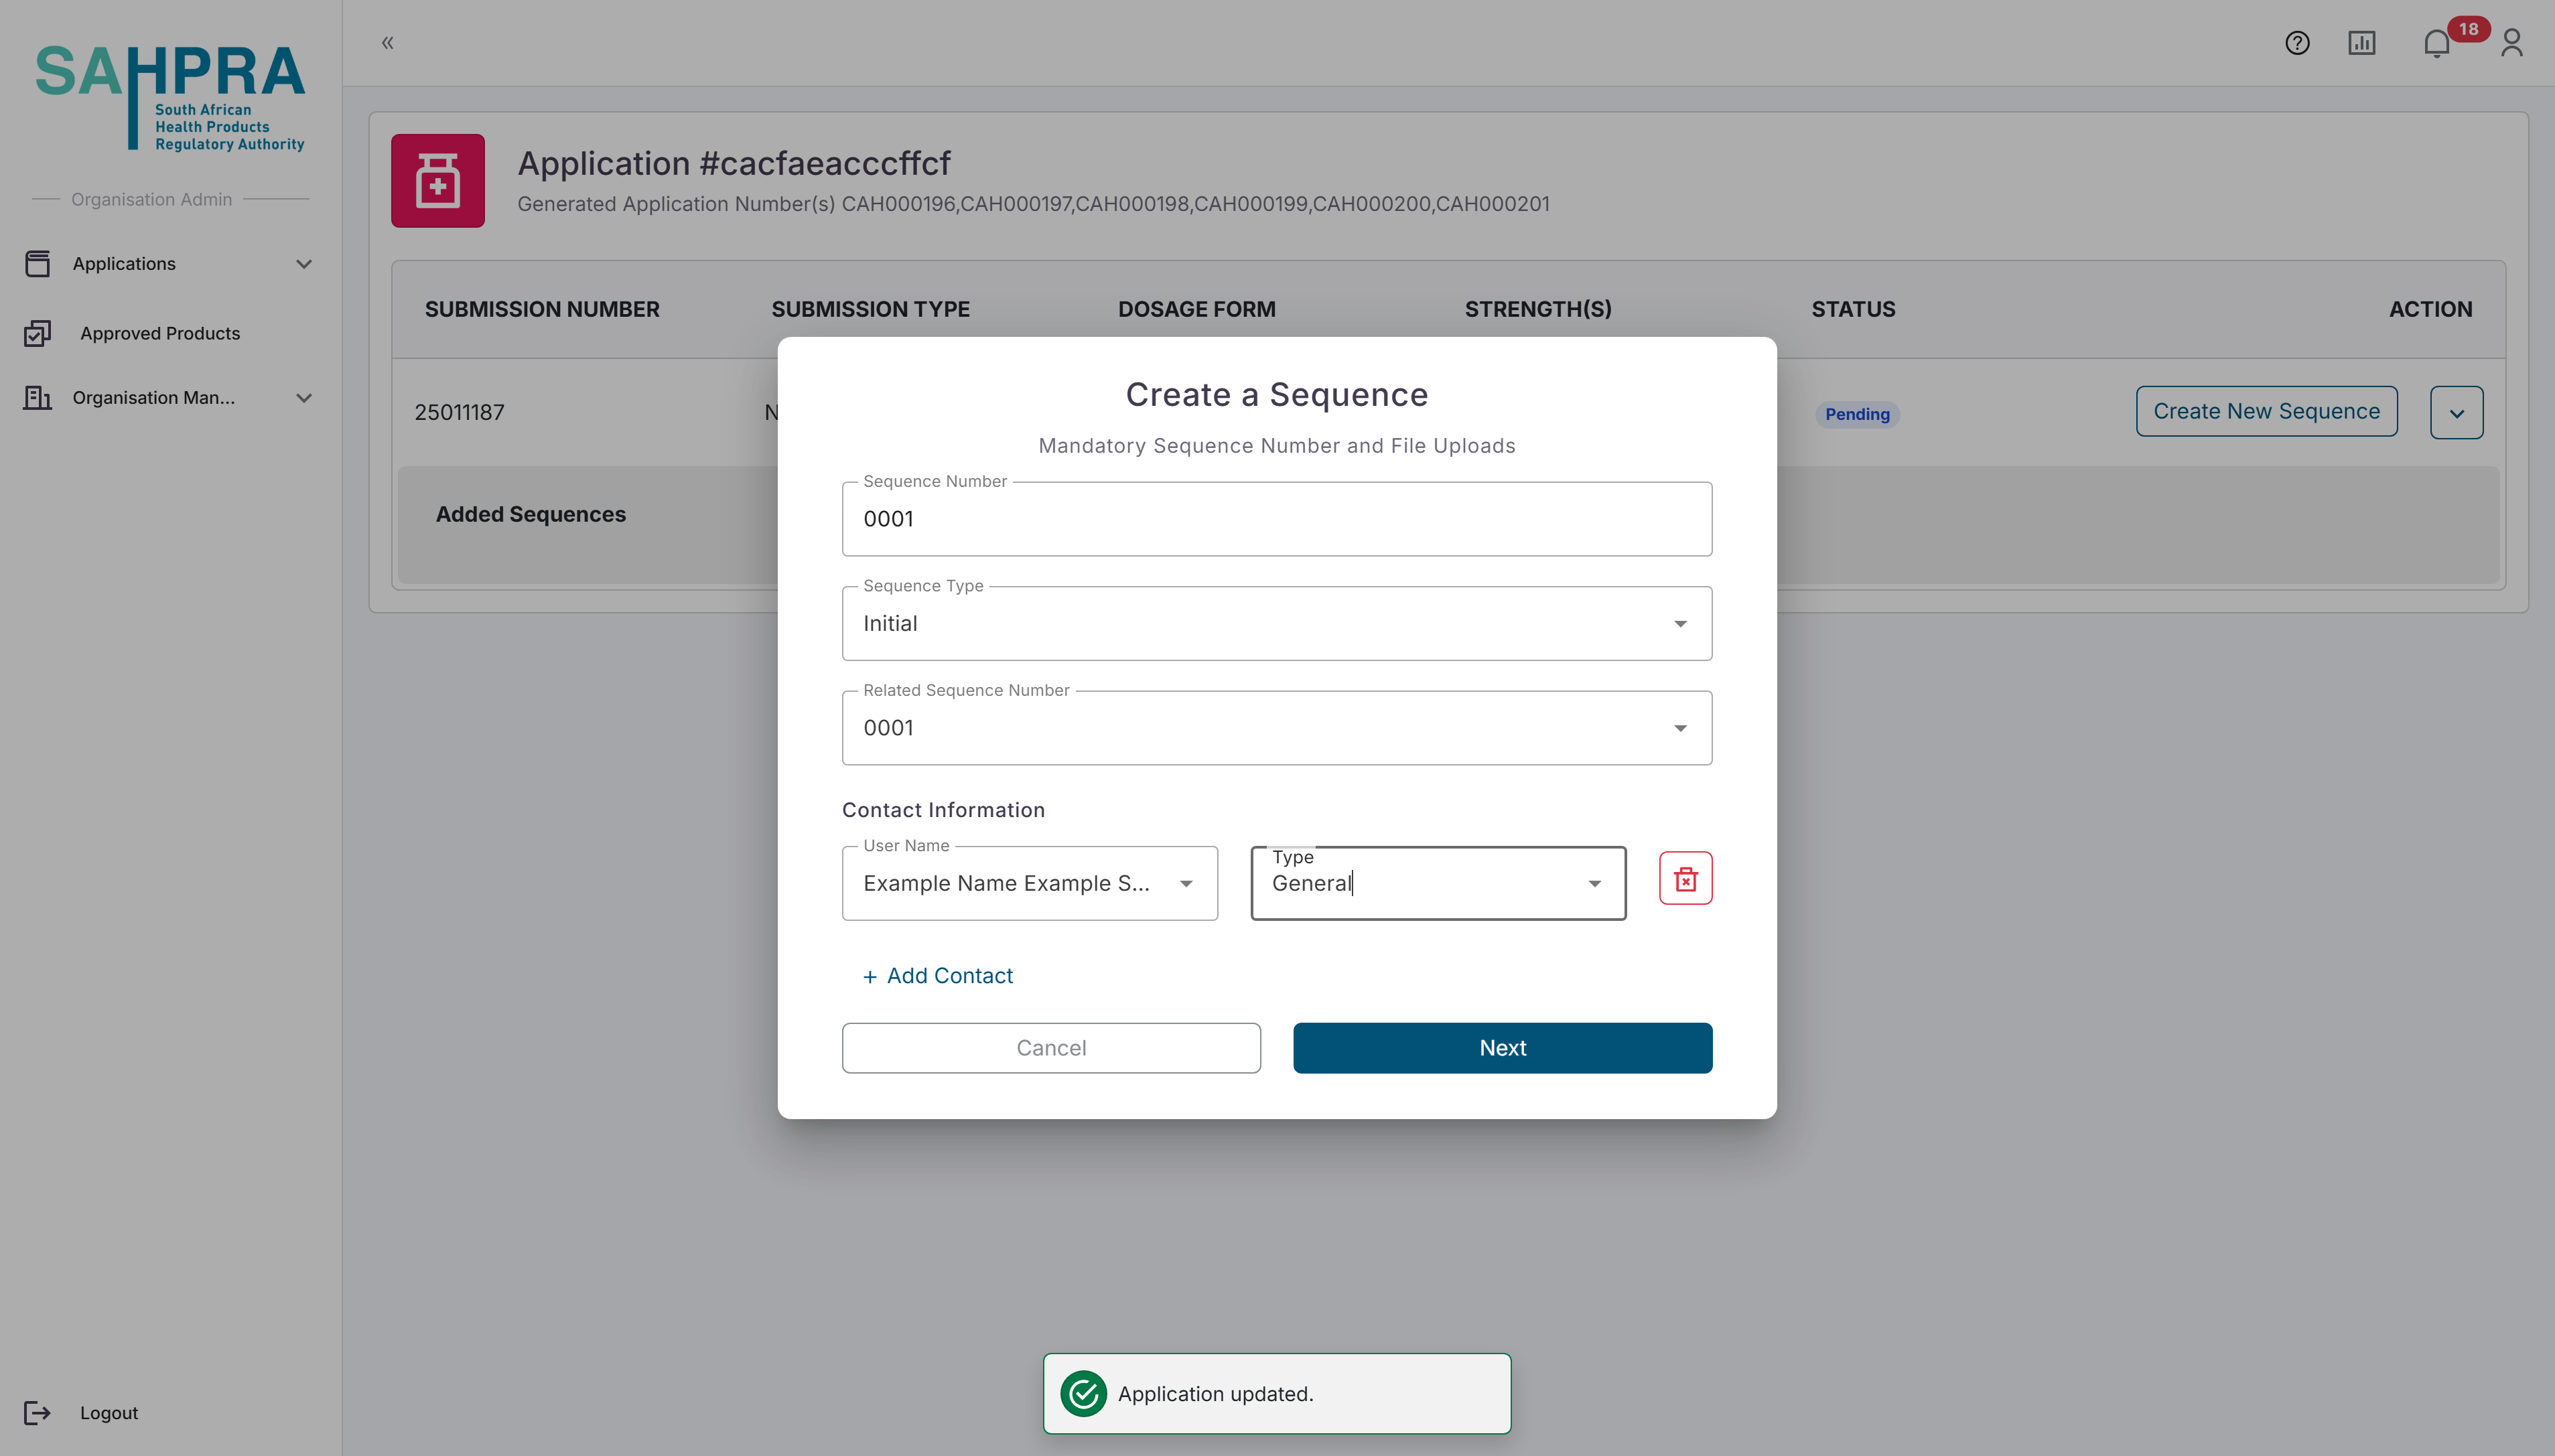
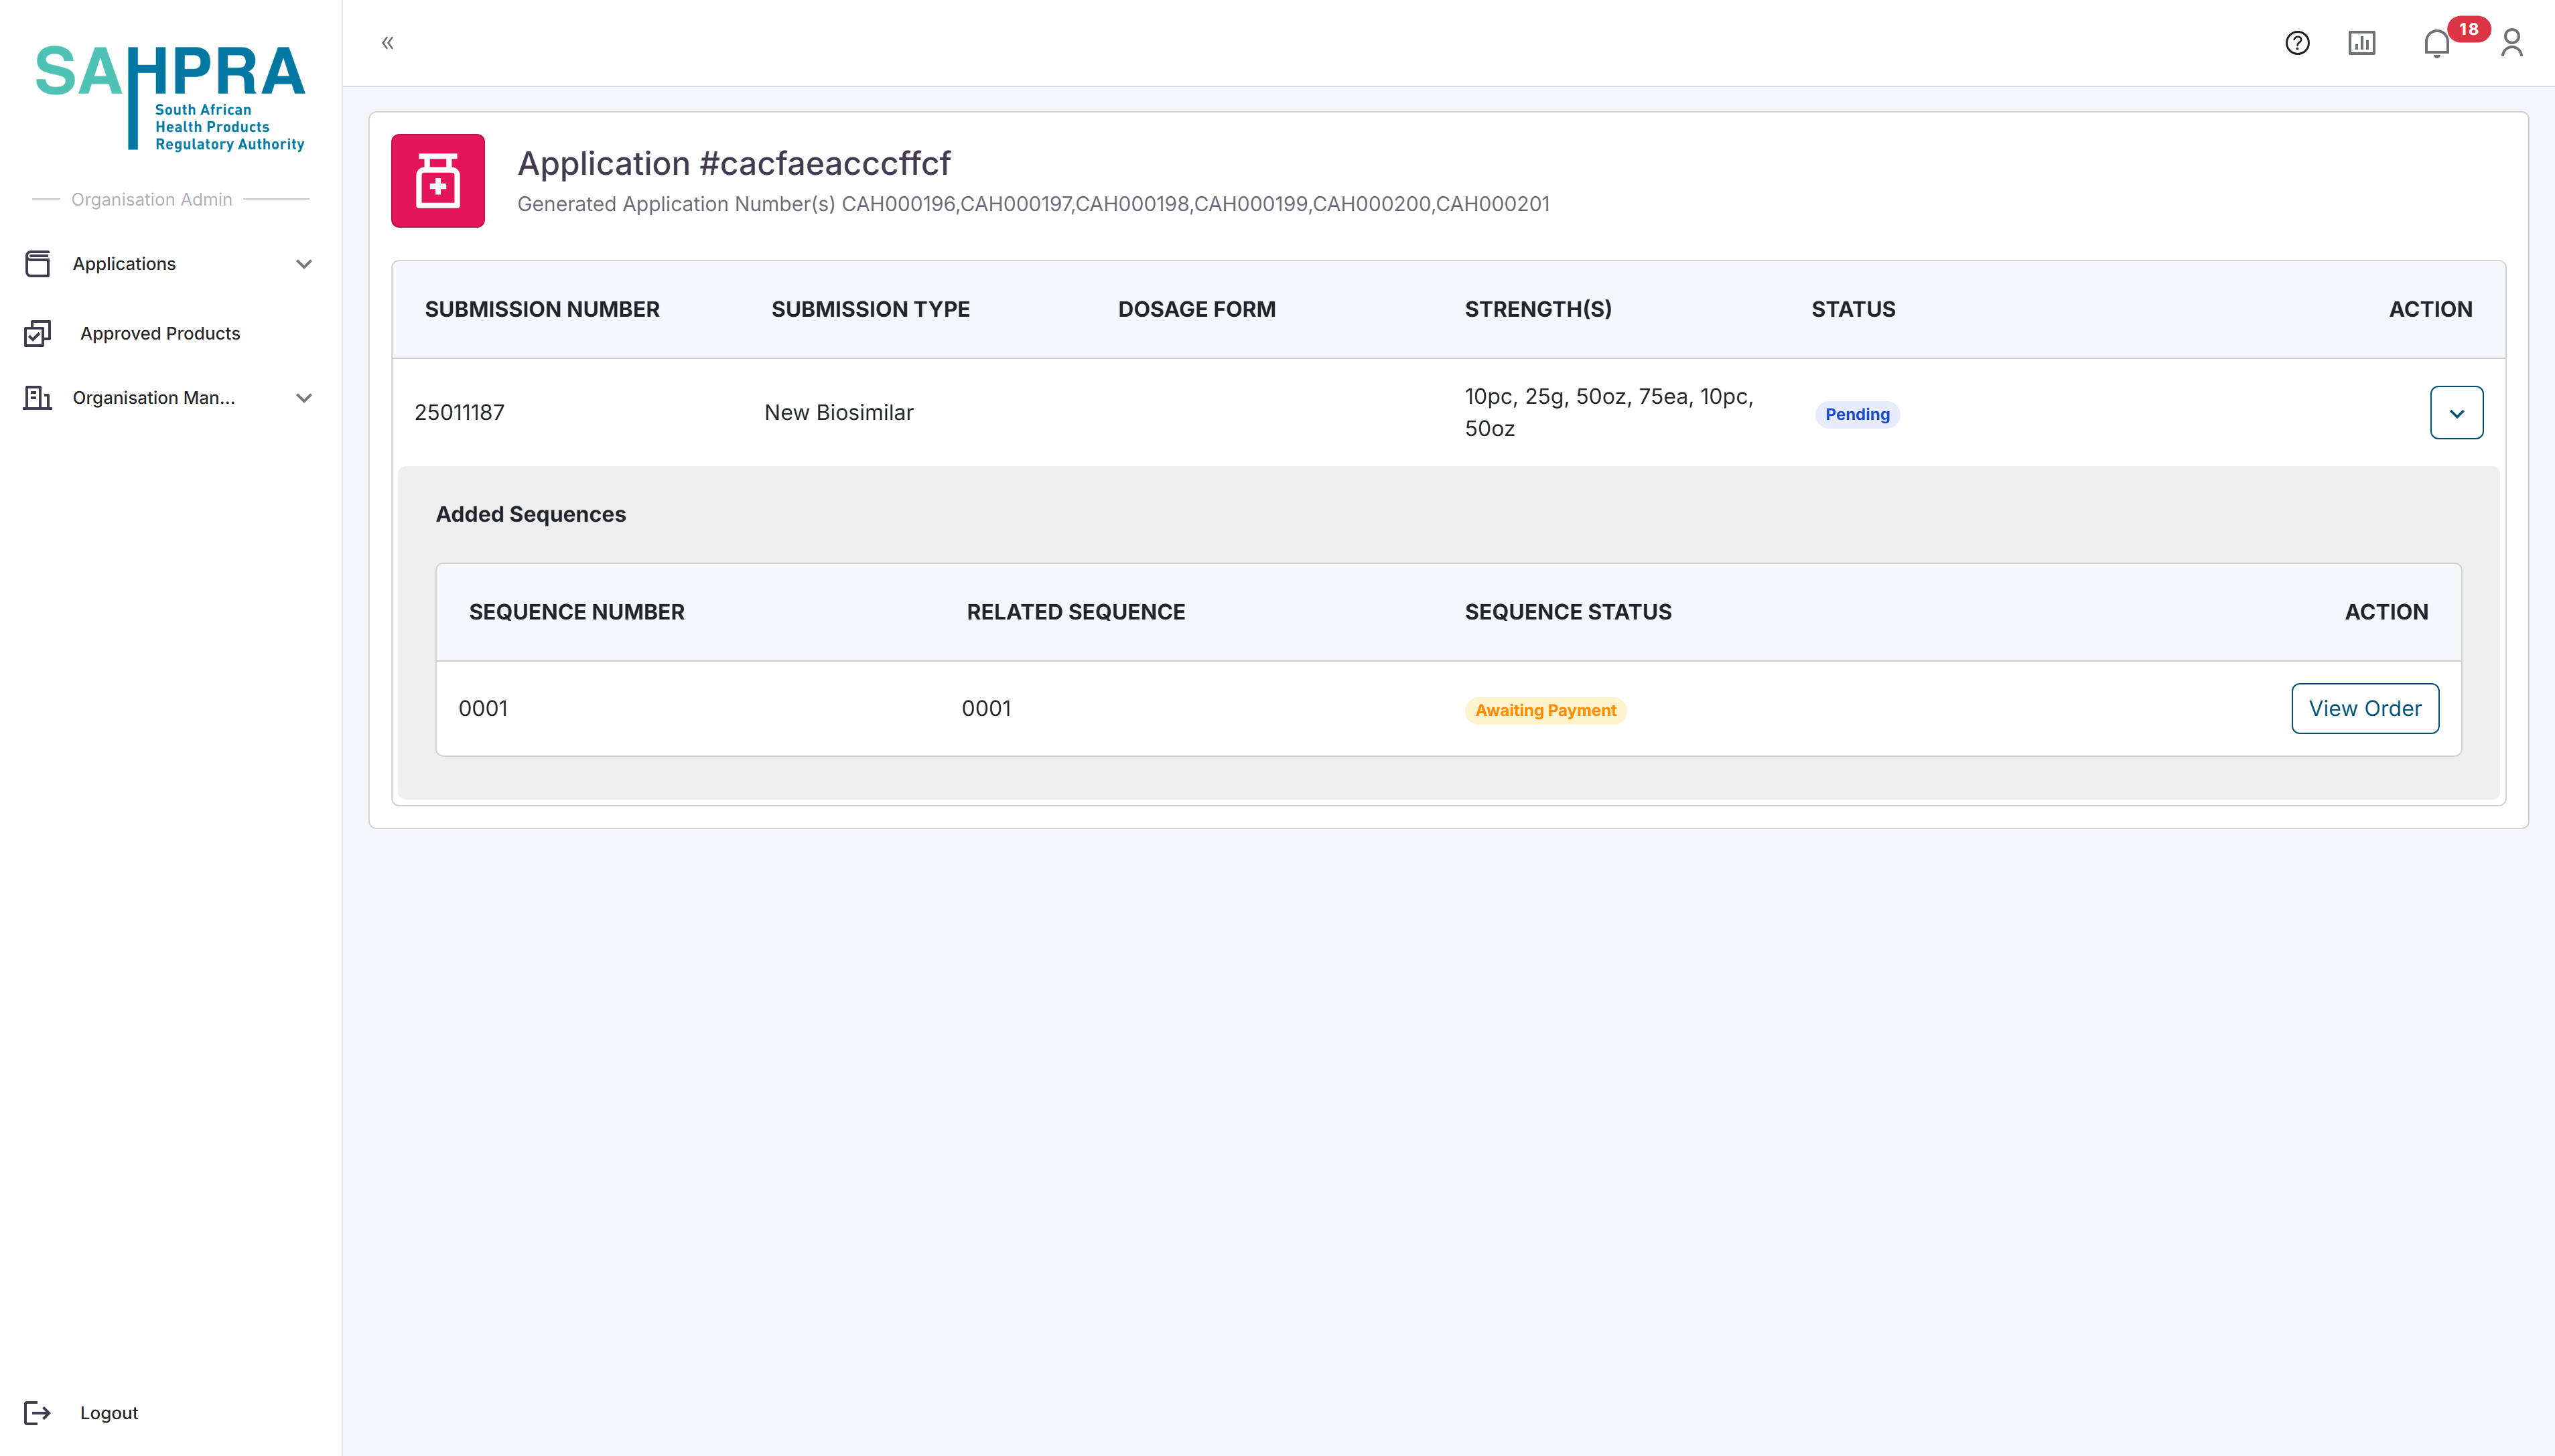
The sequence number will be automatically selected based on the previous sequence number, and the related sequence number will always be selected as the current sequence number for new submissions. The image below is an example of a new application with a sequence number of 0001.
Once opened, the relevant details for the sequence can be selected. Note that the Sequence Number is automatically selected. Make sure to select the relevant Sequence Type depending on the sequence you are creating.The Contacts added to the sequence will receive all notifications and updates related to it, and the selected contacts must be registered in your organisation, otherwise they will not be listed as one of the contacts and cannot be added to the sequence.
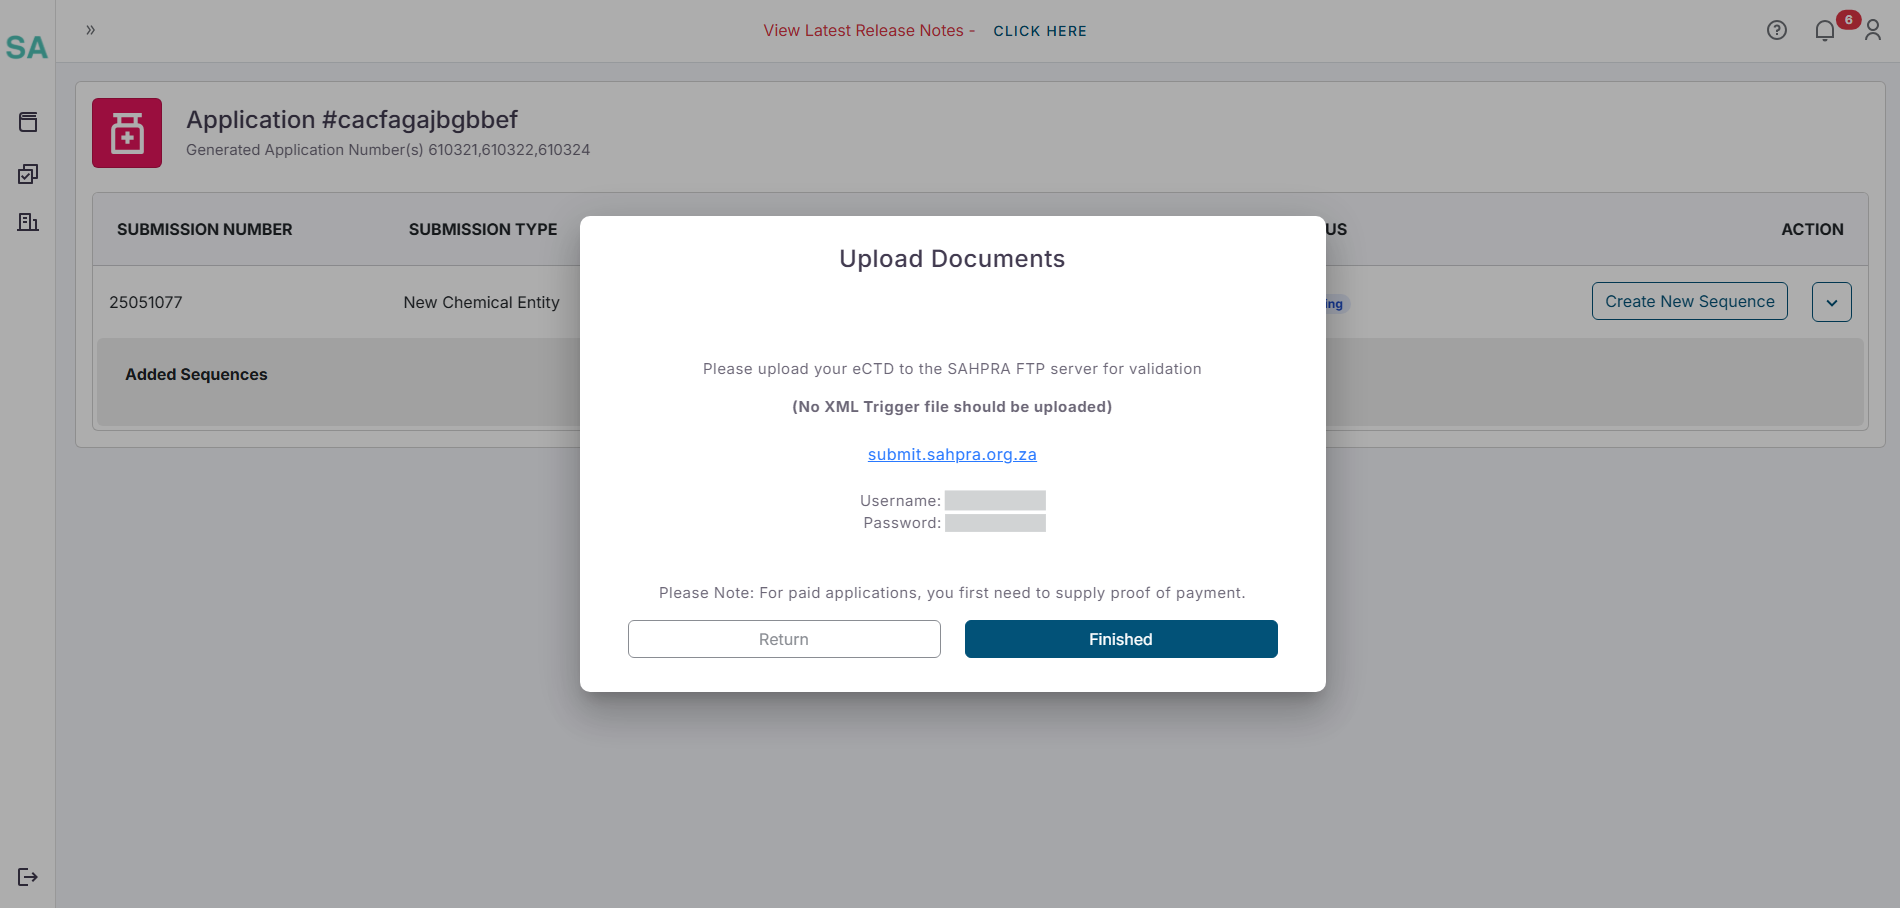
- Once clicking on next a popup will appear reminding you that the upload of your eCTD to the SAHPRA FTP server can commence with the details of your FTP login details. The XML Trigger file will automatically be generated and should NOT be included in your upload as it will fail validation.
Step 4: Payment Processing
- Once exiting the popup, the sequence will be created and a View Order button will appear in the created sequence.
Viewing the Order at a later stage?
You can view the order for the sequence at a later stage by viewing the application again. The page will look slightly different, and you will need to click on the Eye Icon icon next to the sequence to view the order.
Navigate to the Applications Management dashboard and select the application you wish to create a sequence for.
Click on the View button to the right of the application.
Find the sequence you wish to view the order for and click on the Eye Icon icon next to the sequence.
![]()
The View Order button will show the generated order based on the application made and will contain the amount payable to SAHPRA. If the submission has no payment required, click on the View Order button and a notice will appear that no payment is required.
You can upload the Proof of Payment by selecting EFT, uploading the Proof of Payment and clicking on Submit Proof. Note after this submission the application will be deemed as submitted and no changes can be made to the application after this action is taken.
The image below is an example of an order quote for a new application. Each application type has a different order quote, and the order quote will be displayed based on the application/variation type.

- You invoice and proof of payment will be accessible in the Documents tab of the application.

- Before making a payment, please view the latest Invoice for the sequence and use the Invoice Number as the beneficiary reference number on the proof of payment.
Tips for Successful Variation Applications
- Ensure the variation code selected accurately reflects the changes you want to make.
- Provide comprehensive details in your variation description.
- Prepare all supporting documentation before starting the application.
- Double-check that you’ve linked to the correct existing application.
- Ensure your payment proof is clear and includes all required reference information.