%%{init: {'theme': 'base', 'themeVariables': { 'primaryColor': '#f0f0f0', 'edgeLabelBackground':'#ffffff', 'tertiaryColor': '#f0f0f0'}}}%%
flowchart TD
    A[Start Application] --> B[Select HPA Type]
    B --> C[Select Application Subtype]
    C --> D[Fill Application Information]
    D --> E[Fill Drug Information]
    E --> F[Create Application Sequence]
    F --> G[Process Payment]
    G --> H[Confirm FTP Upload]
    H --> I[Application Submitted]
    I --> J[SAHPRA Review]
    J --> K{Decision}
    K -->|Approved| L[Registration]
    K -->|More Information Needed| M[Respond to Queries]
    M --> J
    K -->|Rejected| N[Application Closed]
New Application
This section guides you through the process of creating an new Health Product Application (HPA).
Types of Health Product Applications
The SAHPRA portal supports several types of HPA submissions:
1. Orthodox Medicine Applications
Orthodox medicines are conventional pharmaceutical products typically derived from chemical synthesis. Types include:
- Baseline: For products registered before certain regulatory changes
- New Chemical Entity (NCE): For entirely new active ingredients
- New Generic (Multi-source): For generic versions of already registered medicines
2. Biological Medicine Applications
Biological medicines are derived from biological sources. Types include:
- New Biological: Original biological products
- New Biosimilar: Products similar to an already registered biological medicine
- New Vaccines: Preventative or therapeutic vaccines
Before Creating a New Application
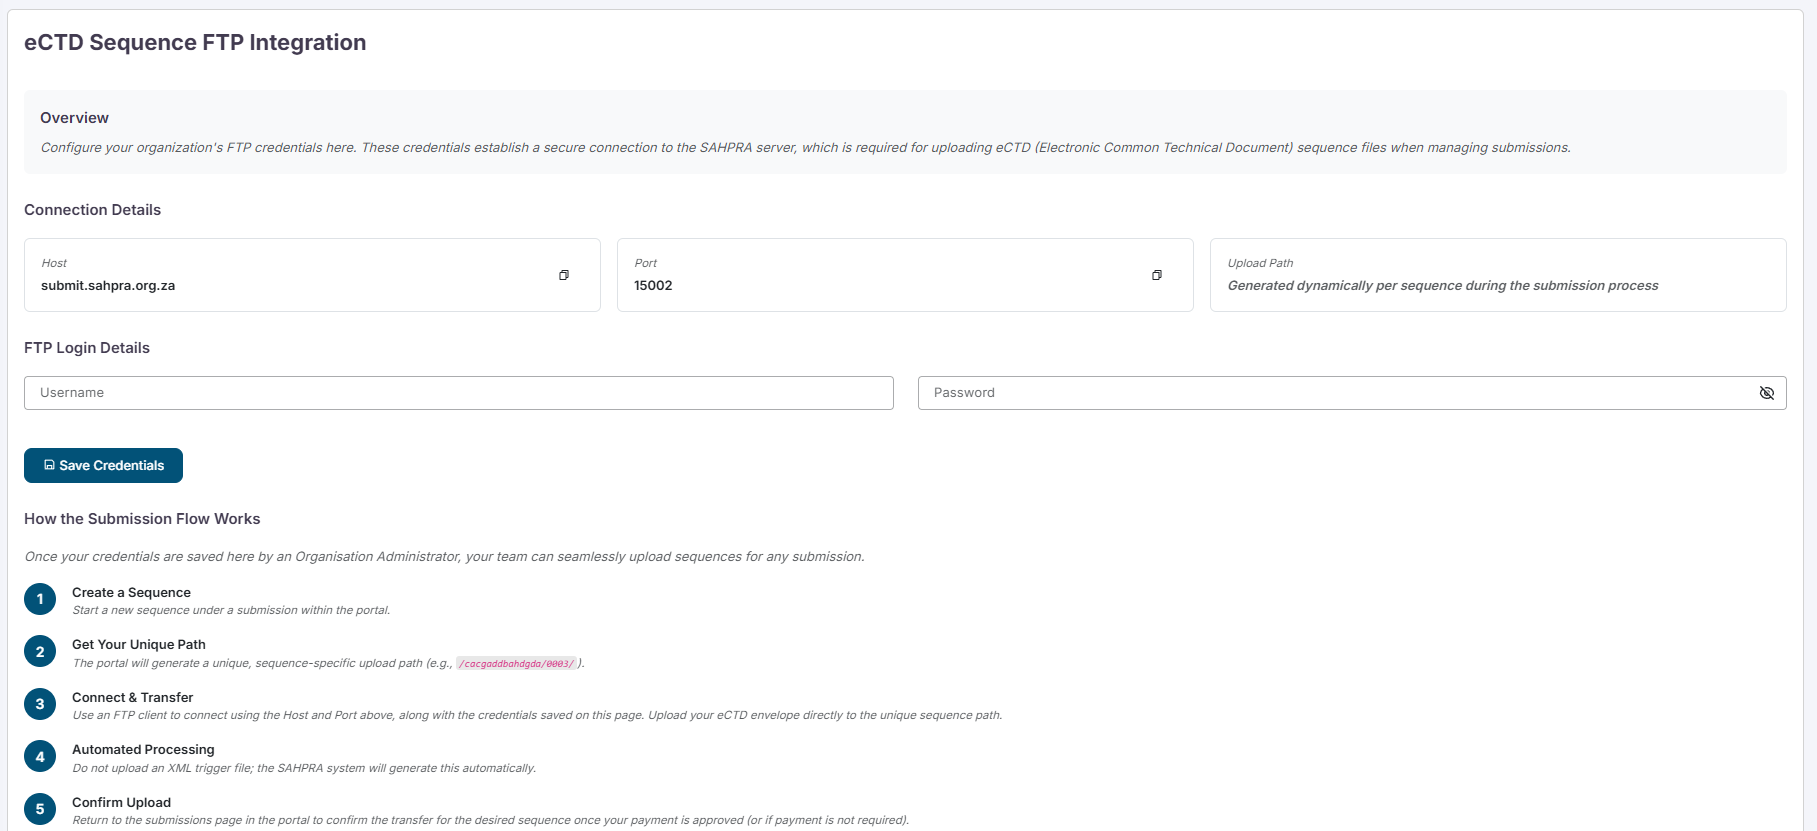
- Note: FTP credentials must be set on the dedicated FTP Credentials page under the Administration menu (only accessible by an Organisation Administrator who also has an HPA Role) before attempting to create applications that require eCTD uploads to the SAHPRA FTP Server. The system will warn you that an upload could not be verified if your FTP details are missing when you try to Confirm FTP Upload on a sequence.
Application Process Overview
Creating a New Health Product Application (HPA)
This section guides you through the process of creating a new Health Product Application (HPA) in the SAHPRA portal.
As an example, let’s look at an application flow when Orthodox is selected as the Medical Category and New Chemical Entity is selected as the Submission Type below:
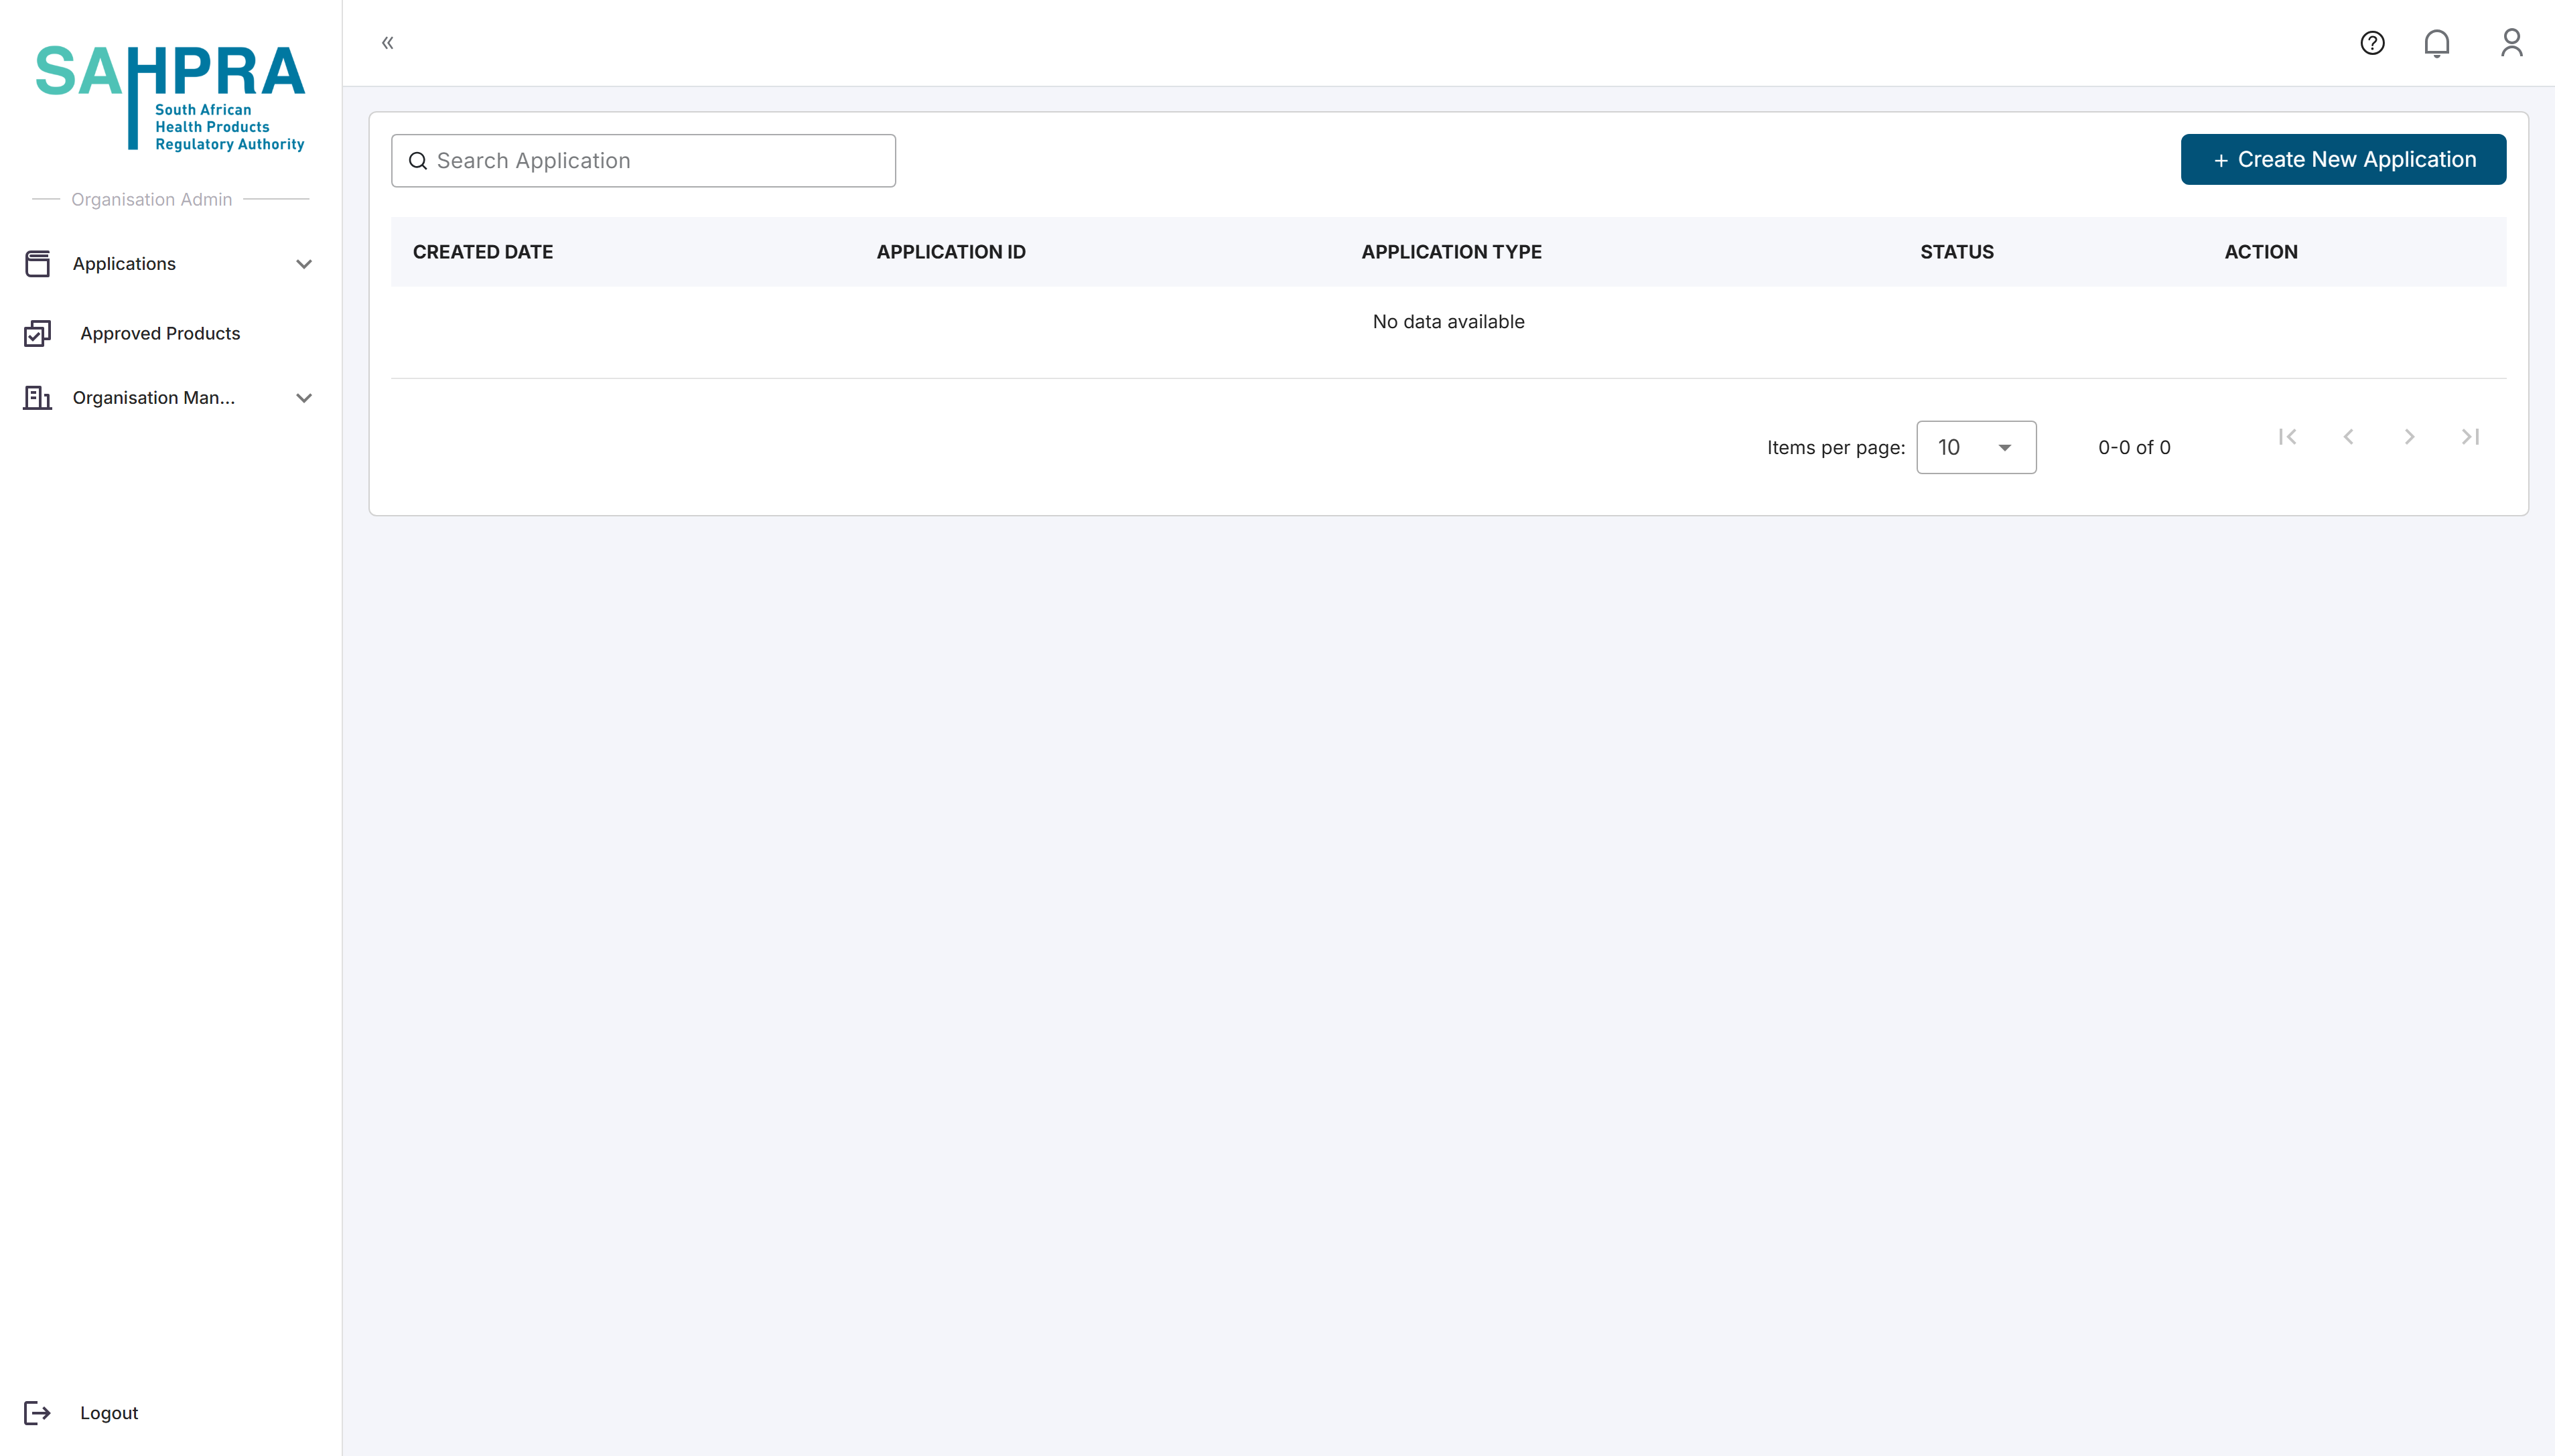
Step 1: Access the Applications Dashboard
After logging in to the SAHPRA portal, you will be directed to the Applications Dashboard.
Step 2: Create a New Application
Click the “Create New Application” button in the top right corner of the dashboard.
A new application creation wizard will appear.
Step 3: Select Application Type
- Select “Health Product Application” from the available application types.
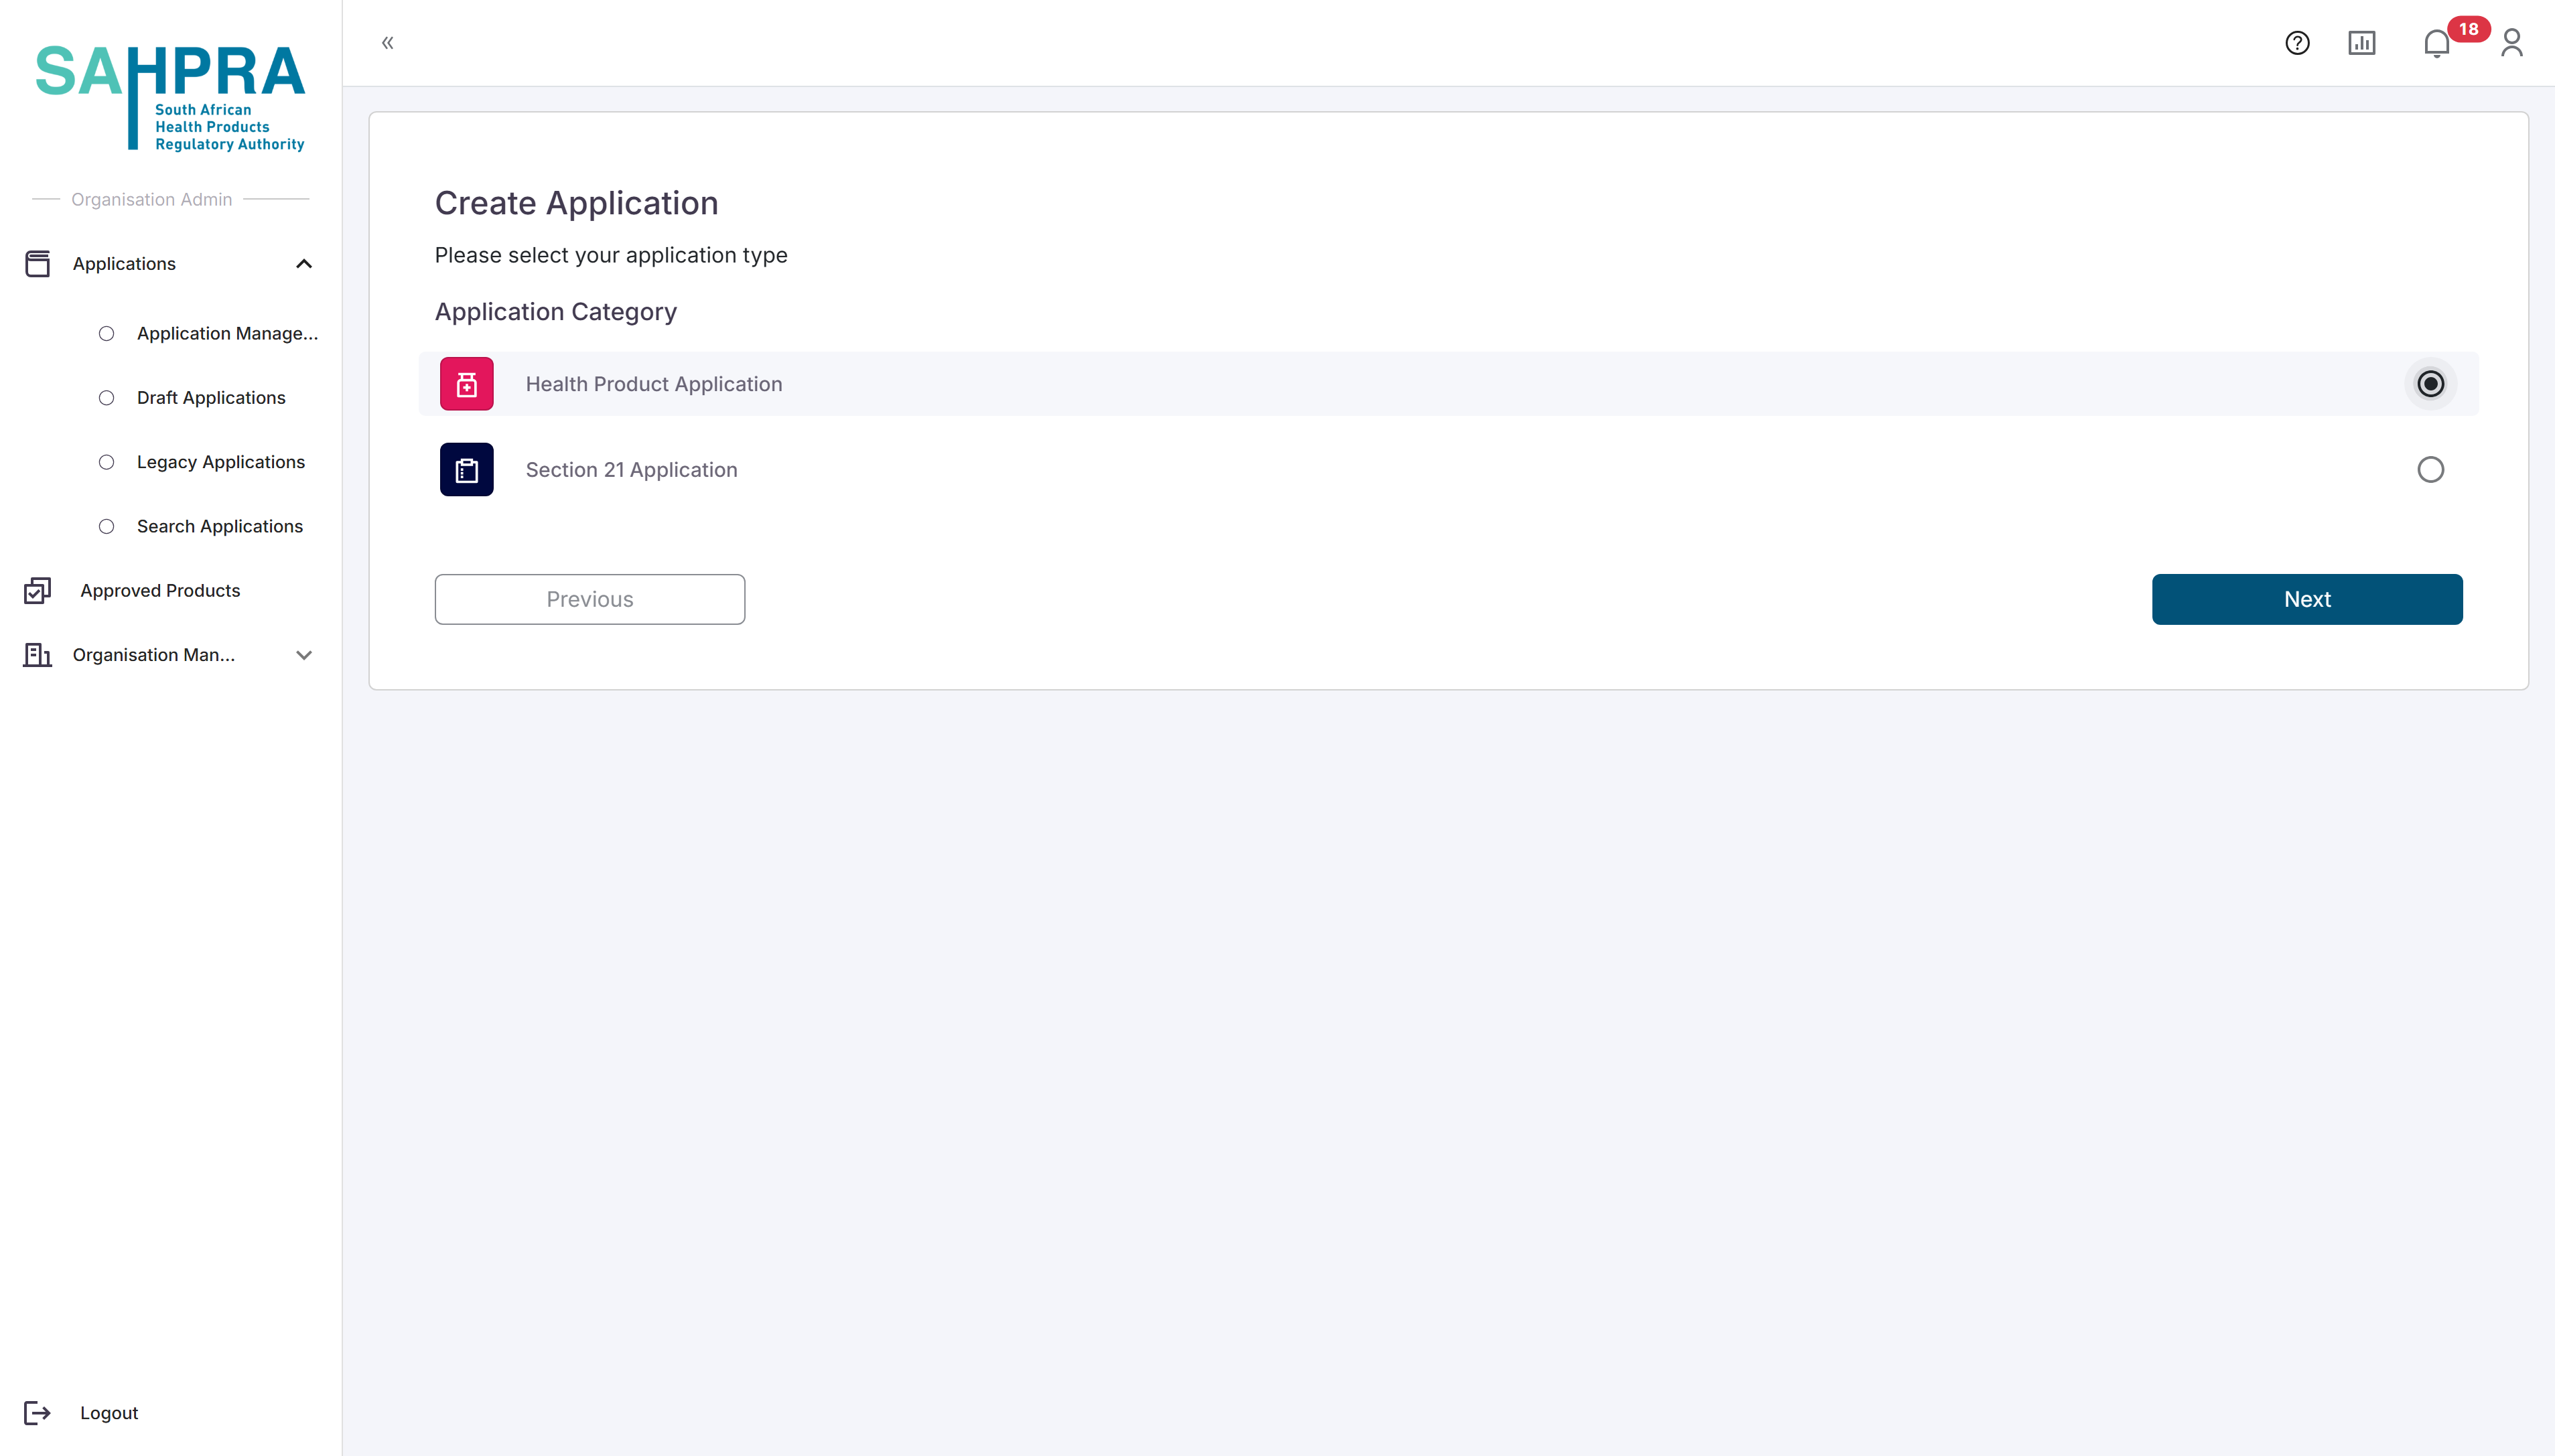
- Click “Next” to proceed.
Step 4: Select HPA Application Type
- Choose the appropriate HPA application type for your submission:
- Orthodox
- Biological Medicine
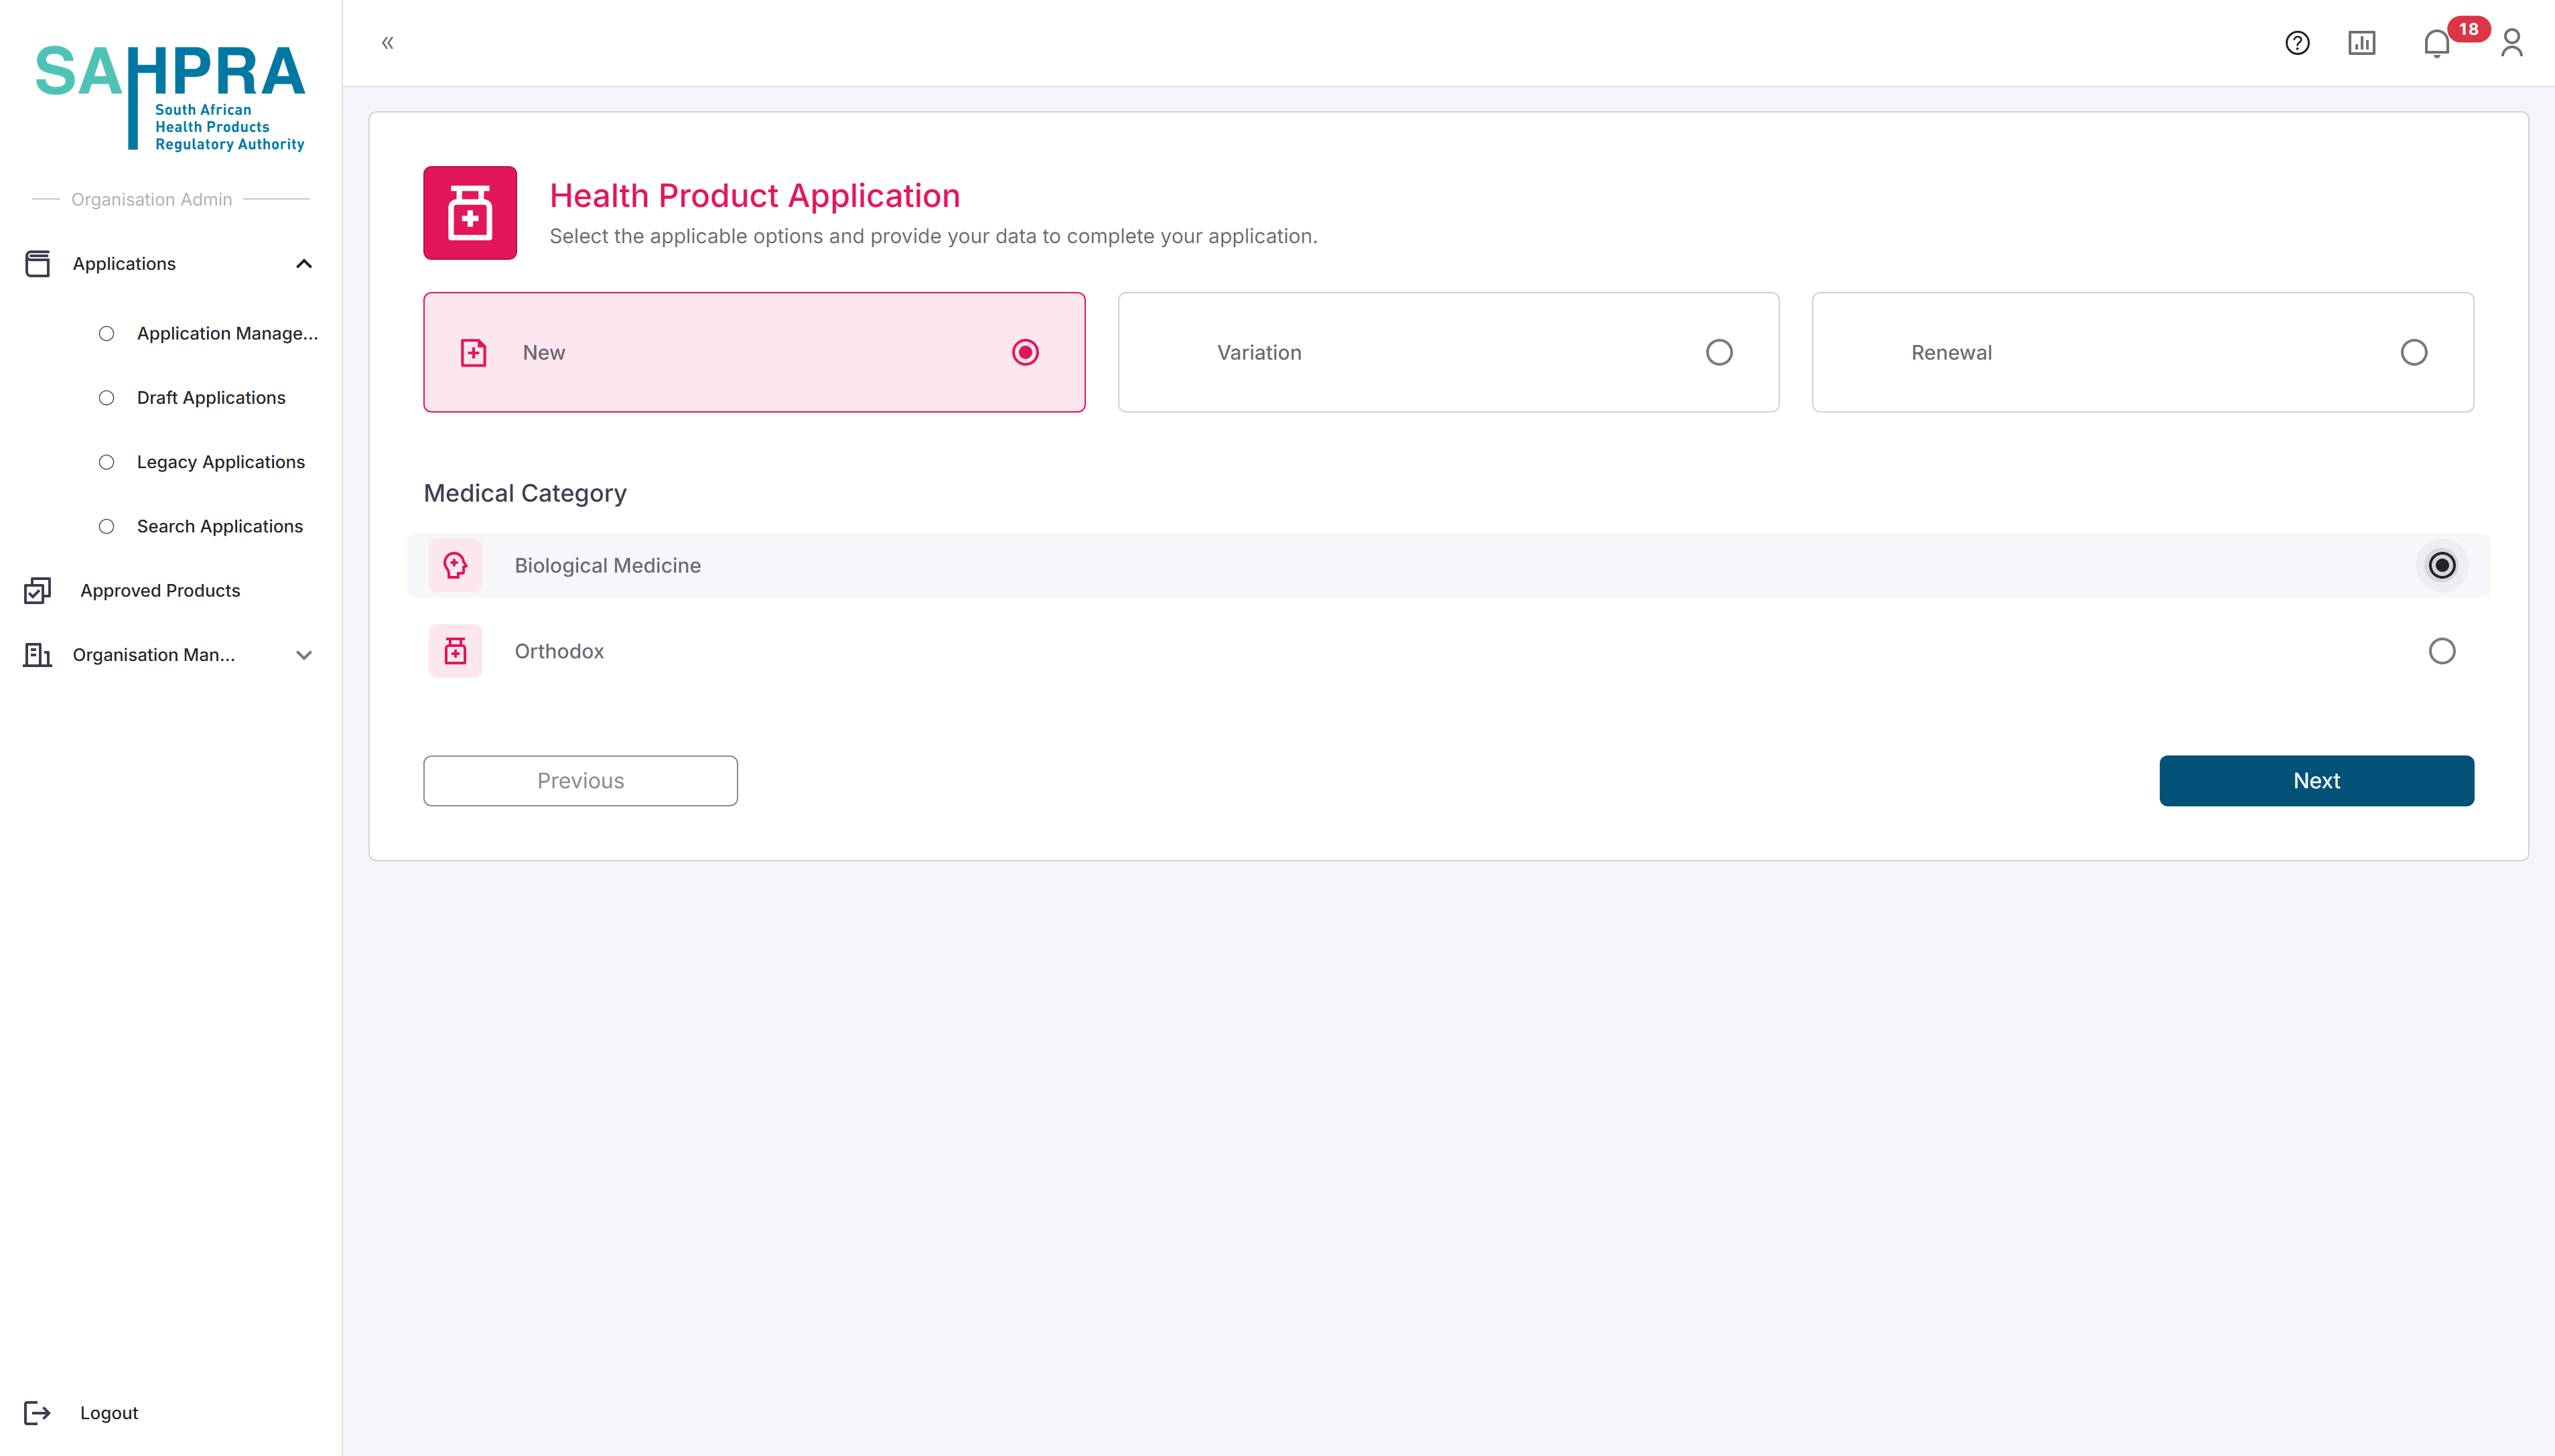
- Click “Next” to proceed.
Step 5: Select Application Subtype
- Select the specific subtype that applies to your application. The options will vary depending on the application type you selected in the previous step.
For Orthodox applications, the subtypes include:
- Baseline
- New Chemical Entity
- New Generic (Multi-source)
For Biological Medicine applications, the subtypes include:
- New Biological
- New Biosimilar
- New Vaccines
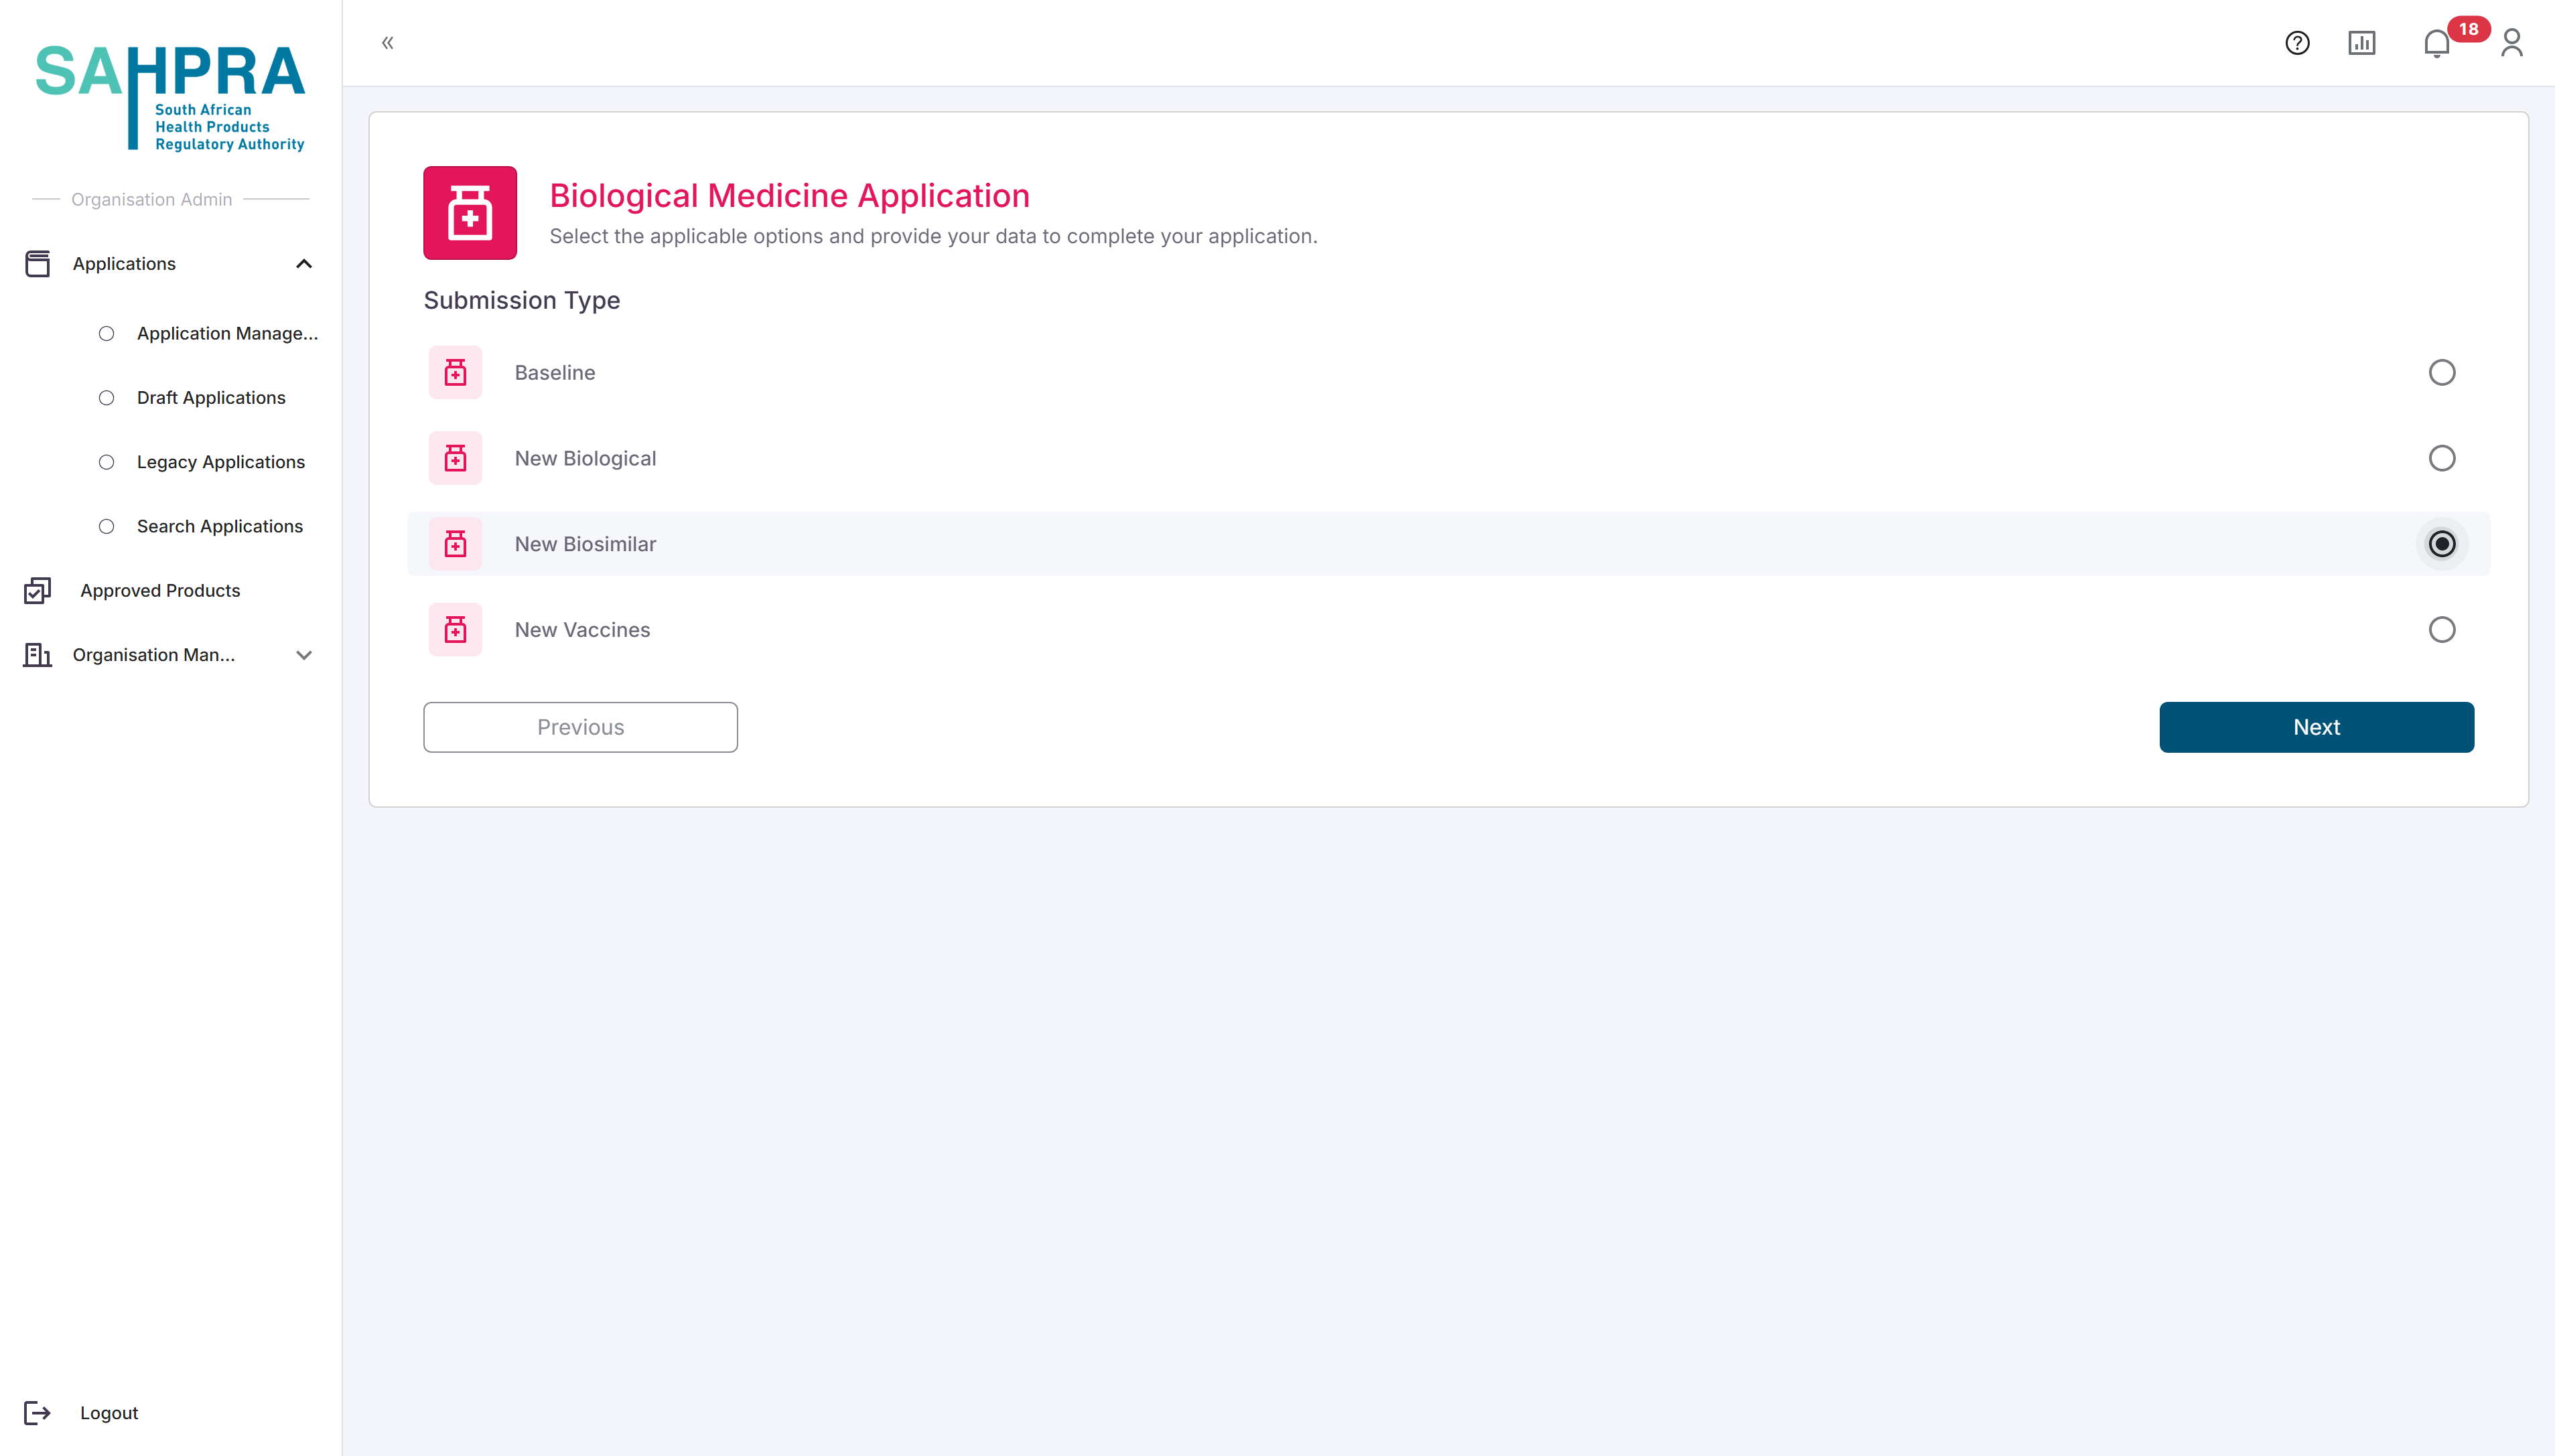
- Click “Next” to proceed.
- Once clicking “next” the application form will open, and the generated Application ID will be displayed at the top. This will be the Application ID that can be entered into your dossier before uploading to the FTP server.
Step 6: Application Information
The Submission Information section can be completed as normal by selecting values from the dropdowns. Note that all dropdowns are searchable by typing characters into the field on the system.
The Product Information section can be completed as normal by selecting values from the dropdowns.
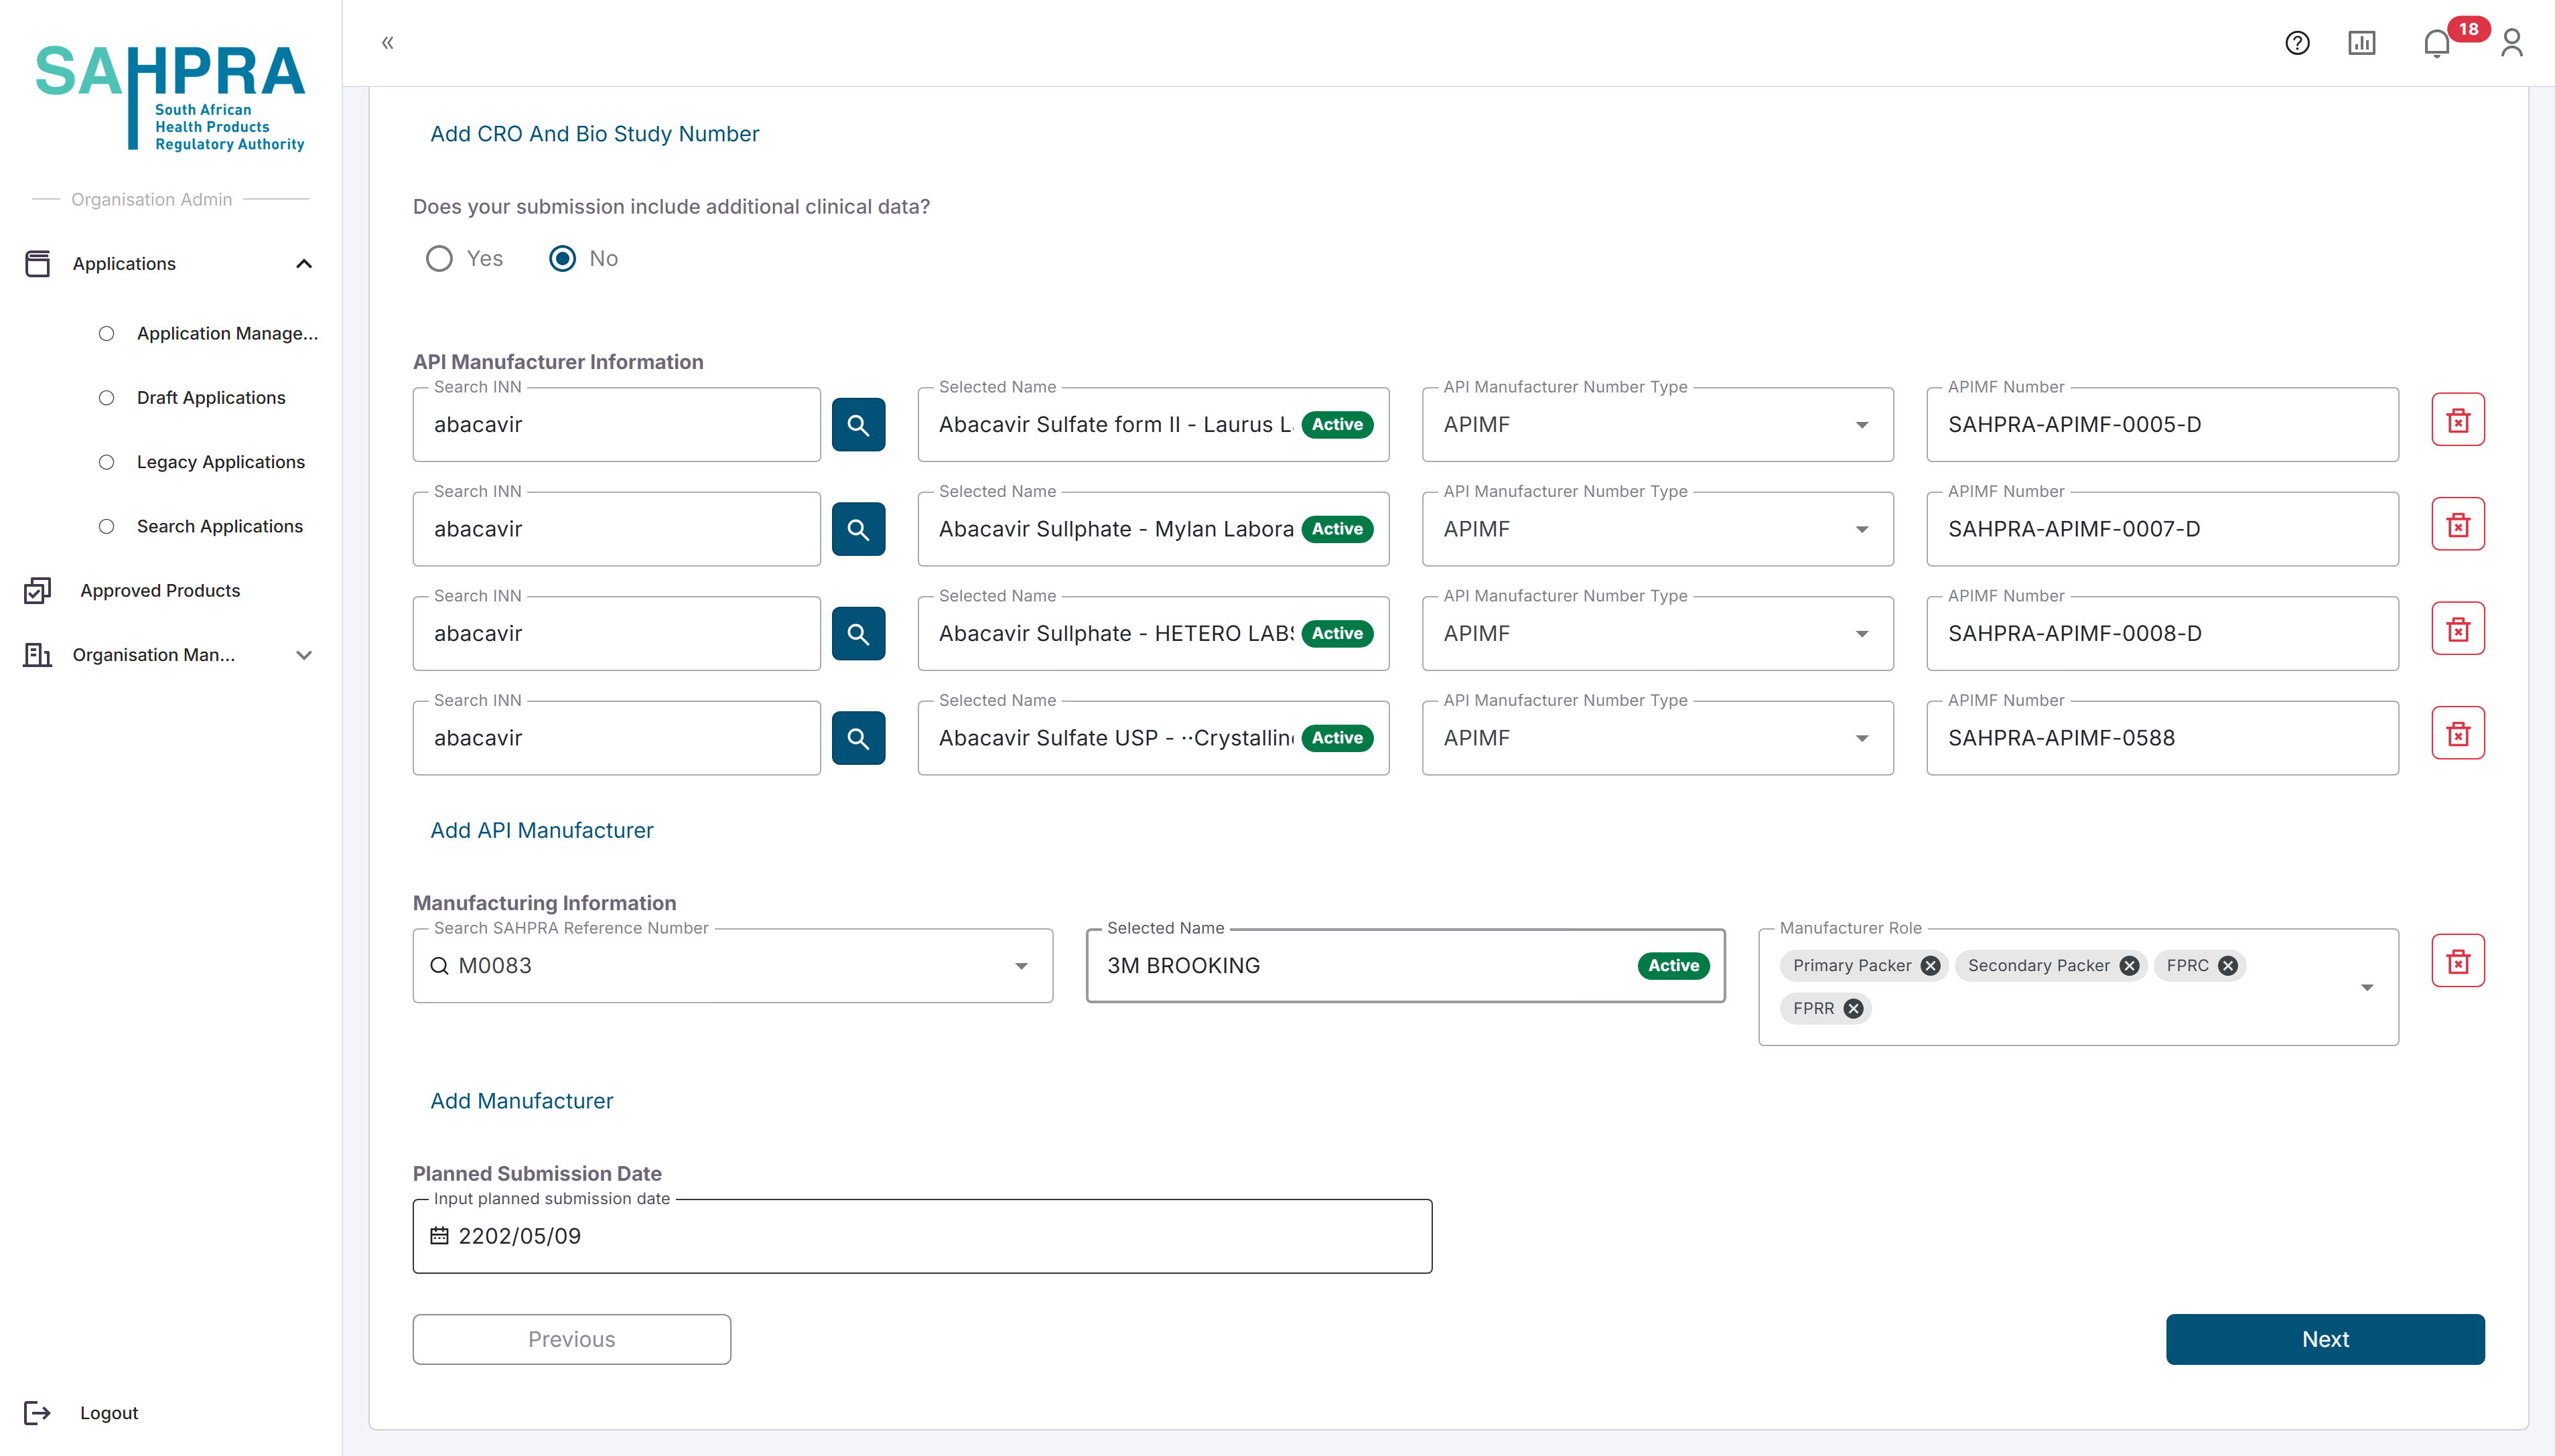
The Bio Equivalence Study Information section can be completed by entering the CRO Name as a free text option and the related Bio Study Number. Note that multiple entries can be made if applicable by clicking on the “Add CRO and Bio Study Number” option below the fields.
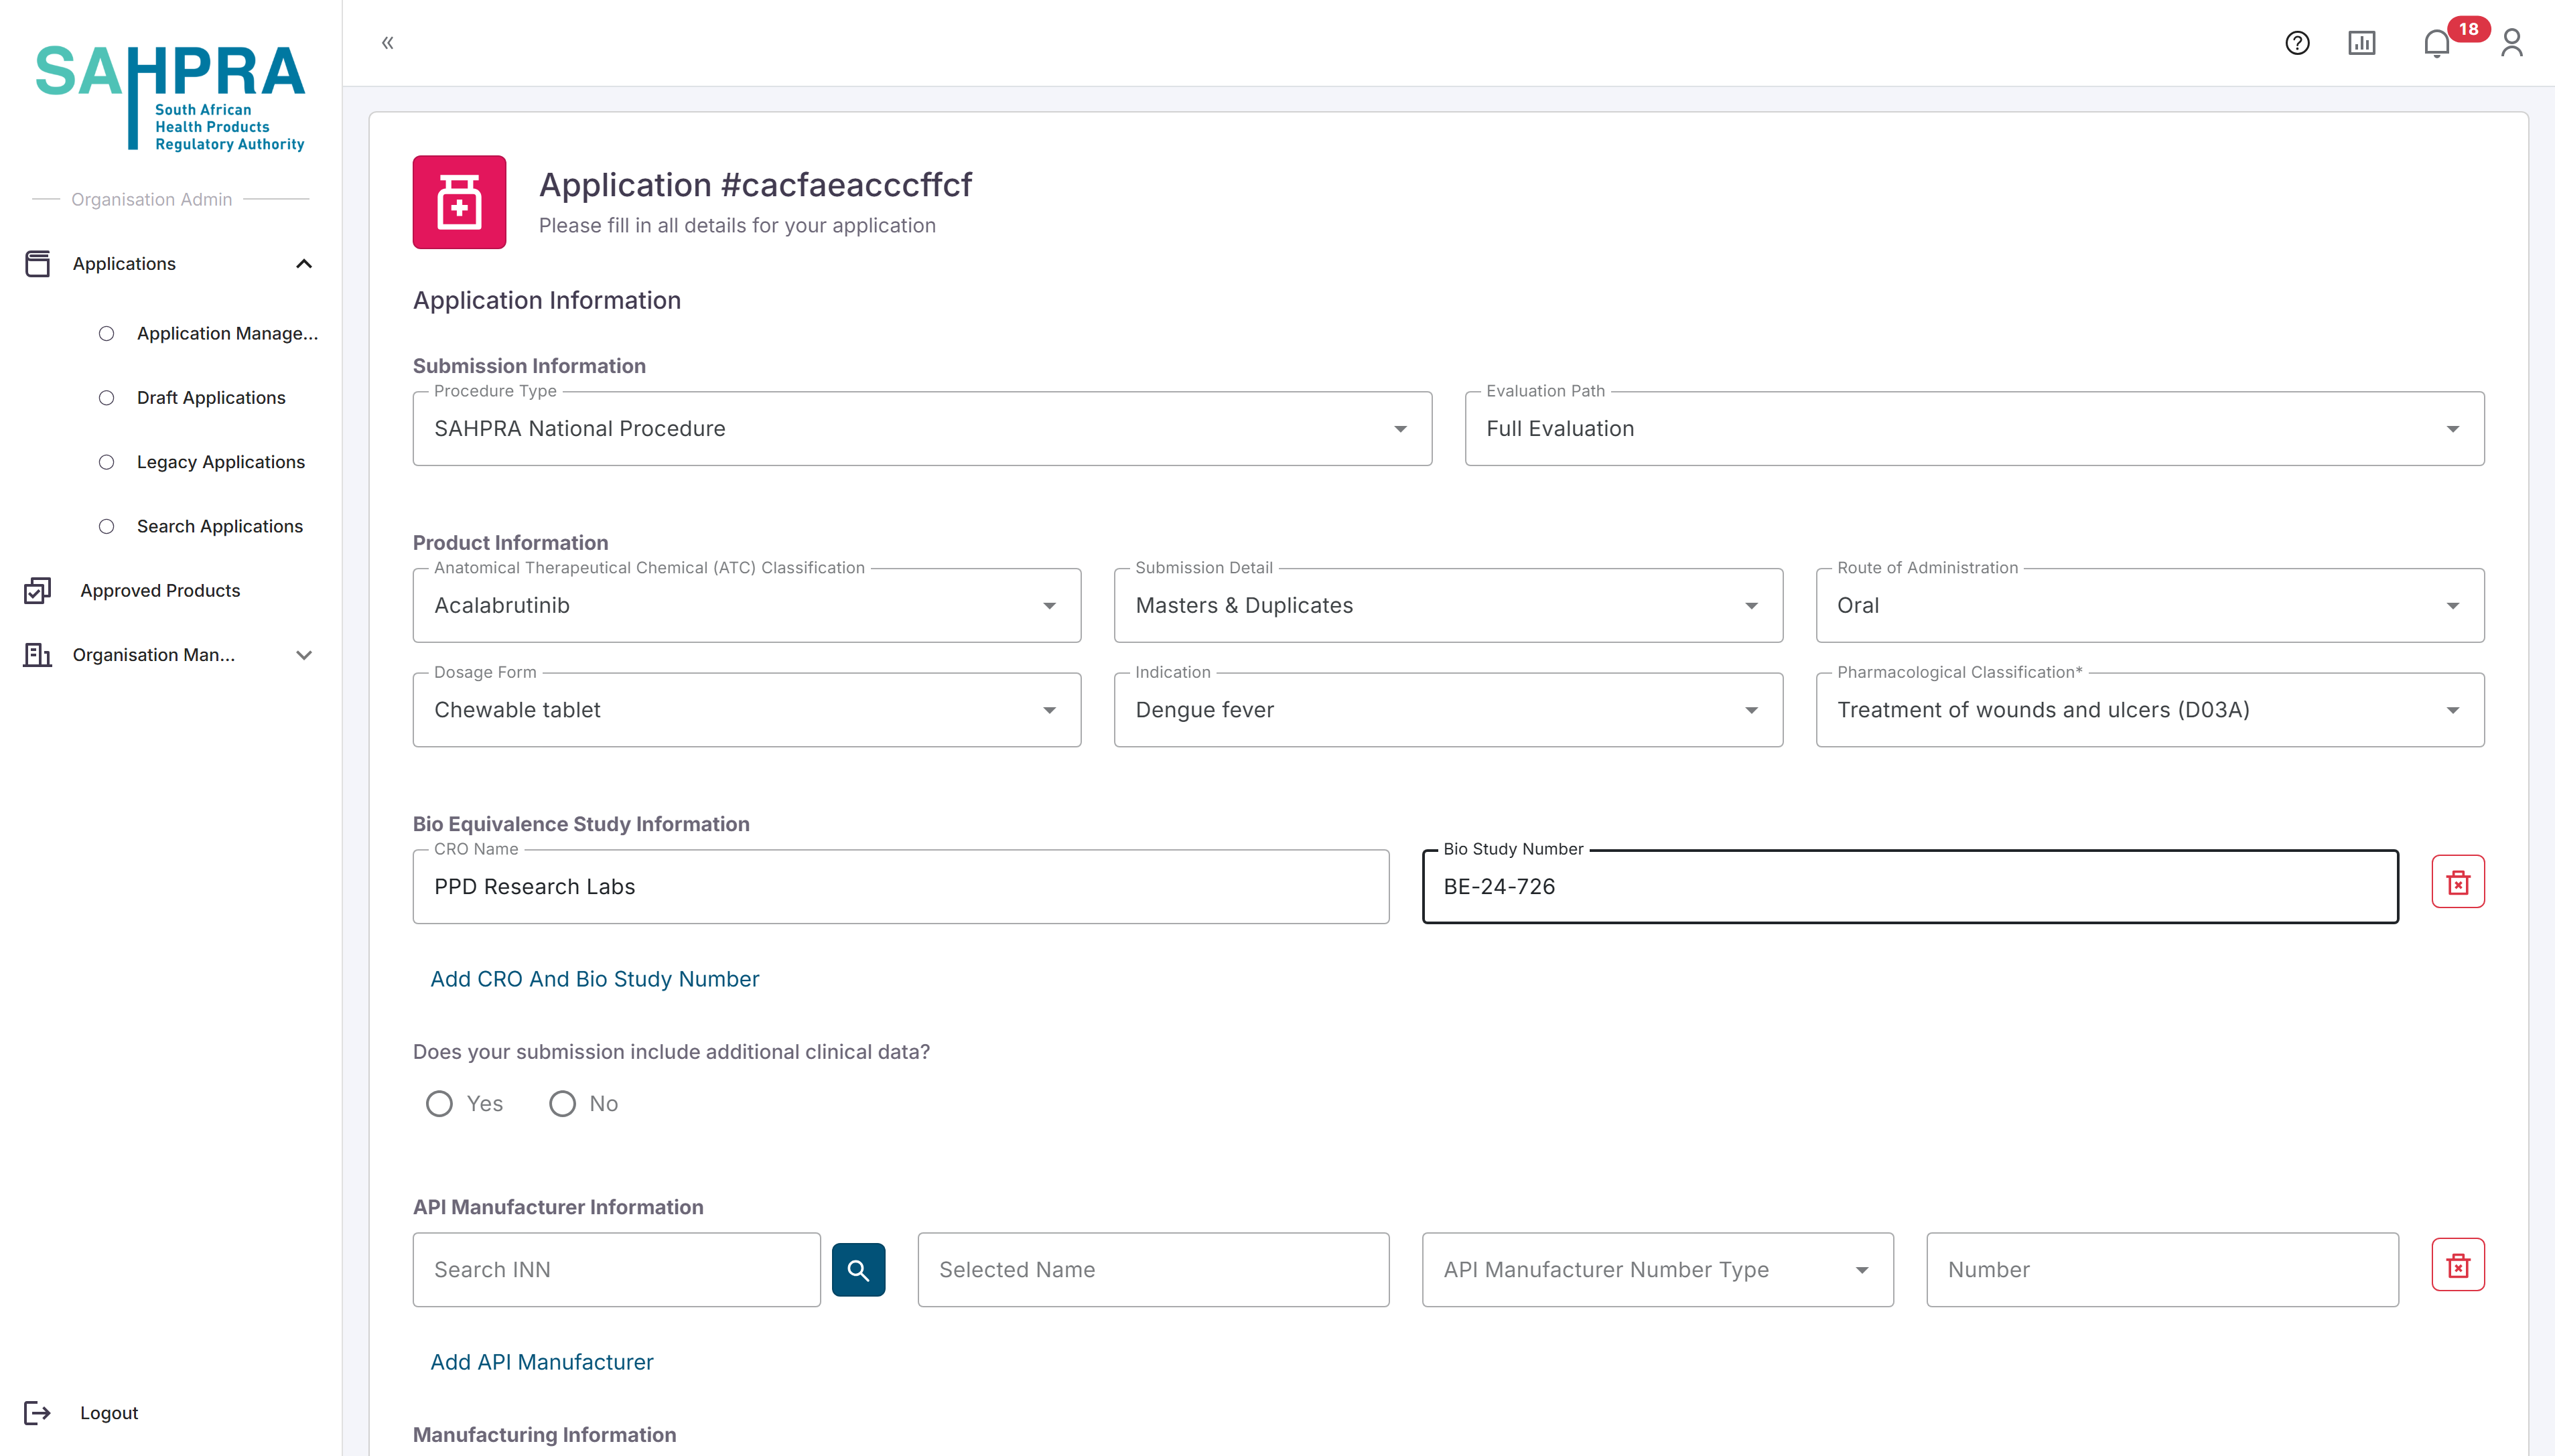
The API manufacturer Information section can be filled in by searching the applicable INN (either partially or in full) and clicking on the magnifying glass icon. Please allow a few moments for the search to return results, then select the correct INN from the list provided. For more details on the API manufacturer Information search function click here
The FP Manufacturer section can be completed by searching and selecting the SAHPRA Reference Number for the manufacturer (the search field will also search by the Manufacturer Name if you are unsure of the Reference Number) and selecting the roles of the manufacturer (multiple can be added in this field by simply selecting multiple options). Note that multiple entries can be made by clicking on the “Add Manufacturer” option.
The Planned Submission Date section can be completed by simply selecting the date you plan on completing and uploading the application.
Step 7: Drug Information
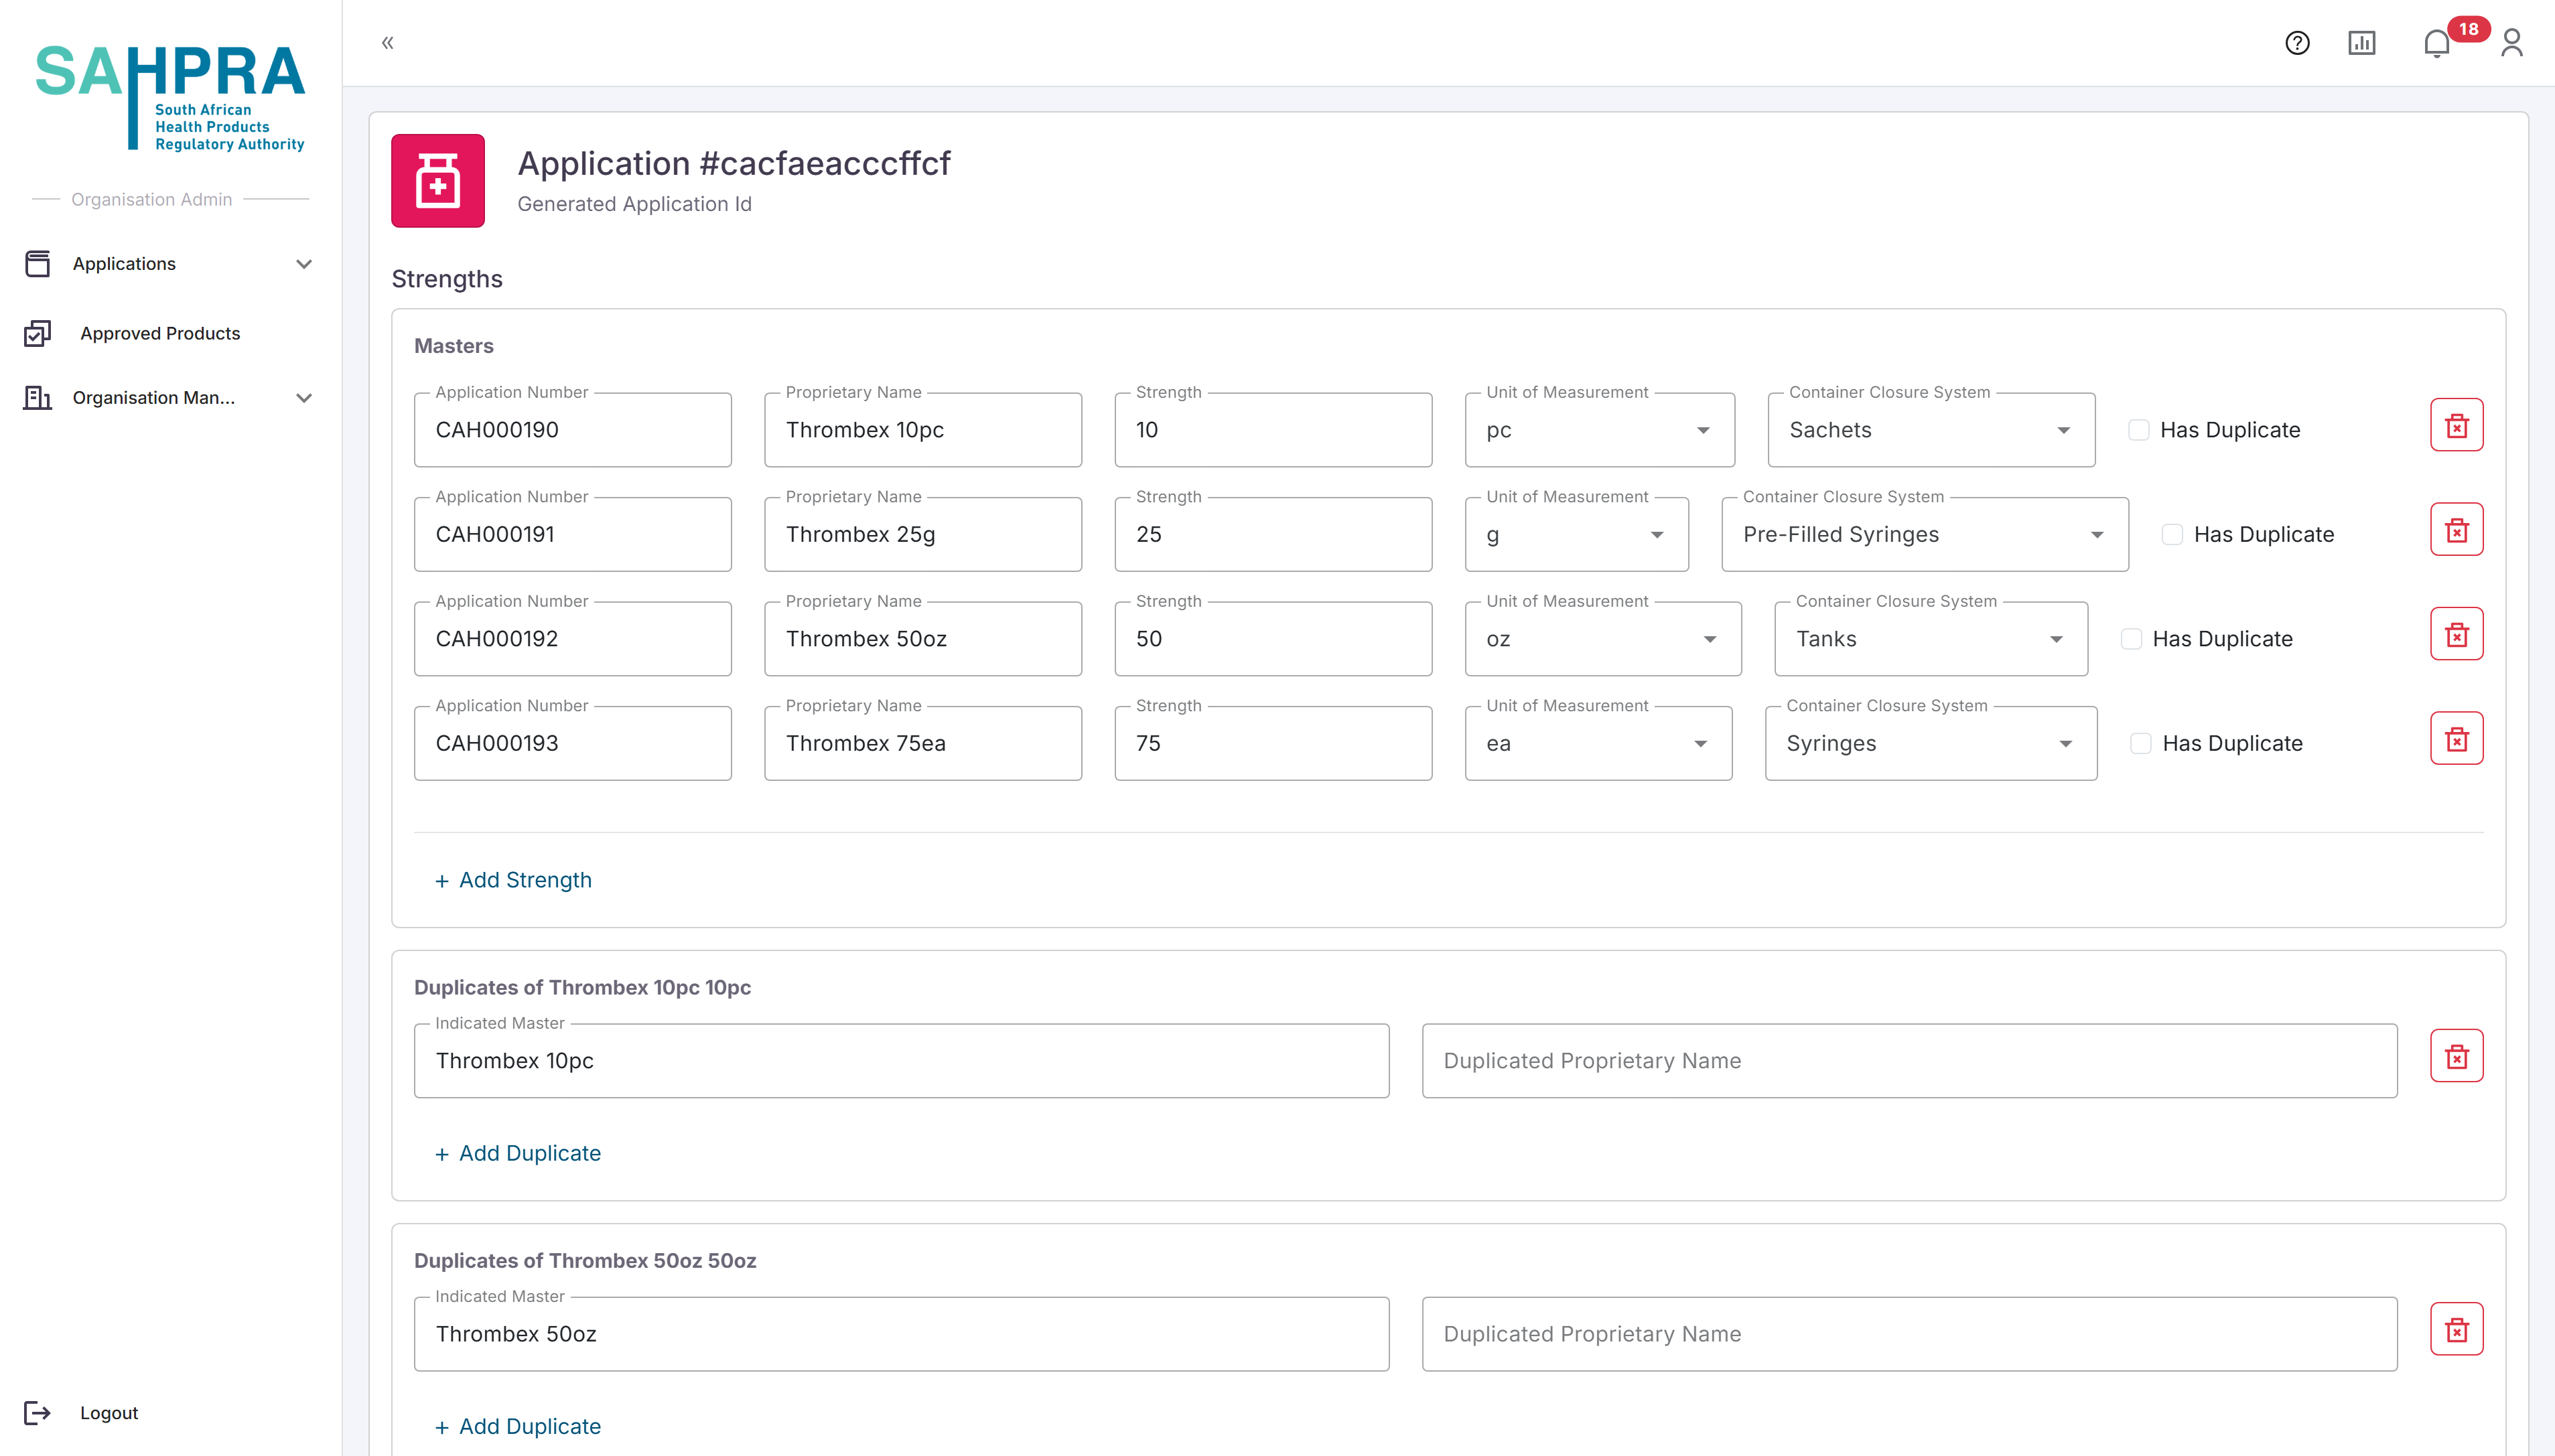
Once complete and clicking on “Next” the option the next section requires your Strengths details to be completed which include the Proposed Proprietary Name (enter the most likely one for record keeping until the final proprietary name is assigned), Strength e.g. 50 or 100, the Unit of Measurement for the Strength, and the Container Closure System. If you selected “Masters and Duplicate” the checkbox for “Has Duplicate” will appear for every strength added. If the applicable strength has duplicates, then check the box to enter the duplicate details which only require the Proposed Proprietary name for the duplicate.
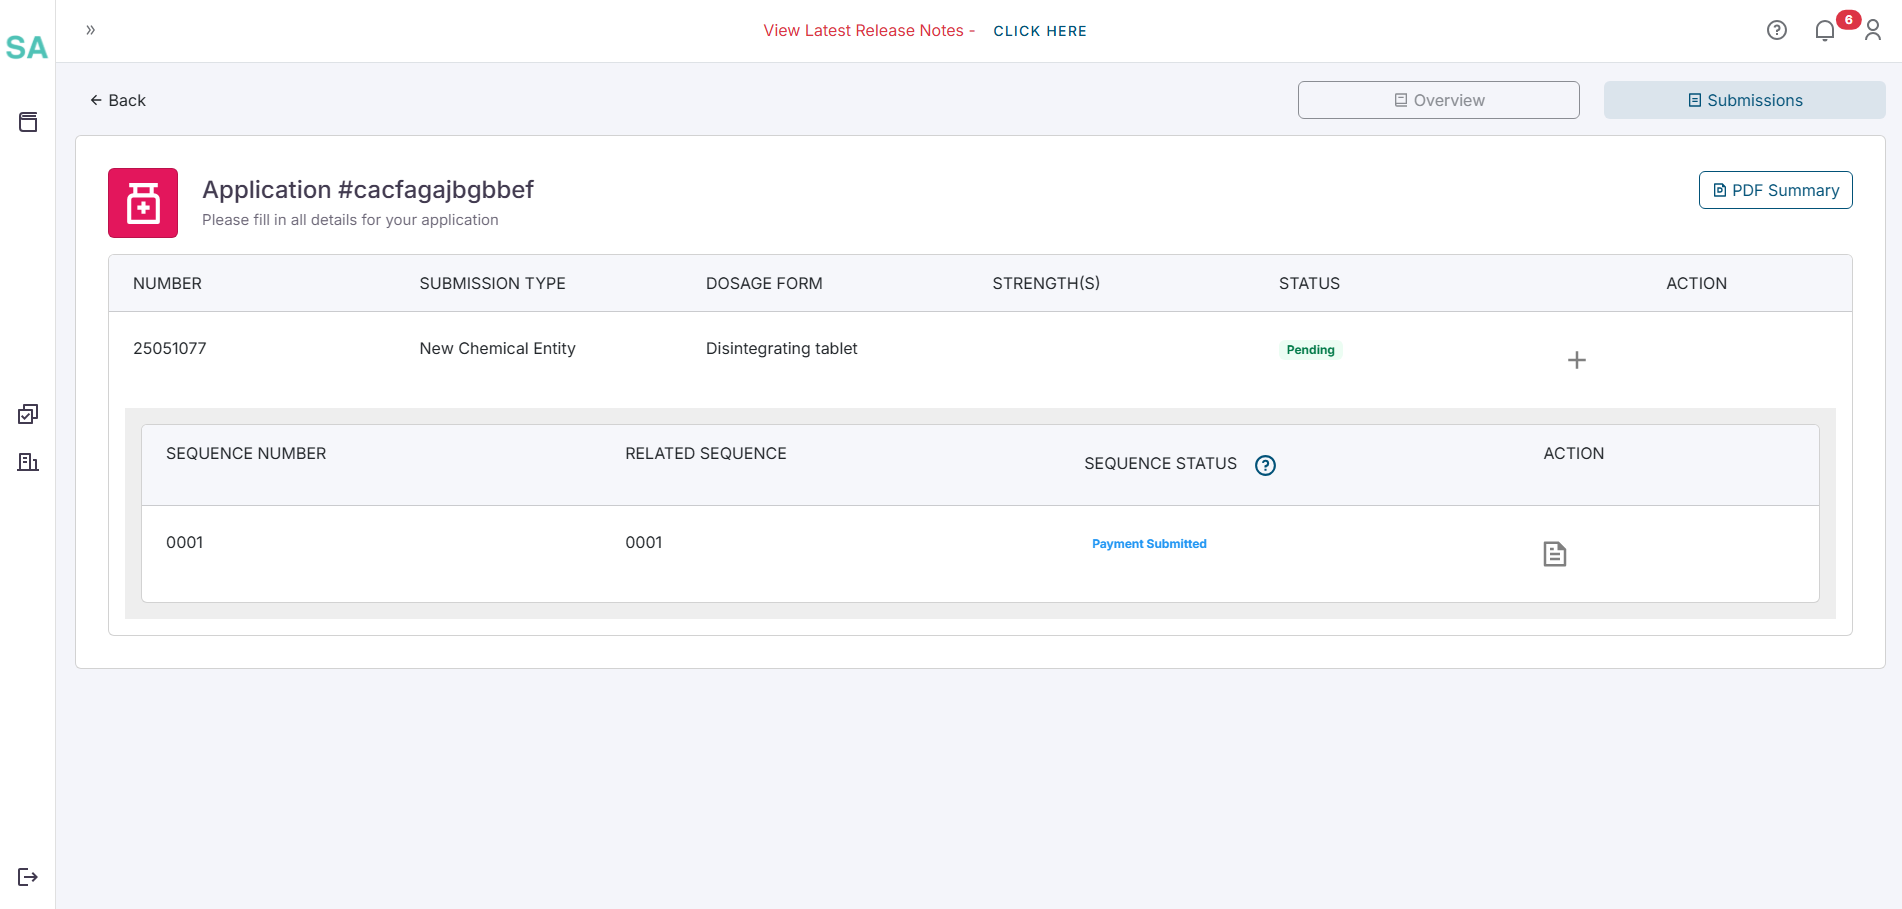
Step 8: Sequence creation
- Once clicking “next” the application overview screen will appear which will automatically create a submission for the application. If you wish to amend details to the application later, you can see the application under the “Draft Applications” section on your left-hand navigation. Here you can click “View” to amend the application.
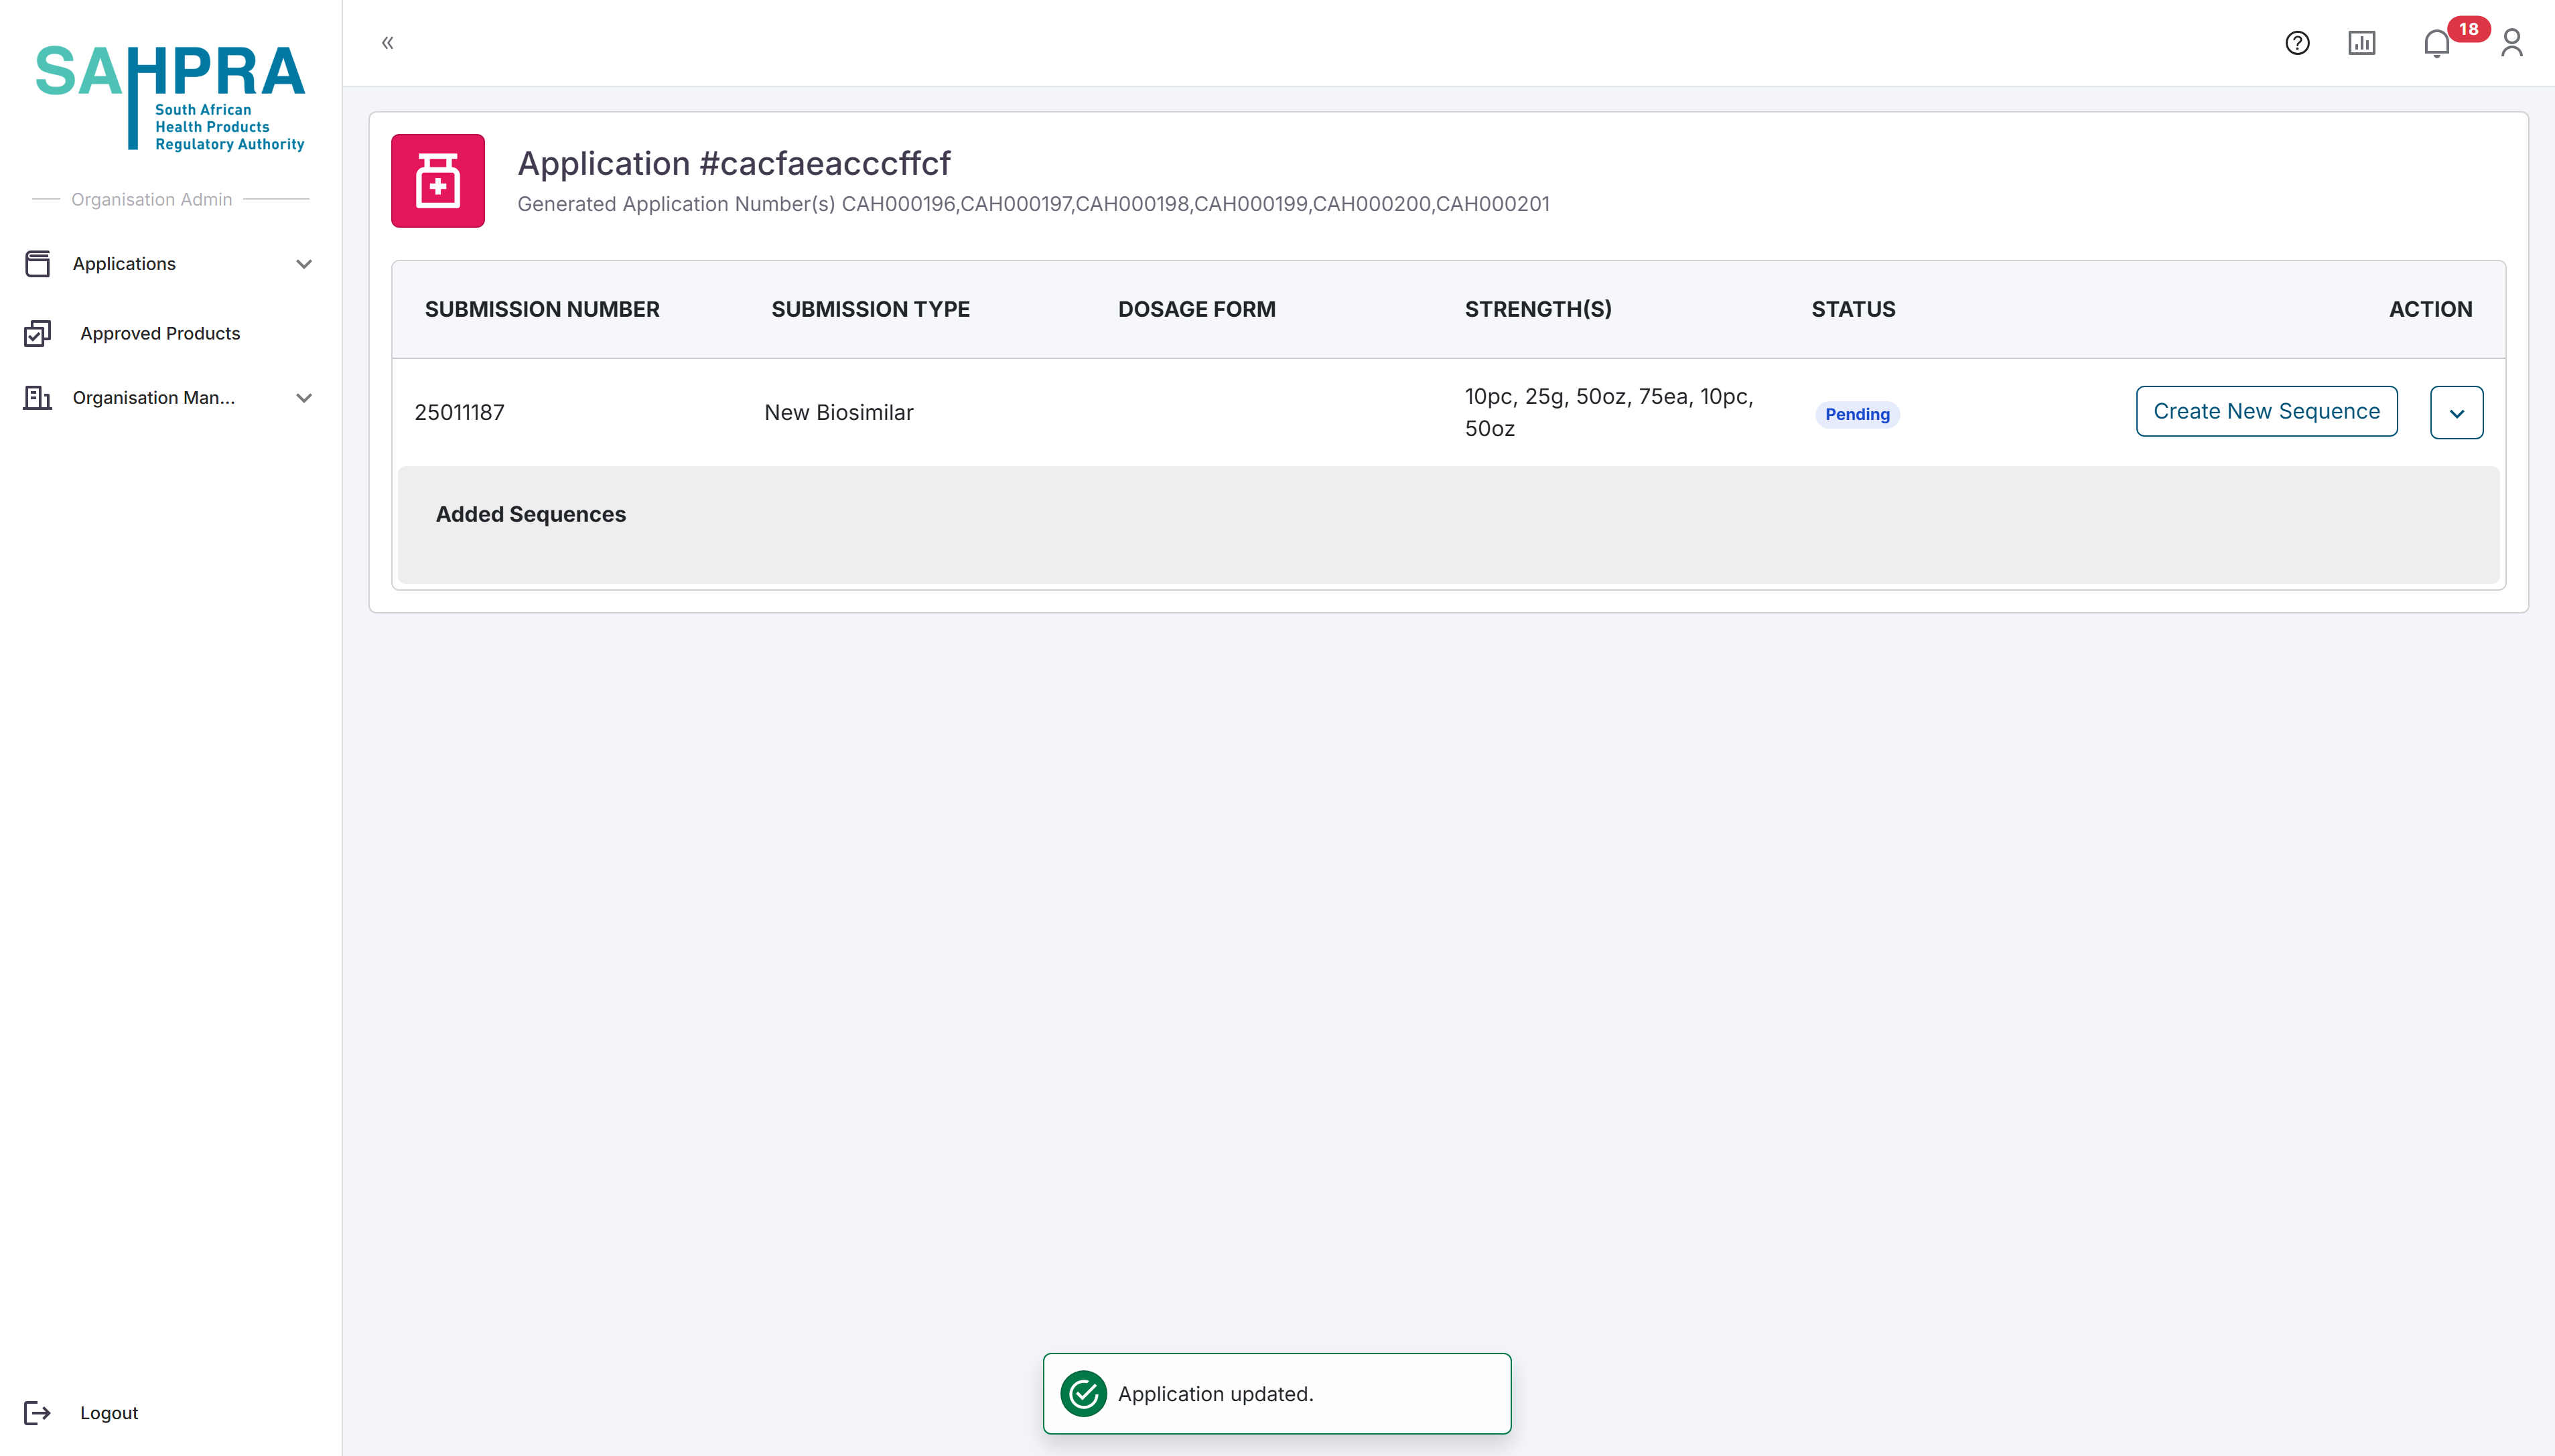
- Once you are satisfied with the application a button on the left hand of the submission labelled “Create Sequence” can be clicked. Once opened the relevant details for the sequence can be selected. Note that the Sequence Number is automatically selected. The Contacts added to the sequence will receive all notifications and updates related to it and the selected users must be registered in your organisation.
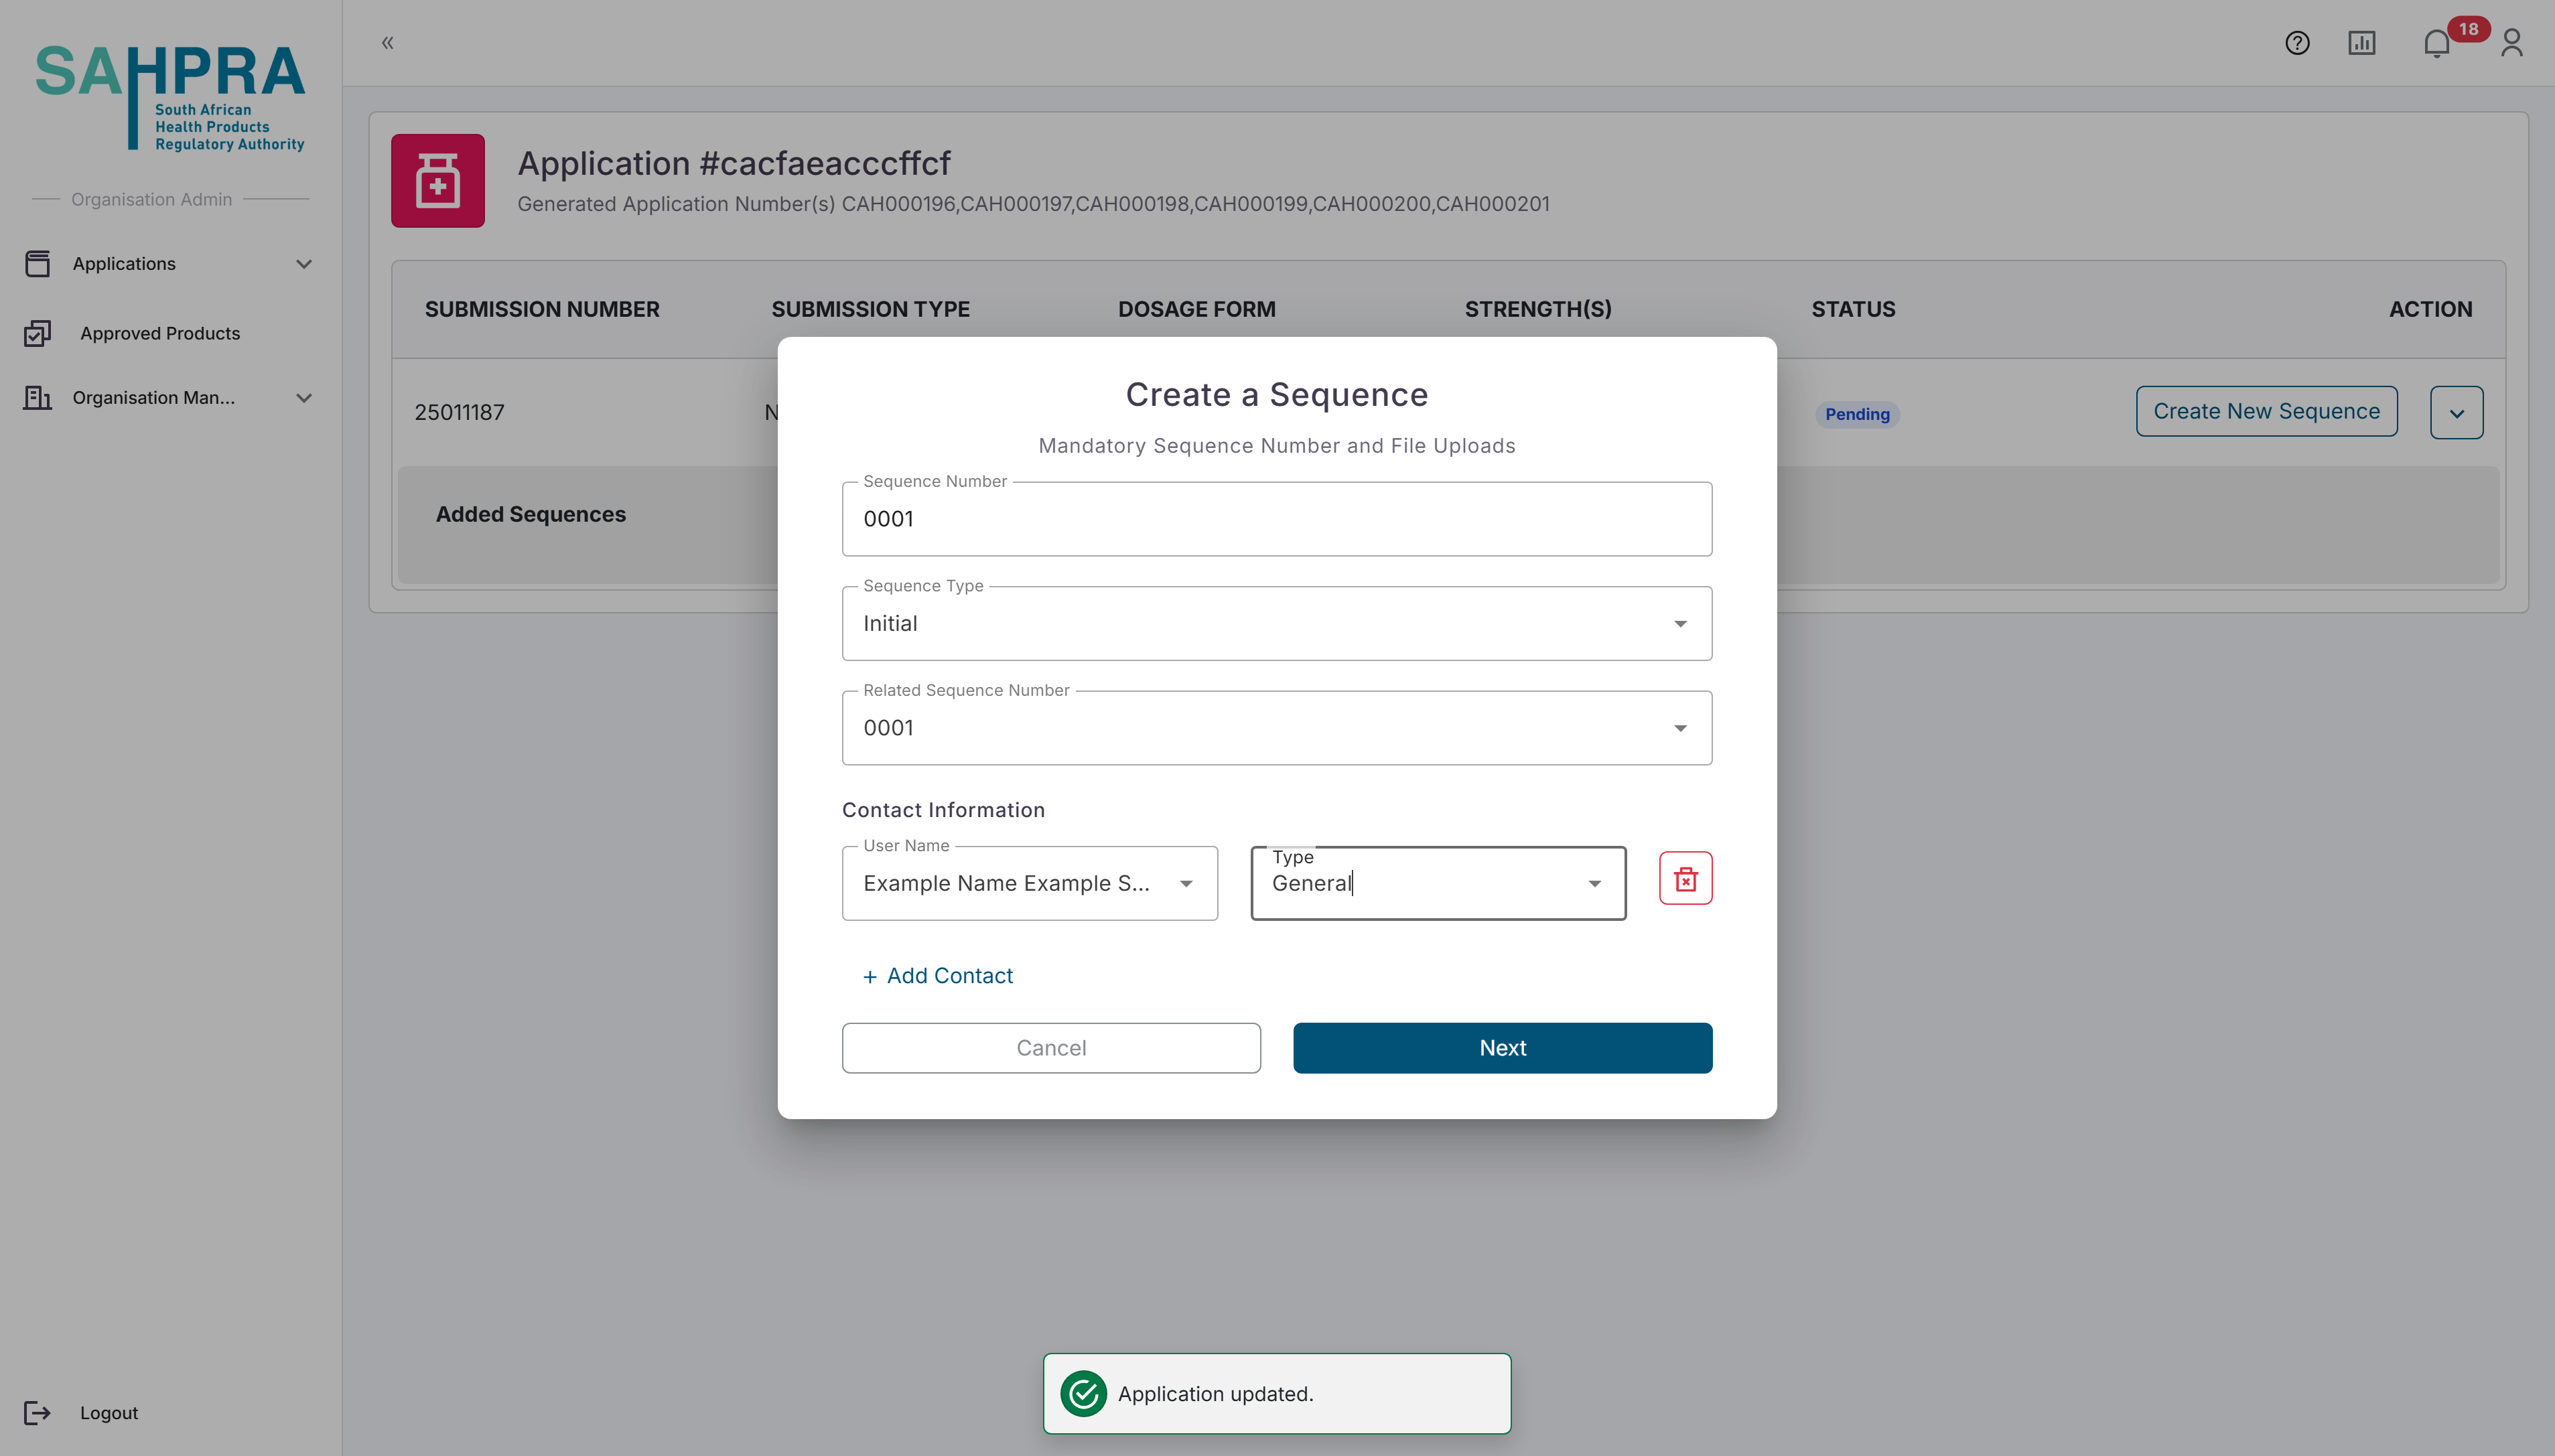
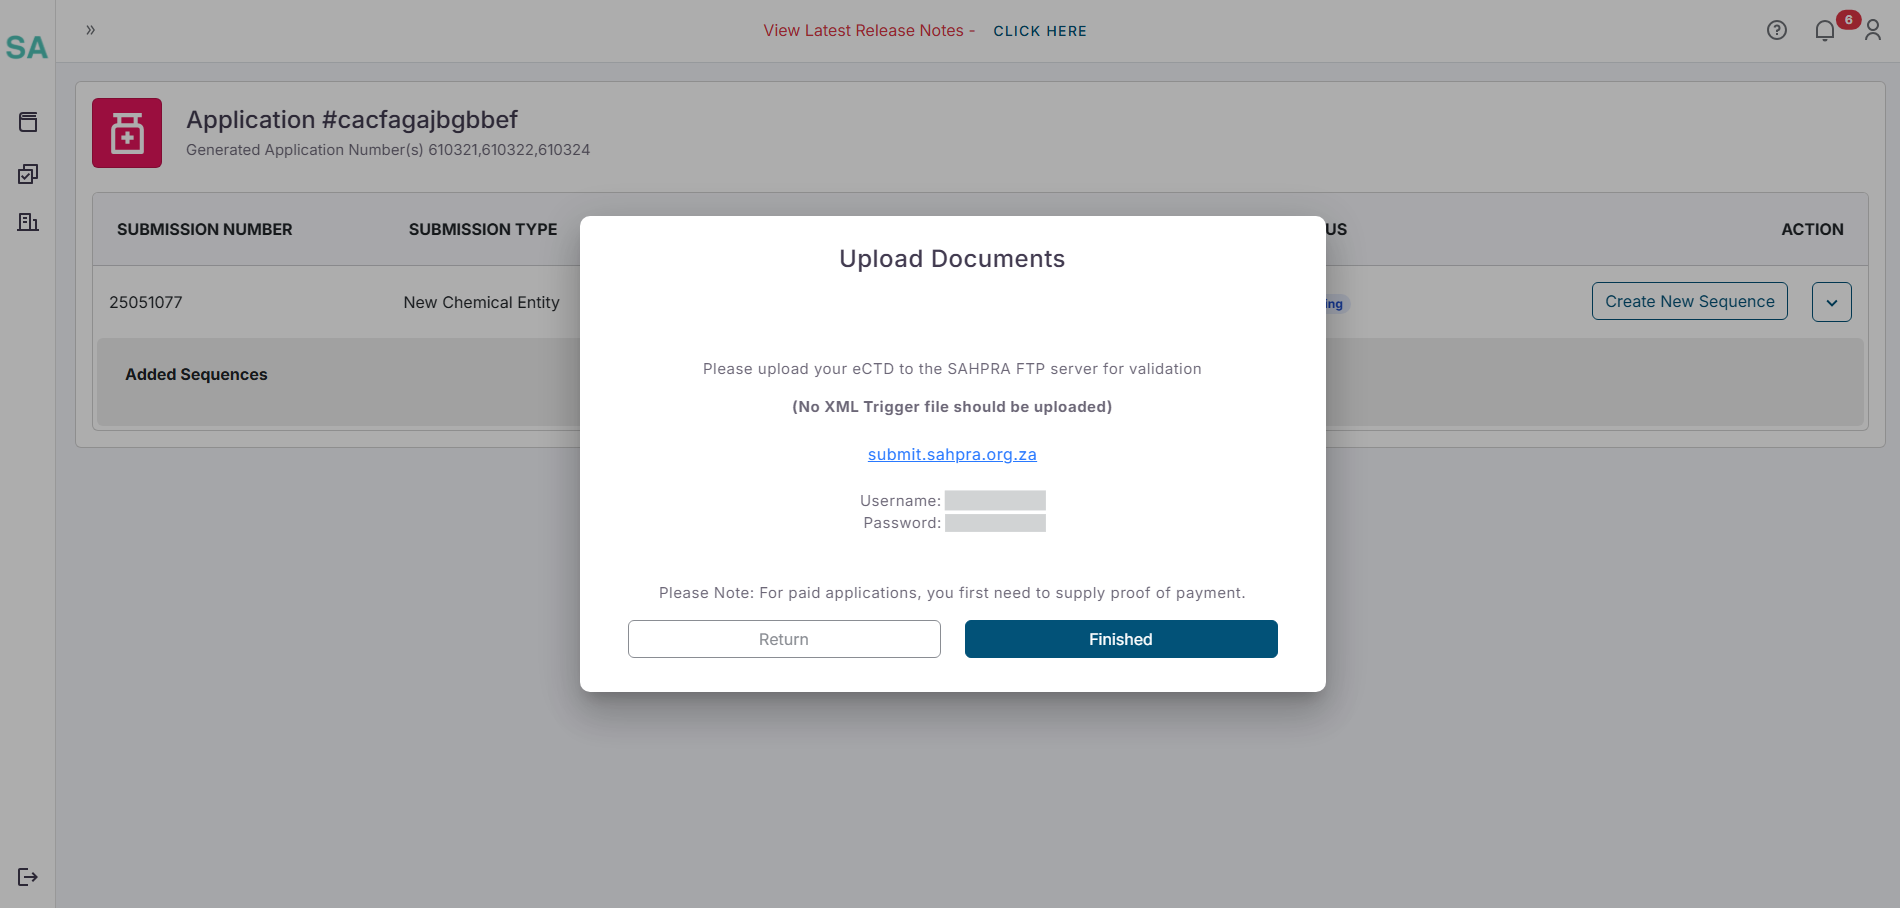
- Once clicking on “next” a popup will appear reminding you that the upload of your eCTD to the SAHPRA FTP server can commence with the details of your FTP login details. The XML Trigger file will automatically be generated and should NOT be included in your upload as it will fail validation.
Step 9: Payment Processing
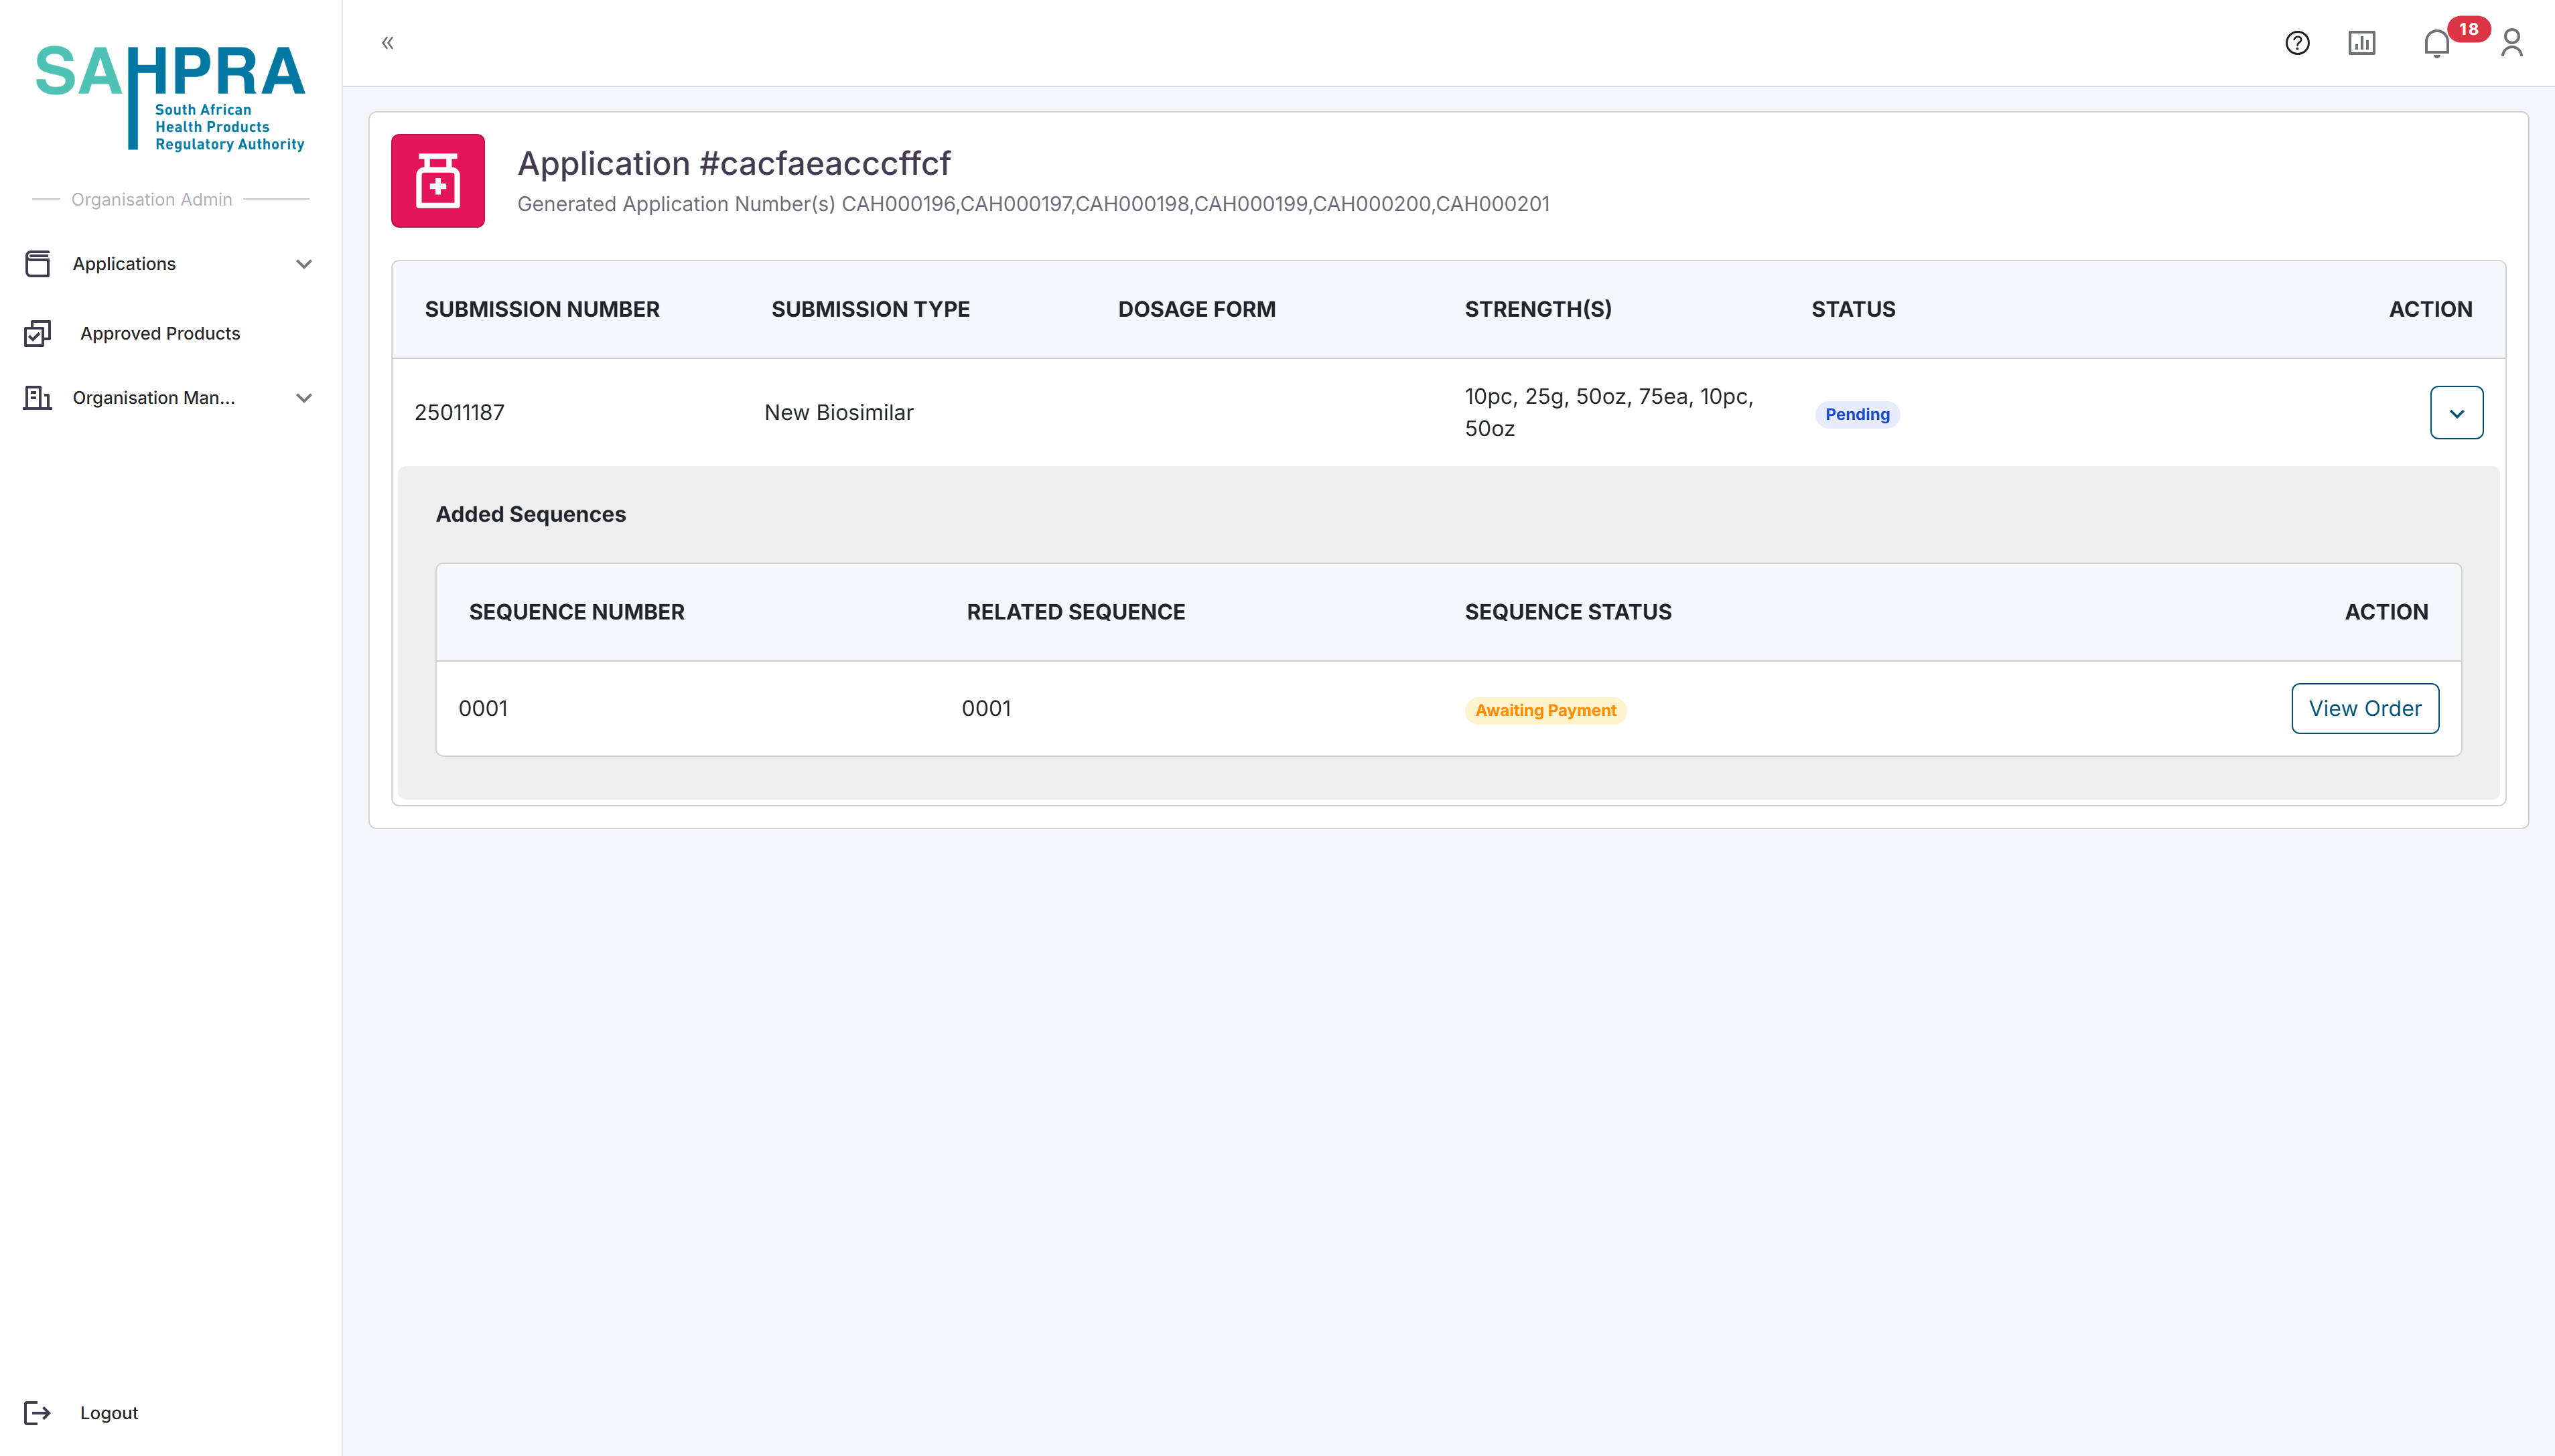
Once exiting the popup, the sequence will be created and a View Order and View Documents button will appear in the created sequence. The View Documents button will always be visible for each sequence and will contain any documentation attached by the applicant or SAHPRA e.g. comments on disputes, PDF queries, Proof of Payments and Variations Summaries generated when a variation is made. The View Order button will show the generated order based on the application made and will contain the amount payable to SAHPRA. You can select to either Download the Proof of Payment and come back later or directly upload the Proof of Payment by selecting EFT, uploading the Proof of Payment and clicking on Submit Proof. Note after this submission the application will be deemed as submitted and no changes can be made to the application after this action is taken.

Step 10: Completing a New HPA Application
- The status of your sequence will become Awaiting Approval which means the payment is being reviewed by SAHPRA.
- Once the payment has been cleared the status of the sequence will become Awaiting FTP Upload. At this stage the button on the sequence will read Confirm FTP Upload.
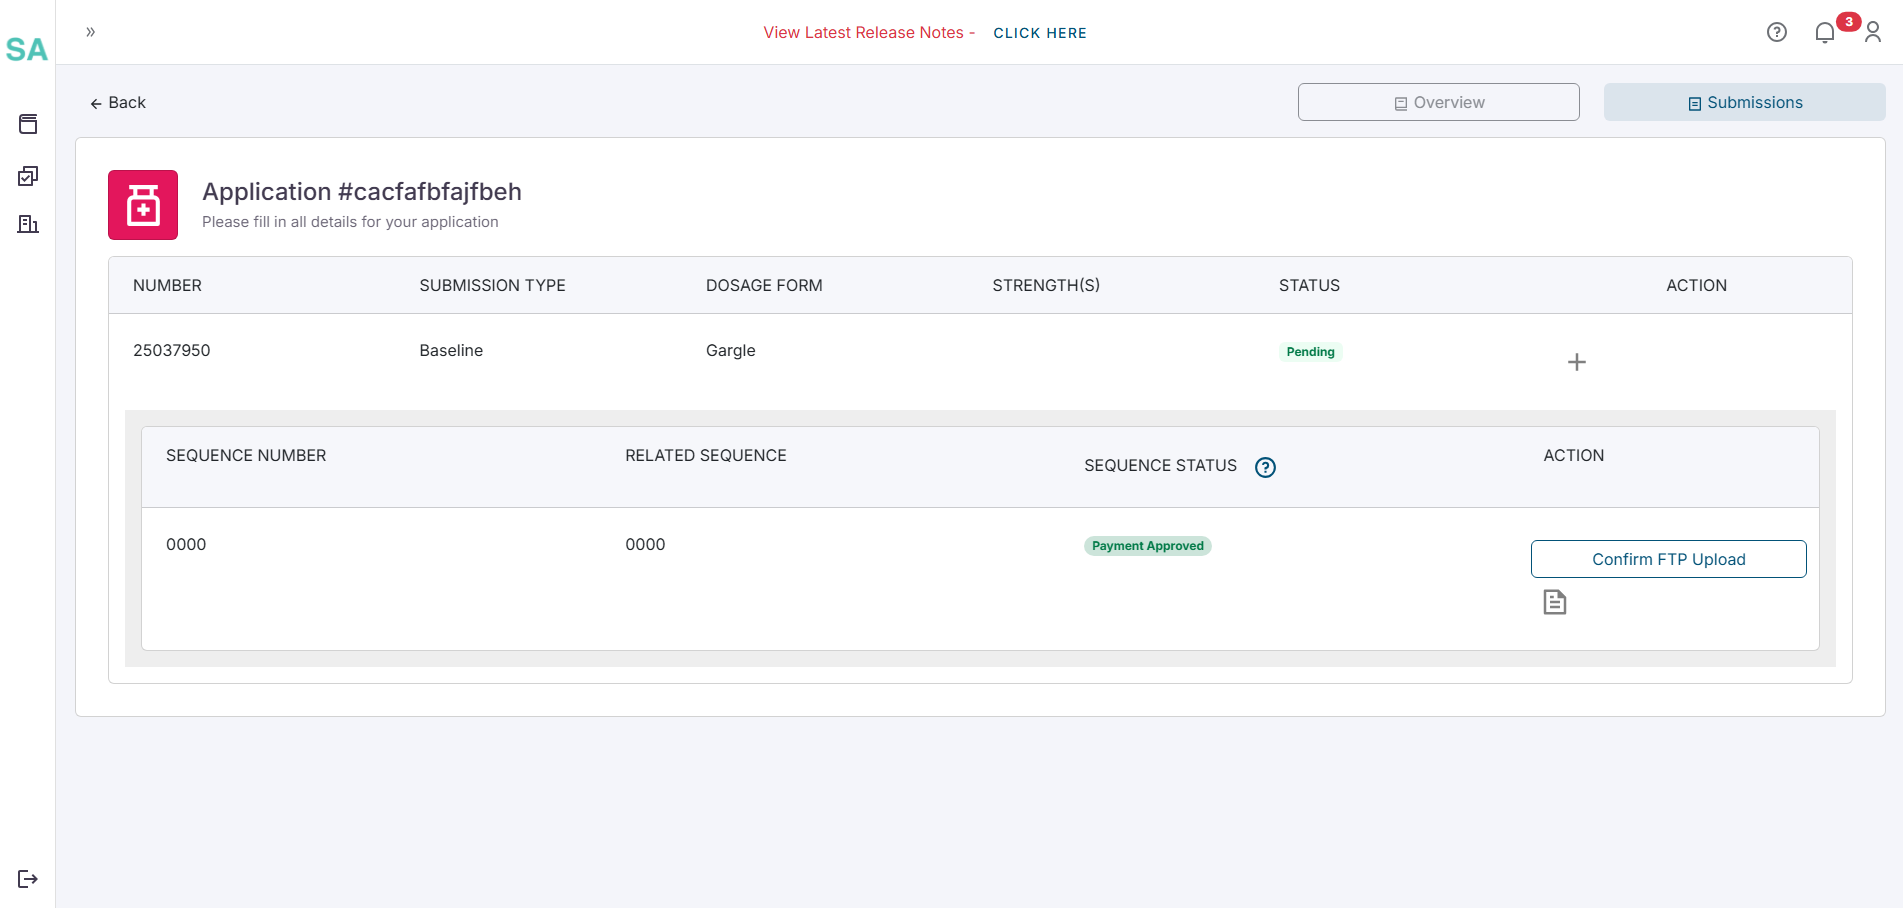
Click the button when the eCTD is fully uploaded to the SAHPRA FTP server. If the upload confirmation is successful a popup will appear confirm the upload. If the upload is not successful refer to the FAQ page for more details.
If the upload is successful, the sequence status will be updated to “Submitted” and the application is successfully submitted for review. Notifications and updates on the sequence, submission and application will be available on the portal and via email. Note that validation errors may be received from a different email address if further issues arise with the application. If this is the case refer to the FAQ page for more information.
Tips for Successful Application Submission
- Prepare all required information before starting the application process
- Save your work frequently if the system allows it
- Pay attention to required fields (usually marked with an asterisk *)
- Have all necessary documents ready for upload in the appropriate format (usually PDF)
- Double-check all entered information before final submission